DOP Local Contrast Optimizer
DOP Local Contrast Optimizer is a Photoshop CS3/CS4 script that implements a simple yet very effective local contrast improvement. We recommend it to be used as your final step (after detail extraction and sharpening).
Motivation
Good local contrast gives an image a more dimensional look. DOP Local Contrast Optimizer is a new script to gain optimal local contrast. Best you download the demo and look at your images. The effect of this tool is not easy to show in small web images.
It is known that local contrast can be enhanced using high radius/low amount USM sharpening. This can lead to clipped highlights and blocked shadows. Also noise easily can get amplified. Our tool minimizes some of these side effects.
Installation
The DOP Local Contrast Optimizer come as Javascript files for Photoshop CS3/CS4 (we only support CS3/CS4).
- Full version is named: DOP_LocalContrastOptimizer.jsx (and DOP_LocalContrastOptimizer_Strong.jsx for stronger effect)
- Demo version is named: DOP_LocalContrastOptimizer_Demo.jsx
- NEW: DOP_LocalContrastOptimizer_Plus.jsx. We now recommend to use this script as the standard script.
Installing the script
The script needs to be copied to the Photoshop CS3/CS4 folder and here to Presets/Scripts (or to the equivalent locations for other languages). After restarting CS3/CS4 you should find the script under File->Scripts. If you do not find it there you did not put the script into the proper location.
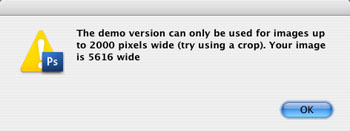
Note: The free demo version can only handle images up to 2000 pixels wide. The commercial version does not have this restriction. You will get this warning message if you use larger images with the demo version:
Using the DOP Local Contrast Optimizer
Using the script
Using the script is simple. Run the script from File->Scripts
- DOP_LocalContrastOptimizer (or the Demo version)
or
- DOP_LocalContrastOptimizer_Strong (no demo version). We would only use the strong version in rare cases.
The DOP Local Contrast Optimizer script does not have a user interface in the script. All control is performed in CS3/CS4 using the created layers:
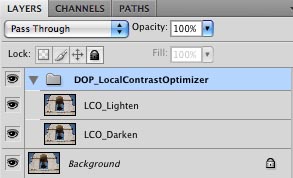
The script creates a Photoshop Layer Group “DOP_LocalContrastOptimizer” with 2 layers .
- LCO_Lighten: Allows to control the lighten effect. Depending on the image this can be very minor or stronger. Note: This layer is by default at 60% opacity. This means you can make the lighten effect even stronger.
- LCO_Darken:Allows to control the darken effect. Depending on the image this can be very minor or stronger. Note: This layer is for the Plus script by default at 60% opacity. This means you can make the lighten effect even stronger.
You can also fine tune:
- Opacity of the Layer Group for lowering the overall effect
- Change the opacity of the layers to control the darken/lighten effects.
- Add layer masks to the group and/or layers
Samples

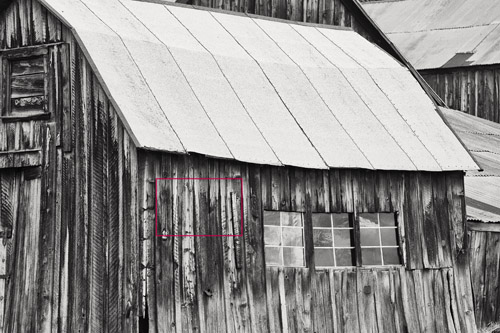
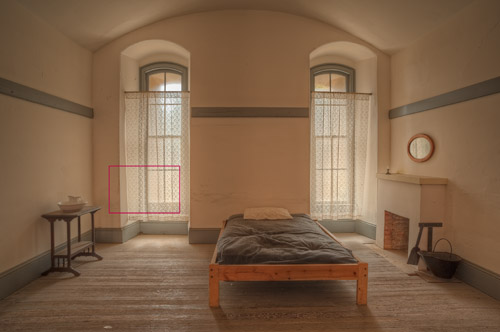
Full image (crop area shown)

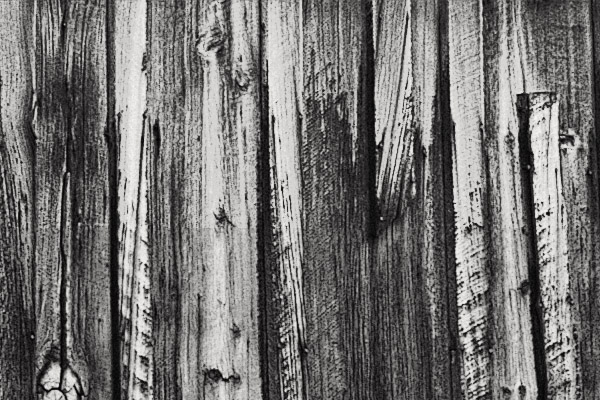
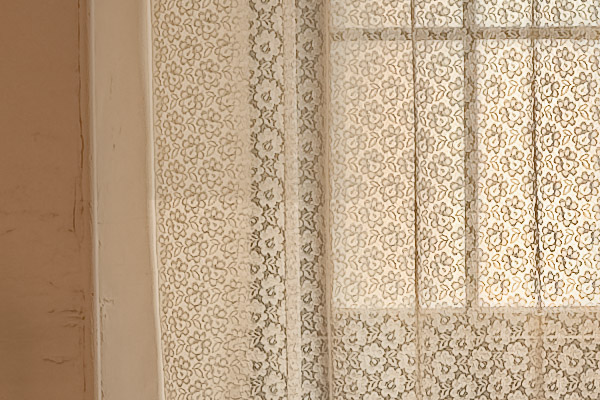
Left before and right after
Full image (crop area shown)
Top before and bottom after
DOP Local Contrast Optimizer also works very well with B&W images. |