Note
We wrote an updated and more complete article for DPReview that can be found here.
Compression: your friend and enemy
It helps to understand the types of video compression performed by today’s Video DSLRs. Without compression, the camera memory card would be full in no time. Uncompressed video would also quickly exceed the maximum sustained write speed, meaning that it would be attempting to write to the memory card faster than the memory card could save (“write”) the images. Compression, therefore, is essential to a Video DSLR working properly for any length of time.
All cameras need to limit the bit rate (maximum data per second created for the video stream) to ensure that the recording does not exceed the memory card’s maximum sustained write speed. This is done through the compression process. Three main compression schemes are currently used in DSLRs:
MJPEG (Motion JPEG) codec, used by Nikon and Olympus
MPEG-4 GOP (Group of Pictures) codec, used by Canon
AVCHD (MTS video files) GOP codec, used by Panasonic GH1 and Sony NEX-5
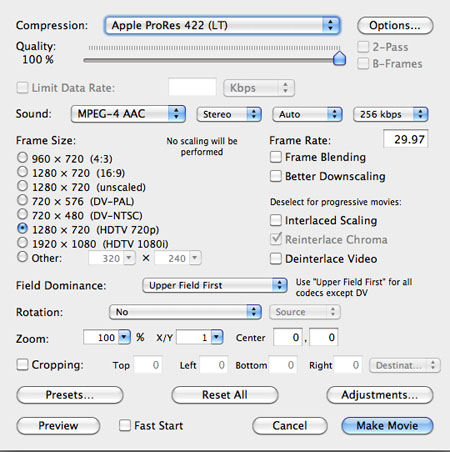
The GOP codecs compress a group of images as a whole. The first frame in the group, although still compressed, is stored in full. The subsequent frames of the group store only delta information to the first one. This means that the compression scheme is very efficient if nothing moves in the video, but it’s more challenging if things move fast. DSLR cameras often have fast processors for performing this complex compression task. There is a downside to GOP compression codecs: they do not perform well during video editing. That is why we transcode (convert from one codec to a different one) all our footage to a higher quality non-GOP codec (e.g., Apple ProRes LT) for further editing.
MJPEG, unlike the GOP codecs, compresses each image independently. Although this is a plus, it also means that at a given bit rate the JPEG compression is more lossy (resulting in a lower quality image).
All these camera codecs use something called chroma sub sampling, whereby the compression process discards some of the color information. This is mainly an issue if you later want to perform major color editing (e.g., significantly change the white balance).
Compression dramatically changes the video you are saving, and reduces the options for major editing at a later time using video editing software. For comparison, still photos comprise only RAW (uncompressed) images, which have 12–14 bit image data, and are often lossless compressed (highest quality). But the data from video DSLRs is just 8 bit, and is quite lossy compressed (lower quality). Note that a single 1080p HD video frame comprises just 2 megapixels of data (very low resolution compared to today’s still cameras).
Why should you pay attention to these matters? Because you need to shoot in such a way that your film doesn’t require major corrections during editing. Good exposure is even more important than with RAW still images.
Video Container Formats
You may think that AVI (more Windows) or MOV (more Macs) files describe different codecs (video compressions). This is not the case. AVI and MOV are container formats that wrap the real video content. The videos in both container formats can then use many different codecs.
MTS (these files hold the videos for the AVCHD format) is also more like a container format although it seems they only wrap H.264 encoded videos.
Compression in the different workflow phases
In each major phase there are different requirements for video compression.
Video Capture
Clearly lower compression and low chroma sampling are better. This has to be balanced with the technical capabilities of the camera system (including card throughput). Looks like the Canon cameras are kind of ok (lower chroma sampling would improve). The Panasonic GH1 provides too low bit rates (there are unofficial hacks that can help to improve though).
Editing
During editing you don't want to use a strong compression codec as your editing codec. This is especially true for Final Cut Pro where we often use ProRes LT. To get from your captured movie and its codec to e.g. ProRes LT you need to transcode your footage (more later). This costs time but also makes your editing more fluid.
We always try to capture the video at it's highest possible quality and resolution (1080p). If we plan the video for the web only we likely downsample to 720p in the transcoding phase.
Output
Once your movie is ready you transcode it again for the target platforms:
- For web we use often Apple TV format
- Let you guide by your authoring software for Blu-Ray.
Note: Many of these codecs are based on the H.264 standard. It is used for Blu-Ray as well as the web.
Useful Tools for Transcoding
In general transcoding is a time consuming process and can be annoying when you work against a time line (then best avoid AVCHD based footage altogether).
Apple Quicktime Pro 7
Apple QT 7 (not QT X which is less capable) can help to perform many transcoding tasks). Too bad it cannot directly deal with the AVCHD MTS video files (but check out ClipWrap below).
Toast 10 Titanium
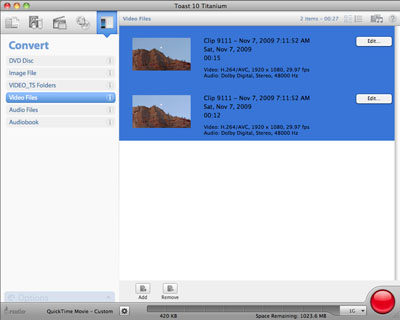
This is kind of the swiss army knife for video transcoding and playing. Toast 10 Titanium can directly play AVCHD MTS files in very good quality (even the 1080p60 footage from the Panasonic TM700).
Of course you also can author your DVD or Blu-Ray Disks with Toast 10 Titanium.
ClipWrap

If you are on a Mac and have videos from the Panasonic TM700 or Sony NEX-5/3 ClipWrap provides a very elegant, lossless and fast way to convert your files to .MOV video files. This process is lossless because ClipWrap does not transcode the content but instead creates a .MOV wrapper for the original content (which is H.264 anyway). We find ClipWrap extremely helpful for these cameras.
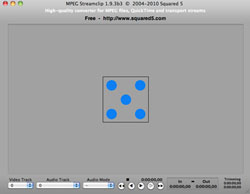
MPEG Streamclip

MPEG Streamclip is a free and extremely useful tool for many types of transcoding. In some cases we found that it performed much better than QT 7 (e.g. transcoding TM700 1080p60 footage to 1080p30).
NeoScene

We use NeoScene to transcode Panasonic GH1 footage. It can perform the requested pulldown removal to convert GH1 1080i60 footage to the original 1080p24.
Conclusion
In many cases we transcode our footage first before we edit (in Final Cut Pro). We do not transcode all our footage because we perform a rough clip selection and also sometimes trim longer clips in QT 7 before transcoding. |