|
 |
|  |

|
 |
Workflow Technique #007"Smarter Sharpen X"
review by
Jim Collum
|
|
When printing in a darkroom, there are only a few options available to the printer to enhance apparent image sharpness. The most common is creating an unsharp mask, using a special masking film, a contact printing frame, pin registration punch, and thin opaque material. This usually requires the use of a film densitometer and plenty of film testing. (For descriptions and supplies for film users wishing to play around with these techniques, this site is a good starting point). This is a fairly labor intensive process, and usually only done with larger format film. The realm of the Digital Darkroom allows for similar control over image sharpness. The reasons for the need to sharpen, as well as the general theory behind it are outside the scope of this review. Sharpening is a vital part of the digital workflow, and I find myself ever in search of the perfect tool. The most recent one Ive tried, Smarter Sharpen X, written by Kevin Dobson ( http://knm.homeip.net:8081/Public/SmarterSharpenX) has most of the features Ive been looking for in a sharpening tool. Smarter Sharpen X is built as a plug-in for Photoshop. I have used it successfully in both Photoshop 6.0 and 7.0. In general, it is easier to sharpen incorrectly than not. Applying the wrong values to an image can result in either a blurry image, or one with halo effects surrounding the edges. Smart Sharpen X offers an interactive mode that allows for easy visual control over the sharpening effects as theyre applied. |
| Controls |
|
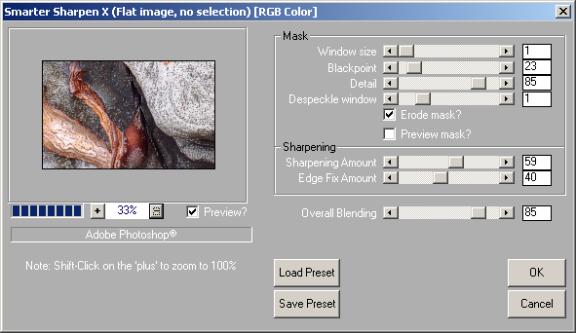
There are four main areas of control in Smarter Sharpen X, Image preview, Mask control, Sharpening control, Blending control, and Preset control. When you start the plug-in, you get a dialog box that has a small version of the image you are editing, and sliders that control the different parameters for sharpening. |
| Image Preview |
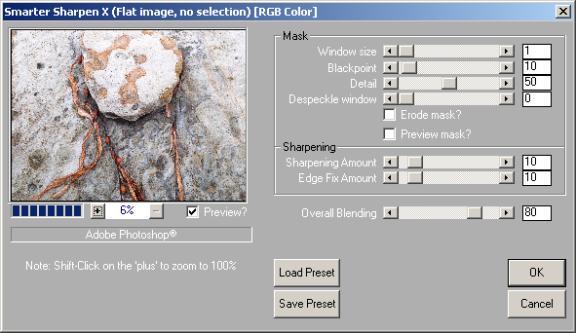 |
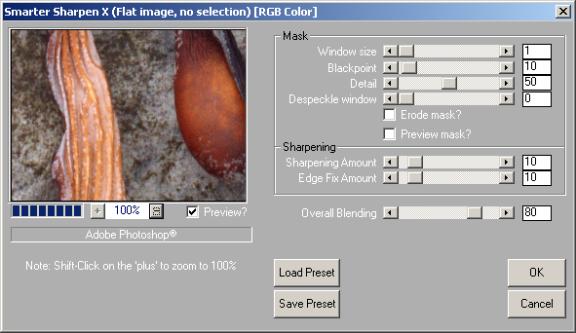
| By using the + and buttons in the image preview section, you can zoom in on your image. Shift + will get you to 100% quickly, is best for precise observation of the effects of the sliders. |
 |
|
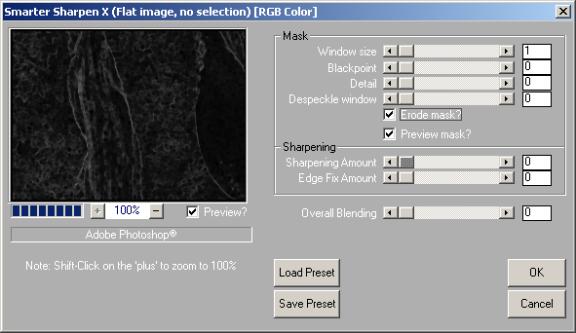
Blending The Overall Blending slider allows for blending between the original unsharp image, and the final sharp image. This can be done outside of this plug-in by using layers, but I have found the interactive use here to be more useful. When set to 100%, you see only the sharpening effects. Sharpening The Sharpening Amount slider controls the amount of sharpening applied to the image (values 0-100). The Edge Fix Amount slider is one of the features that sets this plugin apart. Using a proprietary algorithm, this slider is used to fix haloing effects found on edges after sharpening. This allows for greater sharpness without the distracting halos that often accompany them. Mask This is where I find I spend most of my time. To control what does and does not get sharpened, Smarter Sharpen X uses a mask to only apply the sharpening algorithms to specific areas. Images with grain or digital noise can have these artifacts sharpened to the detriment of the image when using Photoshops Unsharp Mask filter. By selecting the Preview Mask box, you change your view from that of the image, to that of the mask. The Erode mask box is used to enable a noise reduction algorithm that helps prevent the sharpening of noise. |
 |
|
Window size slider defines the number of pixels that are included to determine if a pixel contains detail-information or not. Blackpoint is used as a control of a base for noise levels. Detail determines what is considered noise and what is considered image. The higher the value, the finer the detail that is sharpened. Despeckle window is used if you want to prevent small pixel (1-5) values from being sharpened. Presets The combination of these controls, and the image preview, allows for an incredible degree of variance when manipulating image sharpness. Once you come up with a configuration that works in a lot of images, its handy to be able to save the slider values. With Smarter Sharpen X, you can save and load the settings. Wishlist Although its a tradeoff in redisplay time, the ability to make the preview window larger would be helpful. Most of my images start off in 16bit mode, and I prefer to work with high bit images as long as possible. Currently, the plugin only supports 8 bit images, and Grayscale images need to be converted to RGB. Having the presets saved to a file is a great benefit, but some way of keeping the attached to the image file itself (maybe a layer) would provide better workflow.. one less file to keep track of with each image. Conclusion Since trying out this plugin, Ive found out that I am using it more than any other sharpening tool. It provides great sharpening control, without increasing the visible noise. At $15.50, it provides more control than plugins costing much more. Example |
 Before |
|
|
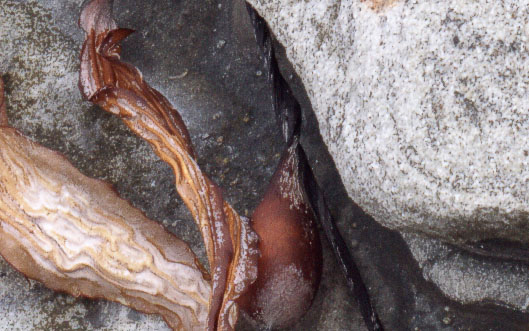 After |

| For Comments post in our News Group |