Recently we discovered two new plugins that had
a fundamental impact on our workflow:
The impact is so strong that we right now revisit
many, many old photos. We finally get the results we wanted when we
took these shots.
Note: You always should perform these
operations in 16-bit mode only. You also better use the lowest ISO
on your camera (in this case ISO 100 on the Canon 1ds2) as both filters
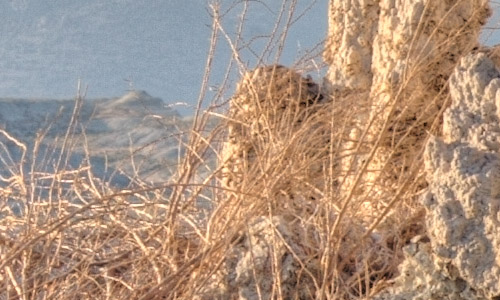
can amplify noise quite a bit. Here is the original file from RAW Developer:
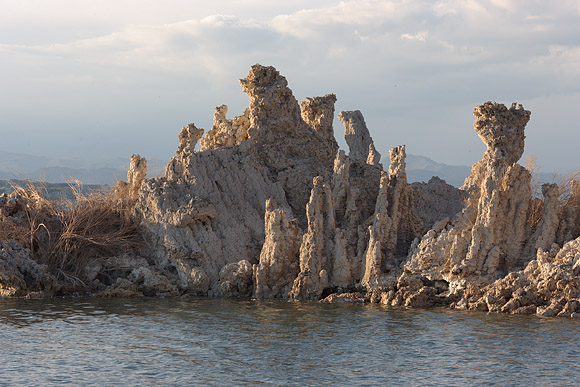
Initial version in 16 bit
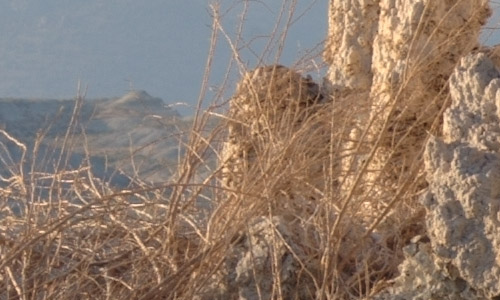
100% magnification crop
The initial version lacks quite a bit:
- Muddy foreground
- Does not show the fine structure of the tufa
- We saw quite a more glow on the tufa with our eyes
Notes:
- We could have done better in RAW Developer with curves but still
think we can do better with with our outlined workflow. This means
we don't bother to improve in the raw converter.
- We got in the past nice photos from this shot but nothing like
the result we show in this essay
Step #1
Cleaning the sky from dust spots with the PS CS2 healing brush.
Step #2
Using Photomatix
Tone Mapping plugin on a duplicate layer. Our goal
was:
- opening up the shadows in the front
- toning down the sky
After using Tone Mapping
100% magnification crop
Step #3
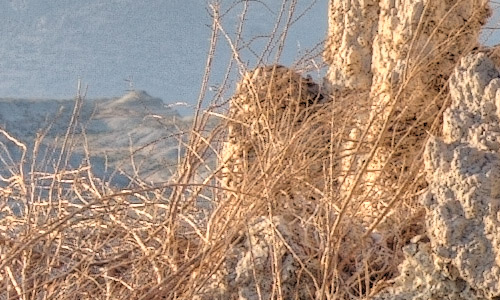
We then use Akvis Enhancer on yet a new
layer. Our goal:
- Improve local contrast (we think Enhancer does an amazing job for
this purpose)

After using Enhancer
100% magnification crop
Step #4 Sharpening using EasyS Plus
Sharpening toolkit (used more like a capture sharpening, we try to
get as sharp as possible with the least amount of artifacts).
100% crop after Sharpening
Final Photo
Note: Remember that
the full sized images looks much better than these downsampled versions.
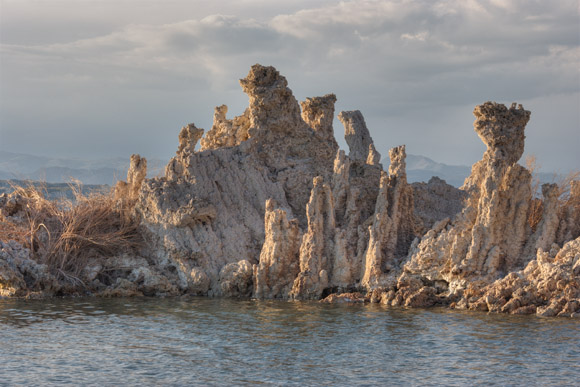
Final version
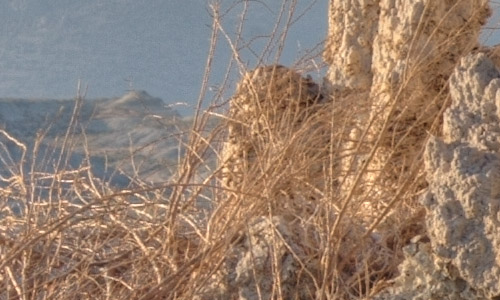
100% magnification crop
Summary
Photomatix
Tone Mapping (PTM) and Akvis Enhancer changed our
workflow quite a bit as we can find many images that benefit from
it's treatment.
Of course all of this can be overdone.
But in this case I think the final image is way closer to our vision
than anything we were able to get before. You maybe able to get similar
results with other tools but it will cost you a lot more time.
The real downside of this technique is
that we need to revisit many, many of our older images. By the way
this was actually the first image we started to work with today. I hope you find this workflow useful.
This is one of the many techniques we will teach during the 2006 Summit.
We will also work with you 1 on 1 and help you with your own images
and with how to use this technique, and many others, in your own work. Click
here to read a detailed description of the 2006 Digital
Fine Art Summit. Joseph Holmes will join the Summit 2006 as a guest
instructor means you can ask this world class printing expert directly.
About the Fourth Annual Photography & Fine Art
Printing Summit
The 4th Photography & Fine Art Printing Summit will take place
November 10th to 13th, 2006, in Page, Arizona. Seats are limited. In
addition to studying color management and color spaces, we will also
do field photography in stunning locations such as Antelope Canyon,
Lake Powell and Horseshoe Bend, as well as study Raw conversion, Photoshop
processing, image optimization, printing. We will also conduct print
reviews of your work created during the Summit. Find out all the details
of this unique learning and photographing opportunity on the 2006 Summit
page. |


