"Timeless Creeks"
Notes on Time exposures with the D1
<c>Paul Caldwell (2001)
|
| |
|
|
| |
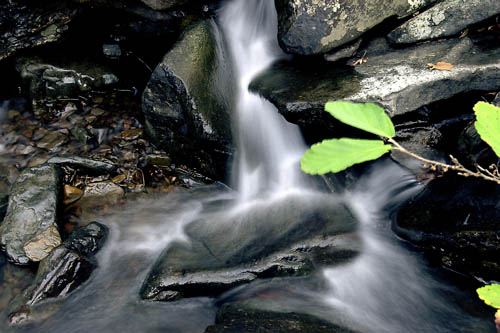
| I have enjoyed traditional photography for over 20 years.
Living in Arkansas I enjoy getting out into the outdoors areas of this state
often for shooting. While Arkansas is not famous for long ranging vistas
or dramatic mountain ranges, we have countless scenic areas that provide
for a beautiful background for shooting. Arkansas has countless rivers and
creeks that are always inviting me to hike them to indulge my photographic
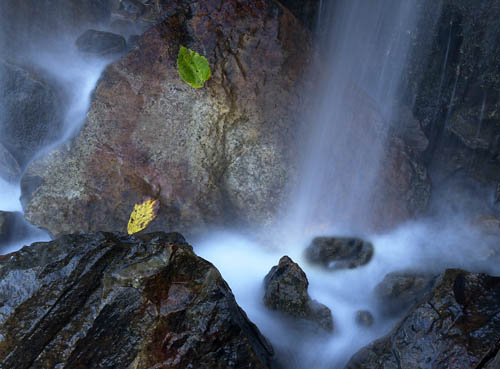
interests. I have enjoyed shooting water for most of my photographic career.
Water provides a constantly changing environment and can be shot throughout
the four seasons. Ever since I started to shoot, I have been fascinated
by time exposures of water. Of course most people understand that the longer
the exposure of a running stream, the more the water will start to look
like smoke, almost flying above the rocks. With film, this was possible
using the slower of the ASA films, either 64-slide film or 100 print film.
The slower the ASA setting, the more room you had to work with in regards
to overall time of your exposure. |
| |
|
|
| |
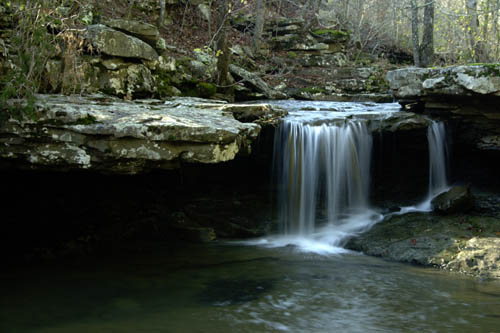
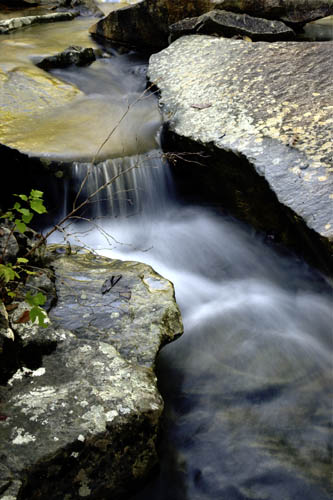
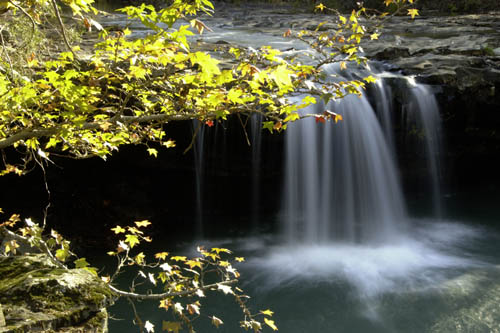
| Shooting water with time exposures can be tricky. Most
often the highlights caused by the water and sunlight reflecting will be
washed out. The longer the time, the worse this problem will become. The
longer exposures can get some marvelous details and patterns in the water
that can be lost if you overexpose the water. Some of this loss can be factored
out if you shoot in cloudy conditions, however you will lose a lot of the
contrast that natural sunlight provides on the rocks, water and steam bed.
When shooting with film I would most often try for between a 2" to 5" exposures.
In normal outdoor lighting, you are looking for a lens that will stop down
to F 22 or even F32. Of course most lenses don't tend to be as sharp when
stopped down to the smallest aperture, however it is one of the many trade
offs required. To get these extra long exposure times, you will most often
have to use Neutral Density Filters. These are filters that most often come
in a 2X, 4X and 8X. They enable you to add extra stops to your lens. 2X
is 2 additional stops, 4X, 4 and so forth. They are called neutral density,
as they don't alter the colors being shot. Here is an example. Say you are
trying to shot a water scene, and you have your aperture is stopped down
to F22 and your metering at 2" says you are still overexposed by approximately
2 stops. By adding a 2X neutral density filter, you should now be at the
correct exposure level. The more filters you add, the more chance you have
of softening the image, so I always to use no more than two at any one time.
|
| |
|
|
| |
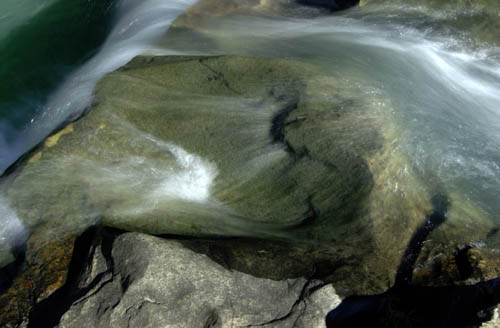
| The other filter that I use all the time for water is a
circular polarizer. A polarizing filter cuts all of the light out except
a certain amount that is coming through a specific plane. In photography,
a polarizer cuts down on glare on the surface of the water and allows you
to see more details. As it is cutting down the amount of available light,
it will work as a Neutral density filter in that most often when you add
a polarizer, you will stop the camera down 1 and sometimes 2 stops. I often
shoot with a combination of a polarizer and (1) ND filter. It is called
a circular because you will need to rotate the filter around the lens if
you move the camera from vertical to horizontal. Most of the filters have
a dot on them so that you can reference your location. As you turn the filter
you can see the glare increase or decrease, and when the glare is gone and
you are able to see through the surface layer, then you have the filter
at its best location for your shooting. |
| |
|
My equipment for shooting water includes:
- My filter set, a polarizer, and a 2X and 4X ND filter
- A good tripod as all the shots should be tripod mounted
- A cable release to avoid any camera shake
|
| |
|
|
| |
| When the D1 came out I was fascinated by the ability to
shoot and see what I had gotten. One of the big problems with water shooting
is you often overexpose a part of the picture and thus you tend to bracket
your shot. With the D1 I can get a very good idea of what I am shooting
and then check it in the LCD. However the D1 can cause some problems for
water shooting since its lowest ISO is only 200. Ideally I would like to
see either ISO 80 or 100 for this. What this means is that you can very
easily overexpose areas of the photograph where the sun was very bright
on the water. If you do this, it will burn that part of the image totally
white and you won't be able to recover details later. What I will do is
use the center weighted metering set to the smallest circle not matrix metering.
Water will fool matrix most of the time. |
| |
| With the D1 I have also found that it is best to shoot
this type of scene in raw 12-bit mode mainly for the increase in overall
dynamic range. This will help you pull more details out of the shadows and
give you basically totally noise free shooting especially with the water.
As many people have discovered with digital cameras, the longer the exposure
the more noise you will tend to get see. When you shoot water and get noise
in your stream, removing it is next to impossible. There are methods to
use in the various photo software programs, but most of them will blur the
slight details of the water ruining the effect you are looking for. When
I started to use the D1, I was amazed by the overall clean images it would
produce up to 4 seconds. |
| |
|
|
| |
| Another important factor is to consider your eyepiece on
the camera. In normal shooting, your body will block the light from coming
into the camera. When shooting on a tripod, you may take your eye away from
the camera and additional light can and will enter the camera through the
eyepiece. This can lead to overexposure especially if you are taking a time
exposure. As I shoot, I will keep my body close to the eyepiece but not
touch it so that I can still block the light from entering the camera. |
|
|
| Most often I will use either the Nikkor 17-35 when up close
to my subjects or my Tamron 28-105. By using these two lenses I have very
a useable focal length for most of the shooting I do. I am also concerned
about overall weight and try to keep the total number of lenses I carry
to a minimum. I will use a step down ring on the filters from my 28-105
so that they can be used on the Nikkor 17-35 thus I only have to carry one
set of filters. I use the remote release for the D1 that plugs into the
jack on the front of the camera. This way I can shoot and not have any problems
with vibrations. |
| |
| Recently I added the 80-400 VR Zoom to my lenses and overall
I love this lens. It has a F32 setting for smallest aperture. This allows
you to use F22, F25 and F29 before needing F32. I have taken several shots
at both F29 and F32 and the results are very sharp. With this lens you need
to have the VR off, as you are tripod mounted. I can also report that with
my shots the tripod collar seems to work just fine. The 80-400 also takes
77mm filters. |
|
|
| One thing to consider when you use center weighted metering
is that your water will have the appropriate metering, but the background
areas can tend to be underexposed. Within Photoshop you can easily mask
the water and then increase the exposure on some of the surrounding areas.
Depending on the subject matter, this may or may not be necessary. |
| |
| I feel that by the use of some of these techniques, you
can enjoy shooting water with time exposures and get extremely beautiful
images. |
| |
| |
|
|