| Digital Outback Photo - Photography using Digital SLRs |
|
"Sunsets, A Study in Light"(Also a love for the 80/400 VR lens)<c>Paul Caldwell |
| Since I have been shooting photographs, I have been fascinated by sunsets. The sun while setting or rising can offer the photographer lighting that is never available at any other time of the day. In the past with film I tended to find that I was spending a lot of time shooting and guessing. I would often spend an entire evening shooting a pretty sunset only to find that everything was washed out or underexposed. From that experience I learned to bracket my shots and then most often I could find the right exposure that would work for a certain situation. |
| Still I felt most times that it was worth it. It always seems at sunsets you get some of the most amazing clouds and then the light playing off of them always adds to the overall shot. You also can find that you need a huge amount of overall dynamic range because you are shooting a subject that has a very bright light and tends to be surrounded by various degrees of darkness. The overall goal for me has been to balance the subject by trying to keep that bright sunlight and then still keep some details in my background such that I don't have total light and dark. This is a true test for overall dynamic range. |
| When I started to shoot with my D1, one of the first thoughts that came to me was wondering just how well a digital camera could handle such a huge range of light. I live in Arkansas and have a location close to my house that affords me a great view due West. I spend hours here just waiting for the right moment and then try and capture the scene as best as I can. One thing about Sunsets, they of course are never the same. Because of this you find yourself drawn back again and again to see if the view you thought was the best ever could be bested. Also as the seasons change, your light and overall surrounding will change thus offering you constantly varied surroundings to shoot. |
| Most of the images I have included were shot in the Nikon Raw format and then converted to tiff with Nikon Capture, however some of my early work was taken in jpg mode. I also used Capture to convert these images. As I progressed I also realized just how much overall range the D1 would capture along with almost no noise, especially in the clouds or darker areas of an image. A couple of key things I have learned over time: |
|
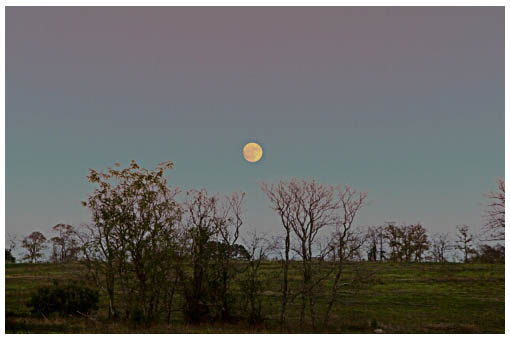 |
| ISO 200, taken with the Tamron 28-105 at 100mm. I was coming back from a long day of shooting and just happened to catch the moonrise over these trees. This looked so much like the moors of England, I had to get the shot. I have since worked the colors up in Capture in an attempt to keep the blue of the late evening sky and green of the pasture. |
|
|
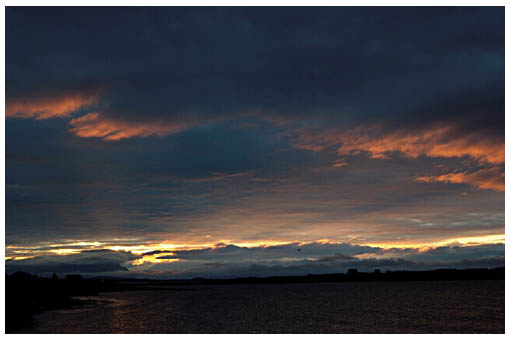
| ISO 200, taken with the Tamron 28-105. I was in Alaska for a fishing trip and spent each evening hoping the weather would clear. On the 4th day it did and I had a treat of the sun setting over a small mountain range. What struck me was the overall gold color towards the bottom of the image then dark clouds with just a tiny wisp of light towards the top. Towards the top of the image the late evening blue sky is still showing. |
 |
| ISO 200, taken with the Tamron 28-105 at about 35mm. Another Alaska shot this time of a sunrise. In the morning light, you tend to not get the reds and oranges, but instead shades of blue and yellow. What caught my eye on this morning was how the sun was breaking through the clouds in a spread pattern and if you look closely you will see a Otter Floatplane taking off bottom right. I was able to work in the two breaking lines of light and still keep the foreground dark. |
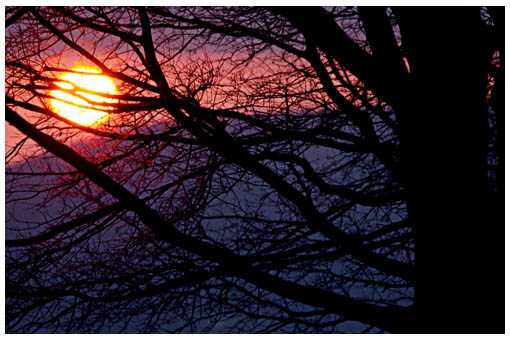 |
| Iso 200, taken with the 80-400 at around 200mm. This shot is an example of the overall play of light and dark you can get with a sunset. I realized that the sun was going to set through this tree and bracketed my shot until I got the exposure right. I wanted the tree to be as dark as possible to frame the scene. The trick was getting the dark tree without totally blowing out the sun and keeping the middle tones. |
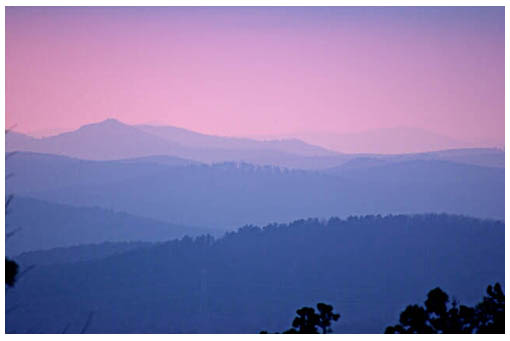 |
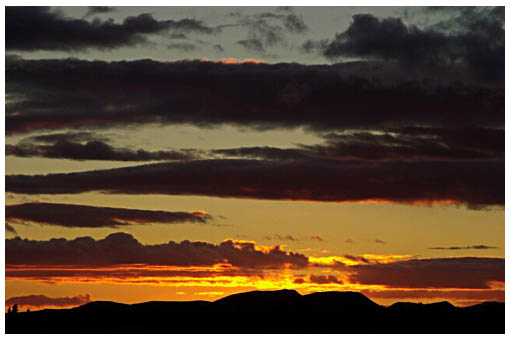
| Iso 200, taken with the 80-400. In this case I was after what I call the afterglow of a sunset. Some of the best colors can be had after the actual sun has gone down. This was a mid-winter image and thus the air was clean of most of the elements that lend themselves to the more vivid colors in the spring and summer. Here I was attempting to get the pink of the distant sky with the varied colored hills in the foreground. Each separate hill has just a slight variation of overall color. My only regrets are that a high power line was down in the foreground and I was unable to remove it without effecting the overall image. |
 |
| ISO 200 taken with the 80-400. I consider this one of my luckiest shots and a major learning experience about CCD technology and film. As I was shooting the sunset on this afternoon, there was a very slight low bank of haze on the horizon. As the sun began the final set, to my eyes it disappeared. However I took one last shot and on the LCD I saw that I was still able to see the entire sun and in fact it looked like Jupiter now. I did a double take and looked again, but I couldn't see the sun. Somehow the overall sensitivity of the D1 CCD was able to still see the sun through the haze. Also, if I hadn't been using the LCD I would have never known and missed the shot. |
 |
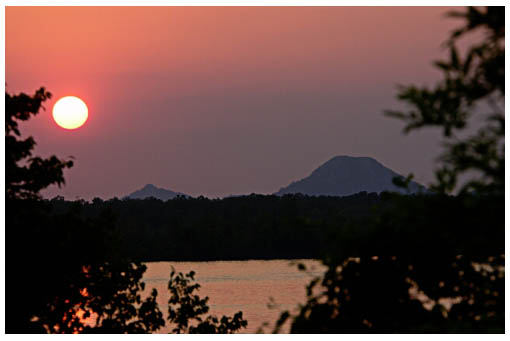
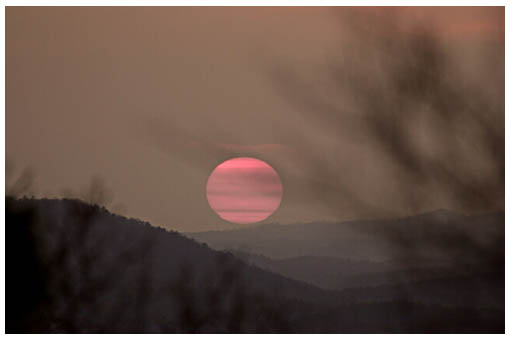
| ISO 200 taken with the 80-400 I included this image to show the difference between a winter image and the spring. In this case I was getting some great sunsets off my deck. In this image you see almost the entire red spectrum until you get to the sun itself. I chose to use the hillside as a frame against the bright sun and sky. I also included the branches in the foreground to add variety and breakup the image. I chose to keep them out of focus so that the eye would not be drawn to them. |
 |
| This image gives an example of the range the D1 can take. Here the sun is bright in the sky however you can see all the shades of purple down to the hillside. After that the detail starts to fade however you can see the overlapping hills all the way to the foreground. There is virtually no noise throughout. |
|
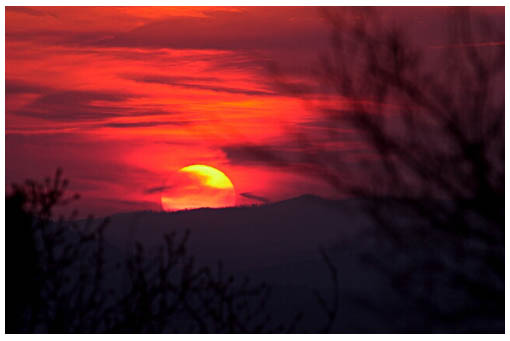
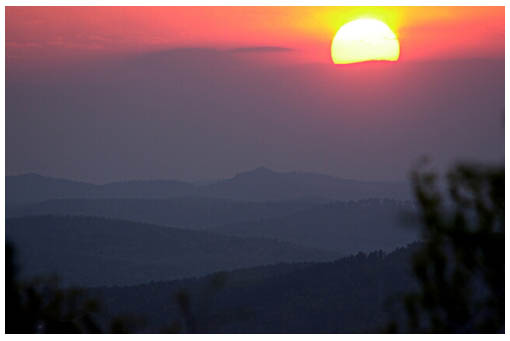
#1
#2 |
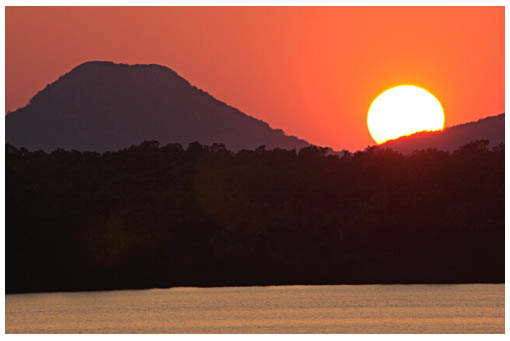
| ISO 200 taken with the 80-400 (approx. 185mm on #1 and 400mm on #2). I wanted to post two images taken from about the same spot to show my point of just how much your color will vary from day to day. Both images were taken about the same time of day about a week apart. On #1 you will see great pink color that is turning golden as it filters through the trees on the left-hand side of the image. I used the trees to frame both sides of this image. On #2, which is a 400mm shot, you see a orange color to the surrounding sky. The sun during the last week has moved across the sky and is now setting on the right side of the mountain. My goal with #2 is to keep the mountain shapes to contrast with the sky. Also I try to keep the exposure light enough that the fringes of the trees will show up along the ridge tops. |
| These are just a sampling from a collection I have been working on for both sunsets and moonsets. I have found that the D1 allows me to capture most of the scene with great dynamic range. I have printed most of these images up to sizes of 11.5 x 16 on a Epson 1280 and have gotten great results. |
| Please feel free to email me if you have any questions or comments. |
|
Technical Information |
| Nikon D1, mostly NEF files converted with Nikon Capture |
|
|
| For Comments post in our News Group |