| Digital Outback Photo - Photography using Digital SLRs |
|
The "Art" of CRW Conversionby Uwe Steinmueller |
| With the D1 I was only using the NEF RAW format to have more color depth (12 bits) and thus more freedom in color correction and 16bit sharpening (using Quantum Mechanic Pro for Windows). |
| Why that? You can perform the following test in Photoshop easily yourself. Take an arbitrary 8bit (per color) photo and do some level, curves and sharpening with the photo. View the histogram before and after the operation. You will find gaps in the histogram. Why bother? This means you have lost some colors during that process and the gradients will not be smooth anymore. Now convert the original photo to 16 bit (Image -> Mode -> 16bit) and perform the same operations and then change mode back to 8 bit. The histogram is not beautiful but does not have these gaps. If you start with original 12 bit in the first place the advantage is even much bigger. If the a photo would not need any enhancement then 8 bits would be just find most of the time. But that is not reality. |
| As I understand the D30 also supports like the D1 12bit color depth and that is why the RAW format is so important. |
| The D1 was very much enhanced in its quality by shareware programs like Bibble and Qimage. Eric Hyman the author of Bibble (and member of the editorial board of this magazine) would like to bring Bibble to the D30. But Canon uses some proprietary compression on the CRW files. Canon please open the spec for that compression or deliver libraries to deal with it. Be sure Bibble and Qimage make your product even more popular. In some way I would propose that Canon subcontracts Eric to enhance the Canon conversion software. The D30 is such a wonderful camera that it should not suffer from substandard software. |
| But back to the reality. I will describe a way to get some usable workflow using the original D30 software. |
|
The software consists of two essential parts:
|
| The following is based on my schema converting the D1 NEF files. |
| Round One |
| 1. I have a new CF-Card or Microdrive of CRW files |
|
2. Have the following directory structure on my disk
The input directory will be used only for batch conversions. In the tree of CRW files I have directories which are sorted by date and contain photos of a certain session. The JPG tree holds the automatically generated JPG previews while the portfolio directory contains the custom in Photoshop enhanced final photos. |
| 3. Copy from your PC-Card slot (that is what I use) or your CF card reader all CRW files (and thumbnails *.thm) into the input directory |
| 4. Now use ZoomBrowser to batch convert all files to JPG. To do this you have to set in "Options" JPG as the the output format for RAW conversion, then select all files and perform File -> Convert RAW Images. Be aware that this might take some time and that the PC is very busy during that period of time. |
| 5. Now move in ZoomBrowser all CRW files into the right folder in the CRW file tree and the JPG file to the JPG files tree. |
| 6. I now also perform some sharpening with a Photoshop action on the new JPG files |
| 7. Now the photos are ready for inspection and only the best get into round two |
| Comment: The Zoombrowser left little computing power to my system while doing the conversions (our system is Win2000, PIII 800Mz, 384MB RAM, 80 GB of disks). And as the conversions take a lot of time (e.g. 98 files) it left me more or less waiting till the conversion is done. |
| Round Two |
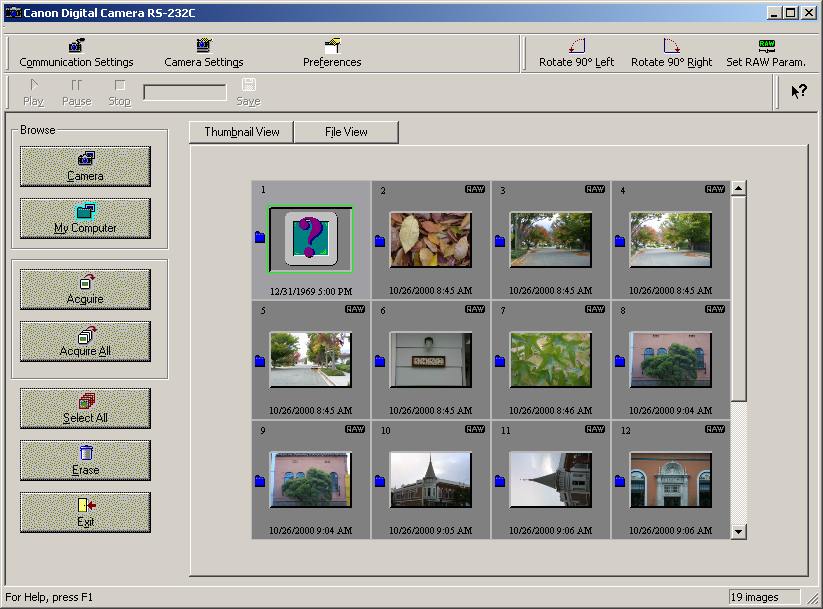
| Now we open the better files into Photoshop using the Twain driver. |
 |
|
There we select "My Computer" and navigate into the CRW file folder and all CRW files are displayed with their thumbnails. The we chose "Set Raw Params" and the following dialog will be displayed. |
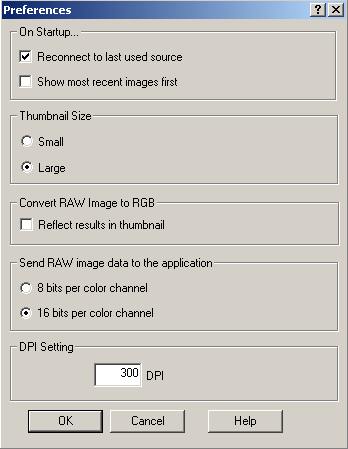 |
| In the "Preferences" dialog you should select "Reconnect to last used source" otherwise you have to navigate to the last used folder over and over again (as I did in the beginning). |
 |
| Here we can set the WB (White Balance) which is very very important, the contrast, sharpness and the saturation (I use low as the D30 are pretty saturated - which is very film like) |
| After selecting these parameters the photo is converted and transmitted into Photoshop. Unfortunately you loose the image name of the file during the Twain import (this is due to the twain architecture as you could also directly acquire from the camera). The you have a 16bit (per color) image in Photoshop (As I understand 12 bits are originally from the D30) and you can perform the usual levels, curves and sharpening (using Quantum Mechanic Pro for Windows) on this image. |
| This process is not really fast but rewarding by the resulting very good image quality. |
| Bugs in Zoombrowser |
| 1. If you move RAW files to an ohter folder be aware that the thumbnails don't get moved. I moved them manually |
| 2. If you remove outside of Zoombrowser files form Zoombrowser directories I did not find to tell Zoombrowser to find that it had to remove the info from it's database (removing orphans it is called in other photo browsers like ThumbsPlus). |
| Problems in the Twain Driver |
| 1) When the thumbnail view is activated the filename is not displayed. |
| 2) Cannot find any indication for the use of ICC profiles in the Twain driver. |
| 3) Missing exposure compensation feature (like in Kodak Software and in Bibble) |
| 4) Could need more fixed WB(white balance) presets |
| For Comments post in our News Group |