| Digital Outback Photo - Photography using Digital SLRs |
|
 |
|  |

|
 |
Photoshop Corner #003"Digital Gradual filter"by Fred Miranda
|
|
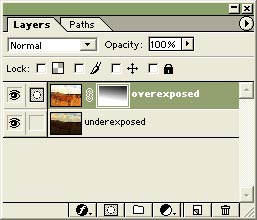
Ansel Adams once said, "You don't take a photograph, you make it." Perhaps he was right. There are so many factors involved in getting the perfect shot. The lighting, the timing, and the subject can vary. Fortunately, when limitations arise, you can sometimes salvage a decent shot by utilizing Photoshop techniques. As a photographer I am intrigued by how much I am still learning about the art of photography. Part of the learning process for me in the digital format, is learning how to effectively use Photoshop to help bring my images to life. There are several techniques that I have developed to aid in capturing a high contrast scene with extended dynamic range. In this article, I wish to share one of my favorite. We all know that there are dynamic range limitations when measuring exposure based on the lighting and subject contrast. To combat these limitations, most landscape photographers carry an invaluable tool called a gradual filter. This filter is nothing more than Split Neutral density filter with transitioning shades from dark to light. Some filters have a dark shade of 1, 2 or 3 stops which can also be combined if the situation requires. The following technique mimics the use of split neutral density filters. All you need is a tripod and a still subject. It's especially useful for landscape images with an apparent horizontal or vertical division between the areas of contrast. You will need two exposures for each image. However, if you are lucky enough to own a digital camera that offers a linear mode, you only have to shoot one image. (Ex: Canon D30*) Here are the steps: 1) Take two pictures. One picture should be well exposed to the foreground, with the background overexposed. For example, if your background is a bright sky, the sky will appear overexposed since you've exposed for the foreground. Let's call this first image "Overexposed". Then, for the second shot, do the exact opposite. This time your foreground will appear "underexposed", and your background well exposed. 2) Bring both images into Photoshop. Make sure you convert them to 8-bit mode. 3) Drag the overexposed picture on top of the underexposed one, while holding the SHIFT key. This will place them into 2 perfectly aligned layers. 4) Make a layer mask for the "overexposed" image by clicking on the layer mask icon at the bottom of the layers palette. 5) Click on the layer mask to make it active, and then select the linear gradient tool. 6) Drag a line from the top of the image toward the bottom until you reach the part of the image that it's not overexposed |
 |
|
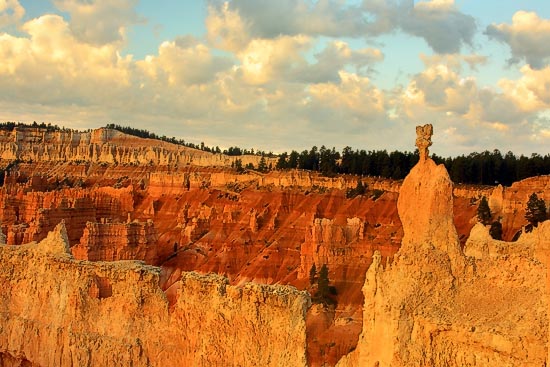
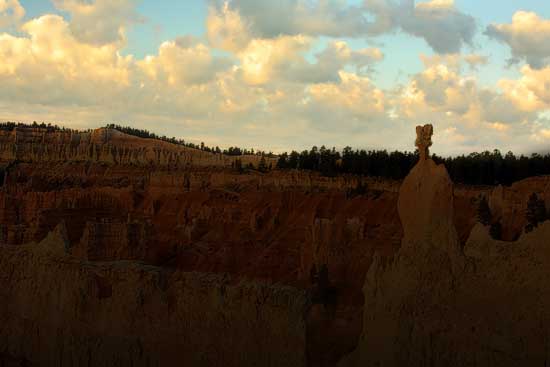
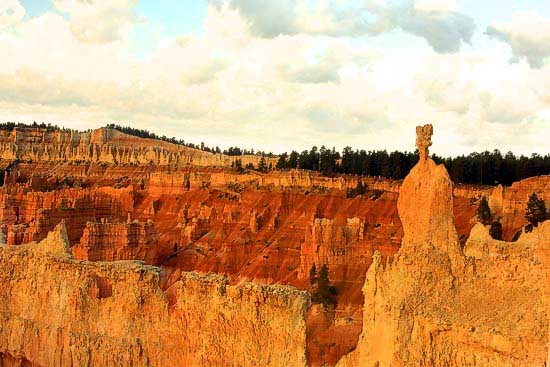
The gradient you just created on the layer mask is the digital split density filter. Now you can control the intensity of the effect by using the "Opacity" slider. *Note: D30 users only need 1 RAW file converted to 2 images. First convert your RAW file into a non-linear image (overexposed). Next, convert the same file to a linear image (underexposed). Then, follow the same steps. Place the underexposed image on the bottom layer and the overexposed image on the top layer. For the non-linear file, use "High" contrast when converting the RAW file. Below is the underexposed, overexposed and final image: (some extra history brush retouch done to the final image) |
|
|
|
So, the next time youre out there shooting, if you accidentally forget your gradual filter -- dont panic. Now you have a new technique to help you save those once lost images. For more images, tips and techniques feel free to visit fredmiranda.com. Happy shooting! |
| Here is a news group for discussing the Outback Photo Essays. |
|
|
| For Comments post in our News Group |