| Digital Outback Photo - Photography using Digital SLRs |
|
 |
|  |

|
 |
Photoshop Corner #004"Correcting Areas of Under or Over Exposure"
|
|
Many photos have areas in them that could use lightening or darkening to reduce contrast or show more detail. Or perhaps an entire photo is a little too dark or a little too light. Photoshop has some tools than can get the job done without blowing out the highlights or blocking up the shadows. It is best to do this before any other manipulations are done on the photo. Brightening an area that is too dark: 1. Select the area that you would like brightened using the Magic Wand or any other tool that can selectively choose a portion of the picture. 2. If the area has a rather pronounced edge in contrast, using the Feather tool, feather the selection by 1 or 2 pixels. If the transition from the area that is too dark is smooth, feather by 5 or more pixels depending on how fast the transition is. 3. Right click in the selected area and click on Layer via Copy and a new layer will be created in the Layer Palette with just the selected area 4. From the Layers Palette, select the new layer by right clicking on it and select Blending Options. 5. On the first drop-down box, select Screen - the selected image will brighten by the equivalent of one stop. Use the slider to adjust the percentage to get the brightness of the selected area to the desired level. 6. Finally, Flatten the Image Darkening an area that is too bright: Follow all of the above steps but instead of selecting Screen, select Multiply. There is a caveat to this technique, in order for it to work well, you have to have enough detail in either the dark area or the light area to have something to brighten or darken. If not you will just get a detail-less section of your photograph. A couple of variations on this idea include using Color Dodge and Color Burn instead of Screen and Multiply as blending options. These tend to add or subtract color saturation in the blended area. Another possibility for this technique is to correct an entire picture for under and overexposure. In this case, in step 1, just select the entire photograph. |
| Comment by the editor |
|
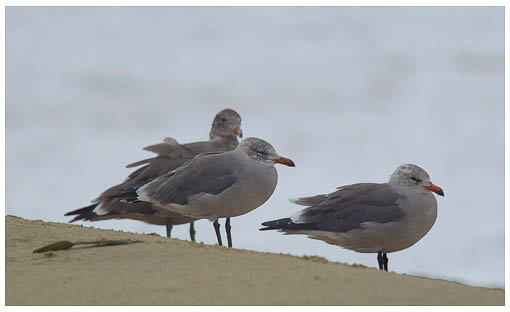
The image on top was posted to the excellent Avian critique group at NaturePhotographers.Net and a valid critique was the too dark shadows at the bird bodies (which normally calls for fill flash). On the positive note the digital files (here Kodak DCS 760) hold a lot of detail with relatively low noise). I presented a solution and E.J. Peiker replied with this more simple and even better one. E.J. thanks for sharing this technique with our readers. Here is the corrected version |
 |
| Here is a news group for discussing the Outback Photo Essays. |
|
|
| For Comments post in our News Group |
