| Digital Outback Photo - Photography using Digital SLRs |
|
 |
|  |

|
 |
Photoshop Corner #014"The Use of Fred Miranda's D30 Linear Action with D1x Raw Files"by Paul Caldwell
|
|
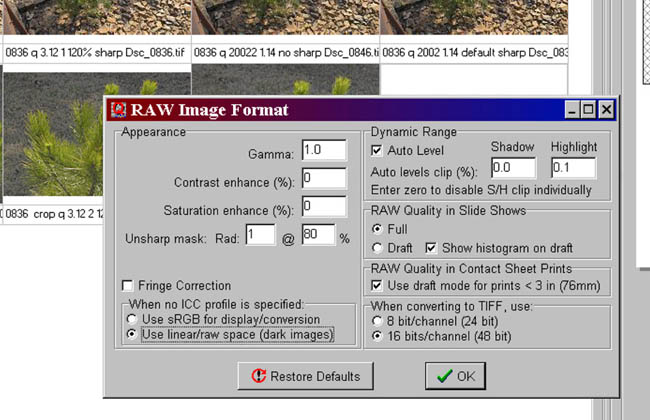
From the sound of this you may think that I have my camera mixed up. Instead I have found from testing with my D1x raw files that Fred's linear action for the Canon D30 works very well with very little post processing required. More important than anything, the colors that the action generates are excellent and very rich with saturation. In my previous work with 35mm film, my main media was slides and I was always looking for a rich image with good saturation. I mentioned very little post processing. By this I mean that you can run the action on a linear conversion of a D1x raw file, then have a very nice image that will not require much tweaking for the final result. First let me explain a linear output. Fred has written this action to work with the Canon D30 raw output. All of the Canon cameras apparently offer a Linear version of the output. From what I have found out, the linear image is very close to what the camera's CCD captured. It will be very dark, with very little viewable color. Unfortunately Nikon's Capture software does not offer this as an option. However both of the 3rd party software platforms available for the D1x, Bibble and Qimage have this as a possible output. To get a linear output from Qimage, follow these steps. Open Qimage and go to the top command line. From there, pick settings then raw format options. You will then have a separate box open called RAW image format. Once you have opened this section, you will see a check box for linear output. Select this instead of the normal RGB output. With the Qimage conversion, you can also make additional selections for gamma and sharpness. With Qimage I will vary my gamma between 0.65 and 1.0 depending on the image. If I am working with an overall dark image to start with, (for example something taken on a cloudy day), then I will take the gamma up between 0.80 and 1.0. If the image was taken on a bright day and has overall good exposure, then I will most often bring the gamma down to around 0.65 to 0.80. Select 16-bit tif as the output medium. After you make this selection, then you will follow the normal raw conversion process of Qimage. Here is screen capture of the Qimage settings screen. |
 |
|
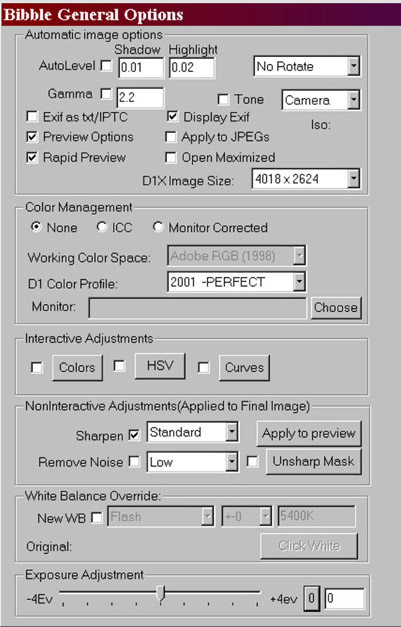
I will leave the sharpness set to the default radius of 1 and percentage of 80. Remember with the sharpness, since you are using a raw file, there will be no sharpening in the raw file from the camera. Because of this your image will be quite soft, so as a normal practice I leave the sharpening turned on during the conversion. To get a linear output from Bibble, follow these steps. Open Bibble and from the main screen, select file then options. Once in the options section unselect the following, icc, tone, and gamma. You can leave the sharpness either turned on or off just like with Qimage. As a normal practice I leave the sharpness set to "standard". You will need to select 16-bit tif as the output format. Also I leave the exposure compensation slider set to (0). You can play with this on your output, however I have found that it seems to have a negative overall effect. |
 |
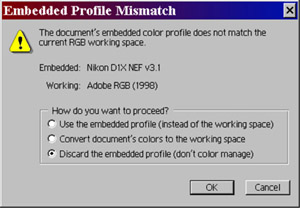
| Now that you have the linear output, the next step is the neat part. Open Photoshop 6.0 and the actions palette. With the linear image you created using either Qimage or Bibble, you now are going to run Fred's Linear action. Fred's action comes with two versions, a sRGB and Adobe RGB (1998) output. For my work I use the Adobe RGB (1998) version and whenever I refer to the action from now on, I will be talking about this version. The same steps will apply to the sRGB version. One note. When you make a linear output from Qimage, you will get a profile assigned. When you open the linear image in Photoshop it will bring up the standard profile box where you have three options. FOR A QIMAGE CONVERSION take the bottom option and don't color manage the image. Bibble linear output does not assign any profile. When you open the image in Photoshop, you will get a similar message box but this time it will say no profile is assigned. FOR A BIBBLE CONVERSION continue to open the image without a profile being assigned. Here is an example of the main screen in Photoshop 6.0 when you open a Qimage linear conversion. |
 |
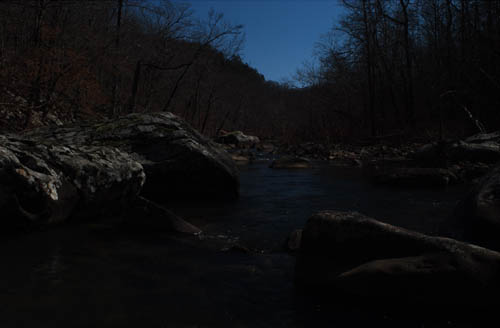
| Once you have selected the "don't color manage option", you will then see a image like the following on the main screen in Photoshop. |
 |
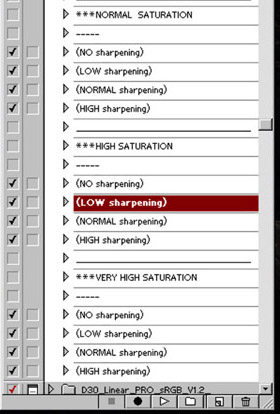
| Fred's action consists of (5) saturation settings ranging from no saturation to very high saturation. Within each saturation selection there are (4) sharpness settings. The sharpness tool being used is the Photoshop USM tool. Depending on my image, I tend to pick normal or high saturation and then low or normal sharpening. Once you have picked the level of saturation and sharpness, simply hit the play button on the actions palette and let the action run. If you like, you can have the action stop at each separate step so you can make adjustments, however for this action, I let it run without any intervention. |
 |
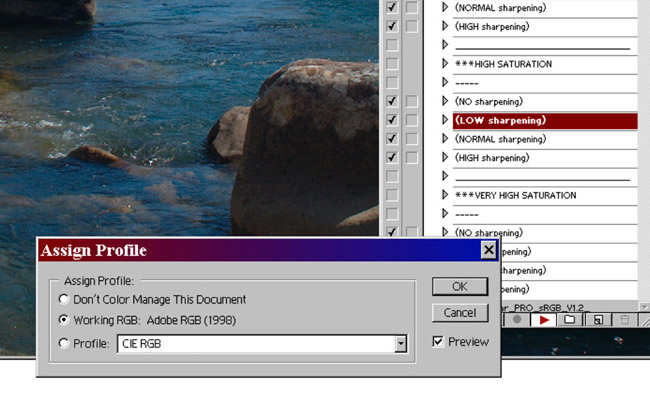
| As the action runs through its steps, it will stop one time to ask you which color profile you want to assign to the final processed image. Here you can select any profile you prefer. Most often I will just select the Adobe RGB (1998), but sometimes will assign several to see the effect. This is a nice step since as you assign the various profiles, you can see your image change in the background. |
 |
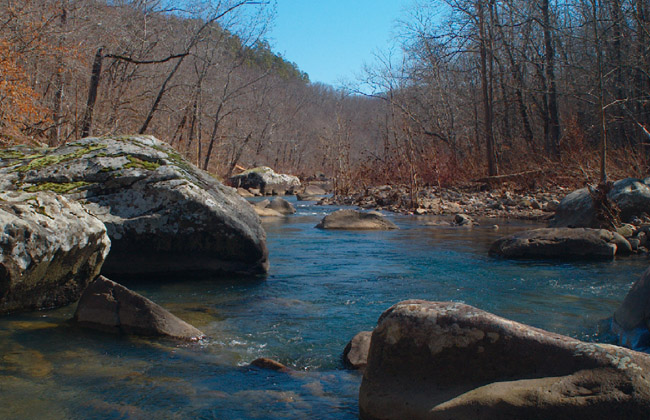
| After you have run the action you have a final 16-bit tif. |
 |
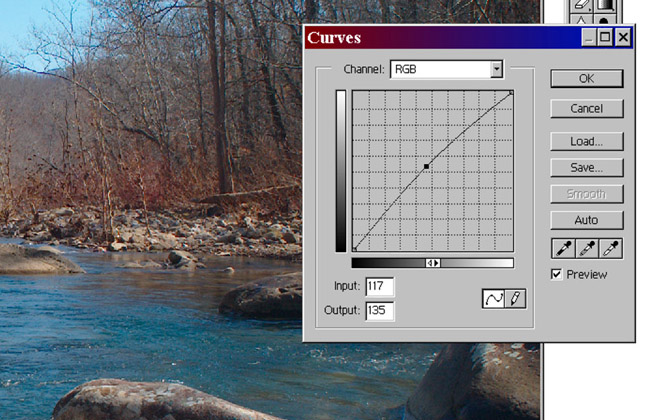
| Most often the only other adjustment I will make in Photoshop to a D1x linear conversion will be a slight curves tweak. I find that on a image that started out as underexposed, after I run the Fred Miranda Linear conversion, I might have to adjust the curves up. If the image was either given proper exposure or slight overexposed, then I will have to take the curves down. In this example I chose to take the curves up just a tad, however this is strictly user preference. |
 |
|
What do I gain by doing this you may ask? I have used Capture 1, Capture 2, Bibble and Qimage. With each I find myself spending a lot of time within both the conversion program and then Photoshop working to get the final colors to where I want them. With the Fred Miranda Linear Conversion, for my required results, I find that Fred gets the colors much more to my liking the first time. To me this is a very important facet of any digital image work. In the image I used for this example, I received excellent colors. Note the sky, the water and the rocks in the foreground. I am still relying on the initial conversion software i.e. Bibble or Qimage to apply sharpening, but that is all, for the rest of the colors I use the action's output. I also find myself not having to make any change to the image's saturation or contrast. The tool outputs the final image as a 16-bit tif, and that's about 60mb in size. You can either print the image at 16-bit or scale it down to 8 bit. For my work, I scale the final image down to 8-bit, as I have been instructed that the Epson inkjet line will do this anyway. My work is printed on an Epson 1280 using either premium glossy paper or archival mat and the results are stunning. I welcome inquires or any other discussion points on this subject.
For Fred's action go to the following site: www.fredmiranda.com, then look under the actions tab. The cost for the action is under $15.00. |
| To download test versions of Bibble or Qimage you can go to the following sites: |
|
Bibble www.bibblelabs.com/download.html Qimaqe www.ddisoftware.com/qimage/ |
| If you want to discuss this review post you comments in NPN Digital Forum |
| Here is a news group for discussing the Outback Photo Essays. |
|
|
| For Comments post in our News Group |