|
 |
|  |

|
 |
Printing Insights #013Epson 9600 Diary
|
|
Part 2 |
|
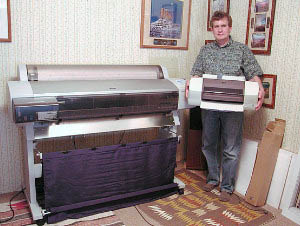
We are very pleased that Alain Briot shares his experience with his new Epson 9600 printer. Alain is a very well known professional landscape photographer. Alain lives in Arizona. |
|
|
| The diary always has the latest entry on top |
| 6/28/2002 |
|
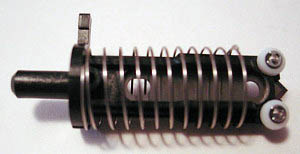
Today a short entry on the 9600 built-in paper cutter. On a roll-fed printer, of 44" width, having an automatic and built-in method for cutting the paper after printing is very important. Doing this by hand is impractical and would result in prints being damaged by either a wrong cut (cutting part of the print off or cutting into the print) or damaging the print by bending or "kinking" it while attempting to cut the paper off the printer. Here is a photo of the cutting head assembly:
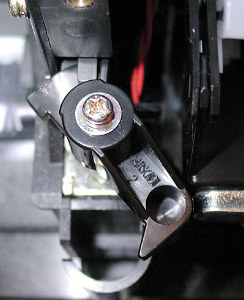
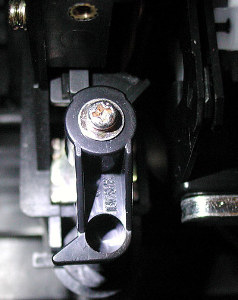
The blade, which has a triangular shape, is located at the right. The spring allows the head to retract when not in use. This assembly is positioned next to the printhead and travels with the head. It is located in a circular slot and held in place by a swiveling holder. Here is a photo of the holder open and closed.
The blade assembly can be easily removed by swinging the cutter holder and pulling out the blade assembly. Cutting is operated in several passes. First, the blade cuts a small startup cut on the left side of the paper from the paper outwards. Then it cuts up to halfway into the width of the roll (22" on a 44" roll), moves to the right sides, and follows the same approach in reverse. The goal of this complex cutting procedure is to avoid tearing the paper by cutting directly from one side to the other. First, the blade may not be able to start a cut from the outer side of the paper without pushing the paper in and risking tearing it. Second, cutting all the way across may result in an uneven cut as the paper is pulled to one side during cutting (a little like cutting with a ruler while lifting the ruler slightly and seeing the blade "swerve" off the expected line... |
| 6/27/2002 |
|
Today I continued testing papers. I received a roll of Parrot Ultra Gloss and samples of Parrot Ultra Lustre papers and proceeded to print the same image I used yesterday and which appears on the photograph of the dye and Ultrachrome prints. Parrot Ultra Lustre paper has a smooth luster surface, without the slight texture of Epson's Premium Luster. Somewhat in between Epson Premium Luster and Epson Premium Glossy. Both papers performed very well with Ultrachrome inks using the Epson settings and profiles. Shadows come out a little dark with the Epson profile and would need more separation somthing which can be fixed with a custom profile. These papers are also slightly "warmer" than Epson's comparable Premium Glossy and Premium Luster. The sky area in the image actually comes out warmer and with a slight red tint to it, something which is actually pleasant to the eye. My findings today confirm those of yesterday, namely that Epson's Ultrachrome inkset is able to produce pigment prints which rival dye prints. In some ways Ultrachrome prints have a more photographic feel to them, especially when printed on heavy photobase material such as Epson's premium Glossy or Parrot Utra Gloss. There is absolutely no digital artifacts to these prints (no "dots") and the quality is superb at 720x720. In fact I am now printing routinely at 720 because I cannot see any difference visually with 1440. The files I print are at 300dpi at the actual print size. On the 9600 they print without banding or dots, even highlight areas, just smooth, continuous photographic tone. |
| 6/26/2002 |
|
Today was spent on testing two photo-quality papers for best output: Epson's Premium Glossy Photo Paper (PGPP) and Premium Luster Photo Paper (PLPP).
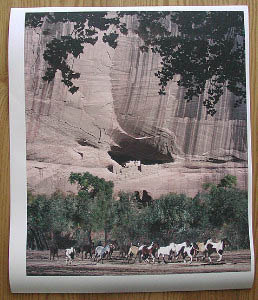
Both papers deliver much deeper blacks than regular Photo Quality paper and than Epson's Enhanced Matte paper. This is arguable of course since it is after all a matter of personal taste, however visually this is the impression I got. The glossy finish of these papers gives prints a photo-like feel and appearance. My favorite of the two is Premium Glossy Photo Paper. This paper, to my judgment, actually delivers deeper blacks than Premium Luster as well as more saturated color. PGPP is basically able to generate a higher level of contrast and create photo-like injet prints with pigmented inks. Premium luster is also very nice but does not deliver a black as deep as PGPP or the same color contrast and intensity. I also could live without the slight grain of this paper. Again, this is a matter of taste as this slight texture does not affect the quality of the output. But the best is yet to come, so read on. The most satisfying discovery today came when I compared a photograph printed with dye inks on an Epson 3000 on Epson Photo Paper with the same photograph printed with pigmented ultrachrome inks on the 9600 on Epson Premium Glossy Photo Paper. The two prints are nearly undistinguishable and this without print manipulation in Photoshop, just by using the Standard Epson profiles provided with the 9600. After a first comparison I noticed that the 9600 Ultrachome print exhibited darker shadows than the dye prints as well as a lack of yellow. I therefore made a second print on the 9600 with an adjustment layer lightening the shadow areas (the trees on the right side in the photo below) and adding some yellow (actually lightening the blue layer with an adjustment curve). Here are the results:
The pigment print is on top, the Ultrachrome print at the bottom. The photograph was taken with an Epson 3100z digital camera with both prints under the same light source. This is not a collage and no adjustments were made to the original digital photograph other than setting the white point on the print border. There is some reflections at the bottom of the Ultrachrome ink print but other than that it should be clear how close those two prints are. Keep in mind that you are looking at two completely different ink sets and that the color gamut is almost similar! This shows how far pigmented inks have come when used in combination with the right paper. In my estimate the Ultrachrome inkset produced a much more satisfying red in the foreground than the dye inkset as well as more pleasing blue shadow areas behind it. The only area which requires work are the trees which could be lightened further. However, the blacks are robust throughout and I don't feel a need for deeper blacks on this paper. Parrot Digigraphics is sending me a replacement roll of Paper compatible with the 9600. The problem due to a wrong reference number. I also have a roll of Parrot Ultra Gloss Lutre paper on order. I will be reporting on their respective performance as soon as I receive these. |
|
6/25/2002 1. Borderless printing |
|
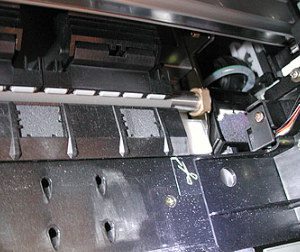
The 9600 is able to create borderless prints on paper of certain specific width. To get borderless prints you first need to enlarge the size of your original file by 2 or 3 mm. This little bit extra dimmention will allow the printer to print slightly past the borders of the paper. Technically, this should result in ink being deposited on the edges of the paper, upon the area where the paper rests during printing. However, Epson has strategically placed small sponges are specific intervals, which correspond to standard sheet paper and roll paper width, to catch this excess inks. Those sponges, which actually feel rather hard to the touch, are visible by opening the front door of the printer and looking to the back at the level of the printhead.
This photograph shows the print head at far right and two borderless ink pads (grey squares).
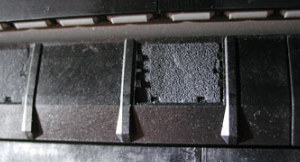
Here is a close up of a single pad. 2. The search for the ideal paper (see also here) I realized today that I was shipped the wrong paper with my printer. I ordered an extra roll of photo-quality paper and was shipped a roll of Glossy Paper-Heavy Weight, SO 41291, which is actually designed for use with dye inks in the 7000 and 9000. I actually conducted tests on this paper and wondered why the print quality wasn't that great. I contacted Parrot and wait for their word as to what to do now. In the coming days I plan to test Epson's Premium Luster Photo Paper and Epson Premium Glossy Photo Paper. I personally prefer photo-quality papers for most of my work although for certain images I do like the look and feel of fine arts papers. However, one thing at a time so for now I'll stick with finding a photo-quality paper that I like. The matte black and light black 220ml cartridges have not arrived yet although I have ordered them at the same time as the printer. |
| 6/24/2002 |
|
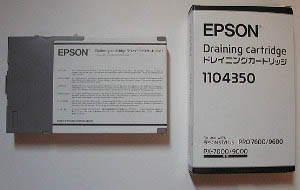
First, the draining cart: the 9600 comes with a "Draining cart" which is basically an empty ink cartridge whose purpose is perform and ink change from matte black to Photo black, or vice-versa.
This cartridge is inserted in place of the black ink cartridge when the black cartridge is changed from Photographic Black to Matte Black ink (or vice versa). The draining cartridge, because it is empty, prevents the printer from sucking ink out of the black cartridge and thus allows ink to be completely drained from the black ink line. When draining is completed the draining cartridge is removed and replaced with the new black ink cartridge, either matte or photo black. The printer then proceeds to suck out ink from this new cartridge and to fill the line with the new black ink. Because all the other ink cartridges remain connected during this operation a large amount of ink from the other 6 colors is drained as well. It would be great if this wasn't the case as it is a very wasteful process, but for technical reasons there seem to be no other way right now. It certainly would be a big improvement if a solution was to be found so that only the black ink line is drained and refilled! I have not personally gone through this process myself because I only have the Photo Black cartridge right now. A matte black cartridge is on order but hasn't come in yet.
Second, metamerism. This was a big issue with the previous generation of Epson pigmented ink printers. For those unaware of what metamerism is it simply refers to the ability of certain pigments to change color depending on which light source they are viewed under. Typically, with Epson pigmented ink, prints would have a correct color balance when viewed under tungsten light (indoor, artificial lighting) but would exhibit a green cast when seen under outdoor lighting conditions (natural light either from open shade or direct sun). The new Epson Ultrachrome inks, I am glad to report, are free of metamerism. In this respect these ink represent an enormous step forward. My metamerism test was very simple: I took 2 prints of the same image, one printed on Epson Glossy Photo Paper and the other on Epson Enhanced Matte paper, alternatively in direct sunlight and under tungsten light in a room with no window light. I honestly could not see a trace of green color shift. I was very careful to focus on middle grey areas -I actually printed a gray scale for this purpose- and again I could not see any green shift anywhere on the gray scale. I also performed the same viewing test with images printed on the Epson 10,000 and could see some amount of green shift on the 10,000 prints, especially in middle grey areas. Epson did improve the firmware for the 10,000 and 7500 in order to reduce metamerism, namely by changing the firing order of the print head, but although this reduced the problem it did not eliminate it completely. The new Ultrachrome inks are, in my estimate, a complete solution to the metamerism problem. Third, deep blacks. I am getting softer blacks on the 9600 than on, for example, the 1270 or other printers using Epson's photographic dye inkset. This is to be expected, unfortunately, since pigmented inksets typically produce softer blacks than dye inksets. However, I believe that custom profiles should be able to generate better blacks. Paper also plays a role in getting deep blacks. So far I have only printed on Epson Enhanced Matte and on Epson Photo Glossy. I have a 44" roll of Parrot ULtra Lustre paper on order and I will report on how this paper performs as soon as I receive it. By the way, Parrot Digigraphic is the Epson dealer where I purchased my printer. They offer a wide variety of paper and profiles which you can see at http://www.parrotcolor.com Fourth, black "color." The 9600 generates very neutral blacks. The 10,000 on the other hand, generates slightly warm blacks. This is also good news since while it is possible to create warmer blacks though color adjustment when starting with a neutral black it is nearly impossible to make a warm black neutral when the natural tendency of an ink set is to create warm blacks. |
| 6/23/2002 |
|
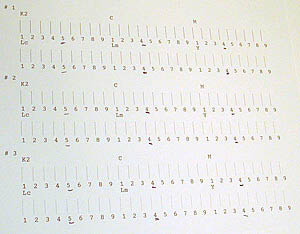
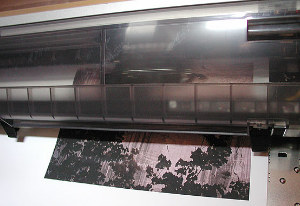
Today I did a printhead alignment test. On a machine this size this test takes on unheard of proportions when compared to the same test on a desktop printer. If roll paper is loaded in the machine the 9600 will print the test across the whole width of the roll, repeating the test patterns every 8.5 inches. I suppose this allows one to calibrate for variations along the length of the printer. However, the calibration program, accessible via the LCD screen on the control panel, only allows one entry for each printed line requiring the user to make an average of the different results over one page. I found this approach confusing and very wasteful paper-wise and so decided to print the head alignment test on a letter size page. This worked well. I just don't know if the head is aligned along the entire 44" length of the printer or not. Notice that there are two head alignment tests: one for uni directional printing with all colors and one for bi-directional printing with all colors. The following photographs show what each test looks like:
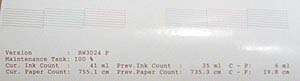
This test allowed me to find out that the 9600 is able to accept letter-size sheets of paper without problems. Unloading a roll of paper is also very easy: just push back the paper release lever and pull the paper out of the printer. This is important to know when one needs to make a small test print and does not want to waste roll paper. That way the test print can be done on a letter size scrap of paper and when a satisfying test is done the full size image can be printed on a roll of the same paper. Only a minimal amount of time is spend switching between sheet and roll paper. The same technique can be used to do a nozzle check. I also conducted various printing tests using different profiles to see what each did. The results were across the board and are difficult to share visually given the fact that a photo of a print will never show what the actual print looks like. However, it is important to note that the Epson profiles for Enhanced matte paper are actually not bad at all and provide satisfying results which can then be tweaked according to the individual requirements of each image. Next I plan to print a test image from Photodisc and compare it to the same image printed on the dye version of the Epson 10,000. It is interesting to know that the 9600 is able to print reports detailing various aspects of a print job as well as reports detailing all print job done on your machine. These reports include how much ink was used for a given print, in milliliters, and how much paper was used, in inches. Information on how much total ink and paper were used over the life of the machine is also available. This image of a nozzle check pattern shows some of this information. Again, there is no need to use expensive photo paper to print such reports. Plain, letter or legal size paper will work just as well.
|
| 6/22/2002 |
|
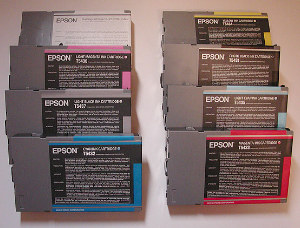
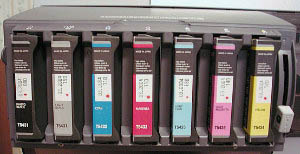
Today I started by loading the inks into the printer, a very straightforward process. Just tun on the printer and insert each cartridge in the ink cart holder, going from left to right -starting with the black cartridge.
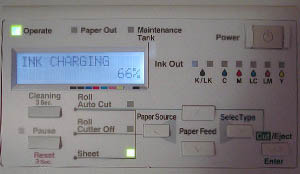
The printer then proceeds to load the ink and keeps you updated of the process on the control panel:
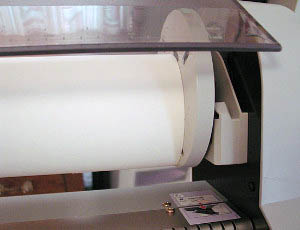
The next step was to load the paper using the 44" roll of Enhanced matte Paper
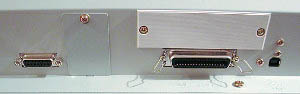
Again, no problem here: start by lifting the paper-release lever on the right top of the printer and push the paper down until it comes out below the printhead area. The only difficulty was that pushing the paper down won't do the job. The paper curls up just enough to not be able to make it on its own past the rollers. It is thus necessary to open the transparent front cover and pull the paper down. I found that pushing the paper down with one finger placed in-between the rows of rollers works best. This isn't necessary when loading sheets of paper as they are by nature flatter than rolled paper. The printer was connected to my Macintosh G4 via USB cable.
Although I had already installed the software for the 9600 I found it was necessary to install it again to see the printer port appear in the chooser. Printing from Photoshop, using the Epson driver, is no different from printing to any other Epson printer. You just send the file to a bigger machine, and you can send a much larger print file, that's all. My first print came out perfect. You can see the printing process and the results here.
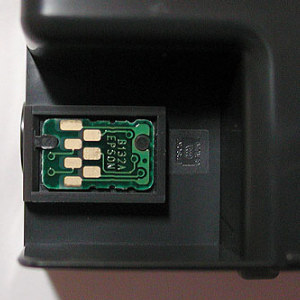
From this successful beginning I started to print other files and explore the various features of the 9600. Here are some of the unique aspects of this printer illustrated by photographs. First, one of the unique characteristics of the 9600 is the use of Epson's new Ultrachrome pigmented inks. There is also a dye version of the 9600 but I chose the pigmented model. The two printers are identical, the selection of inkset being made when the original ink cartridges, the ones that came with the printer, are inserted. These cartridges have special chips which tell the printer whether it will be a dye or a pigment printer. Here is a photo of the chip on the cartridges. This chip also tells the printer how much ink is left in the cartridge making these cartridge unrefillable unless someone finds a way to reset the chip in the future.
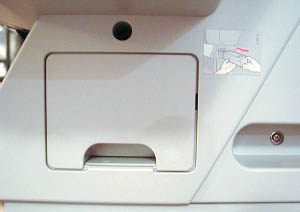
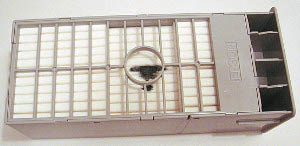
Another item that is chipped is the "maintenance tank. The purpose of this tank, located on the right side of the printer just above the stand
is to collect ink purged from the printhead during either cleaning, cartridge replacement, or cartridge removal (when the printer is to be moved or shipped for example). The tank contains heavy abortion sponges which gets filled with ink over time until the chip communicates to the printer that the maintenance tank needs replacement. In the past, this meant an expensive service call as this replacement could only by made by a technician (or a printer owner with above-average knowledge). With the 9600 it simply means a call to Epson Supplies for a new maintenance tank, then pulling the old tank out of the printer (it slides out just like a drawer) followed by inserting the new tank.
All inkjet printers have such a tank to collect wasted ink. However I personally didn't much about maintenance tanks before acquiring the 9600. |
| 6/21/2002 |
|
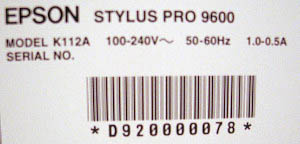
The printer was delivered today and we assembled it without any problems. The most difficult part of the assembly seems to be the cloth paper basket which is a little difficult to figure out at first. Otherwise the printer is very easy to assemble. 4 screws hold the stand together, 2 on each side, and the necessary Allen wrench is provided. The printer itself sits on top of the stand and is held by 2 small butterfly screws, that all. I was concerned by the weight of the machine, 280 lb shipping weight, but it is easily manageable with 2 persons if the stand and the printer are carried separately. However, a lift gate is necessary on the delivery truck as the printer is too heavy to be lifted and carried down from the truck. It comes in a very large sturdy cardboard box with a plywood bottom and wooden block sort of like a light duty pallet. There is a special offer for a roll of free media in the box. Make sure you don't throw away the box too fast as the UPC code is needed to get the free media! I had to go and retrieve part of the box myself, luckily it wasn't too late. Space-wise, the printer is quite large, as can be expected, but the fact that the stand is on rollers makes it very easy to move it around. For example, getting access to the back of the printer is very easy: just move it forward a couple of feet, as needed, until you have enough room to access the rear of the unit. This is much better than lifting a heavy unit or crawling behind a cramped space. The rollers are multi-directional which makes moving the printer a very easy process. The height of the paper reel, ink tanks and printhead are also ideal. Just a little below chest height which makes working with the unit very easy and convenient. So, so far, so good! No problem to report. Tomorrow we will move on to ink and paper loading. I will also have some jpegs showing details of the machine. One last note: the serial number of my printer is 78, clearly one of the very first units
|
| Alain Briot |


| For Comments post in our News Group |