| Digital Outback Photo - Photography using Digital SLRs |
|
 |
|  |

|
 |
|
Selective Color Correction with Color Mechanic
review by Uwe Steinmueller |
|
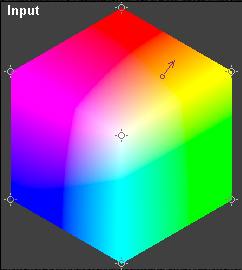
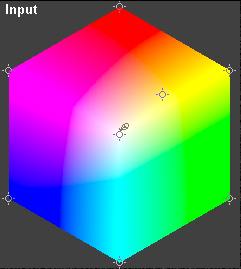
Whenever Michael Reichmann of the Luminous Landscape finds a new tool and even praises I pay attention and this time he introduced a new Photoshop plug-in Color Mechanic. It caught me attention as doing color corrections is tough. Also Color Mechanic is of course no silver bullet but it might come close. The plug-in come as 8 and 16 bit versions ($29.95/$49.95) versions for Mac and PC. A sample can be downloaded and you can learn what Color Mechanic can do for you. The principle of Color Mechanic is easy to understand. Color Mechanic uses the HSV color model where each color is defined by a hue, saturation and brightness. I find this model much more intuitive than RGB as it defines a space (or in this case a cube). One can either select a color in the left window which displays the original photo or directly in the color cube. Once you create a so called "Control Point" it is shown in the color cubes (left for the original and right for the modified colors). The control points can be used now for two very different purposes:
Changes to the hue and saturation are performed by dragging the selected control point to an other location inside the cube. Mostly you will use very modest changes. The brightness can then also be changed using an extra slider. You can also download the manual so that we don't want to repeat the handbook. Instead we show two use cases to illustrate Color Mechanic. |
| Case 1: Correcting gray values |
 |
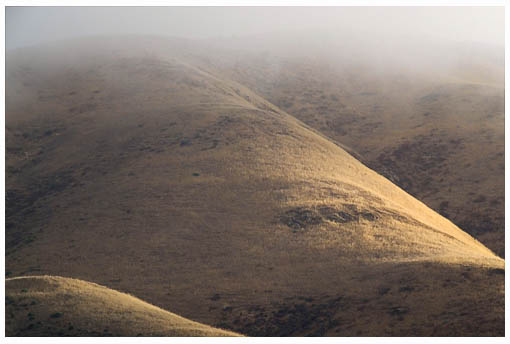
| This photo has a slight yellow cast in the fog on the top right side. This might even be correct in reality but still I don't like it too much. |
|
The picture below show the corrected version. It took me one minute and I felt a lot of control/logic about this process. |
 |
| Case 2: Changing selective saturation |
| This test case is a bit more complicated and again Color Mechanic does again a wonderful job. |
 |
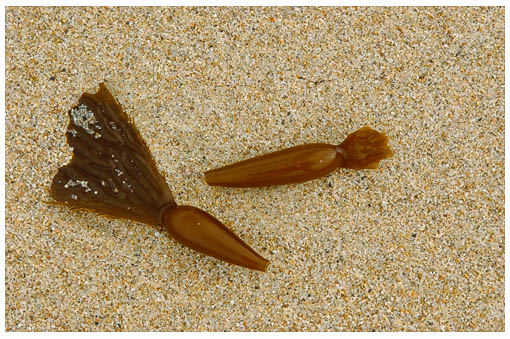
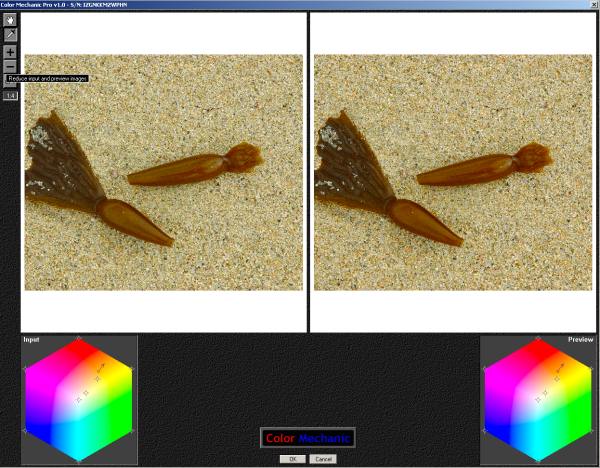
| Here I wanted to enhance the color of the kelp and started with the following correction |
 I
selected a control point from the kelp body and got the result below. I
selected a control point from the kelp body and got the result below. |
 |
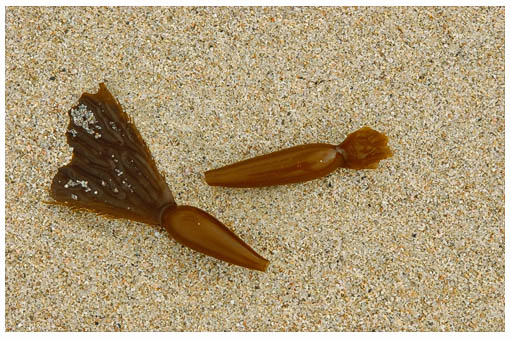
| The result on the kelp I like but the sand also changed in a way I did not want. What to do? Lock some colors! |
 The
second control point locks the gray/yellow colors in the sand. The
second control point locks the gray/yellow colors in the sand. |
 |
| The sand is now much better but there are still some orange spot in the sand which also got too much saturation. |
|
Below you find the final image with more saturation in the kelp and a sand close to the original. |
 |
| If you start using Color Mechanic plan to have a lot of time available. Not because it is slow to use (just the opposite) but you want to revisit a lot of photos and it is so much fun. |
| One thing could be enhanced in my opinion. Dragging the control point just a very little bit gives quite a change in color. It would be good to either be able to zoom also into the cube or use other input techniques for small changes. |
| Conclusion |
| I agree with Michael this is a must have Photoshop plug-in. Highly recommended. |
| For Comments post in our News Group |
 The
cast was removed with just two control points. For the first one I selected
some spot in the yellow casted fog and than dragged the control point
towards the white spot in the middle. The second control point was used
to lock the color of sunlight on the hill.
The
cast was removed with just two control points. For the first one I selected
some spot in the yellow casted fog and than dragged the control point
towards the white spot in the middle. The second control point was used
to lock the color of sunlight on the hill. The
third control point was selected in the sand and the zoom tool in Color
Mechanic makes it easy to select the right color.
The
third control point was selected in the sand and the zoom tool in Color
Mechanic makes it easy to select the right color.