The 21st Century Daguerreotype
Have you every
wanted to hit your emulsion with a hammer? Would you like to
use a blow torch as the archival wash? Do you believe
in alchemy? If you don’t like a print, wouldn’t
you like to take a sander to it and start over again? If so,
you
might consider daguerreotypes. Humor aside, I believe that
the Daguerreotype is certainly the most unique and one of the
most
elegant photographic processes available today.
Last summer, I joined ten other students in a workshop on making
daguerreotypes taught by one of the leading contemporary daguerreotypist;
Jerry Spagnoli. Jerry has a thoroughly modern approach to using
the daguerreotype as an expressive medium for his art work. He
works to make daguerreotypes that are more than photographic
images, but are beautiful art object themselves; he has perfected
several processes for creating rich tones and colors in his daguerreotypes;
his work from the streets of New York are wonderfully three dimensional
and include vibrant, blue skies, and he was able to leverage
the incredible sharpness available in daguerreotype for stunning
details in his Anatomical series.

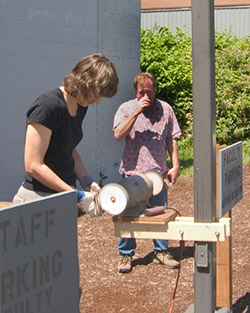
Image 1: Jerry Spagnoli demonstrating
the Construction of a Daguerreotype Case
A daguerreotype is essentially an image created from particles
of reduced silver and iodine over a mirrored surface. The mirror
helps created an incredible illusion of depth and the surface
particles create a grain-free image of almost infinite sharpness.
Gilding can produce a rich range of colors especially in bright
highlights and blown out highlights.
The daguerreotype (like many alternative processes) is shrouded
by contemporary mythology and mere misinformation. Overall, the
process is no more difficult than printing in the traditional
wet darkroom, but this process is so different from other techniques
with which photographers are familiar that it is almost impossible
to compare. Much of the work for this workshop was done outside
in the sun, and the plates only get wet during the final clearing
and finishing stage. Following Jerry’s instruction, we
were able to make passable daguerreotypes during the first day
of the workshop, and many good one by the end of the workshop.
In this workshop, we learned the Becquerel method of development
for Daguerreotypes, a process that is slightly simpler than the
traditional method and does not involve development using mercury.
Image
2: Buffing the Daguerreotype Plates
The daguerreotype process
begins with a plate of copper that has been plated with silver – there
are a number of companies that can silver plate for daguerreotypes – we
got our plates directly from Jerry. These plates must then be
buffed
to a mirror smoothness (and smoother still) – this is
performed using a ½HP jeweler’s buff – the
plates are first mounted onto a 1 ½ wooded block (using
5/8ths inch penny nails) to stabilize – a propane torch
is used to heat the plate and remove any moisture and the plate
is buffed aggressively on the jeweler’s buff to create
a very smooth mirror finish.
Following the machine buff, we took the plates indoors to continue
buffing by hand on velveteen. The final plate is an extremely
smooth mirrored surface.
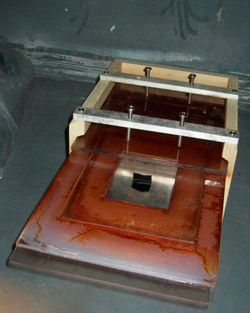
Image 3: The Sensitizing Box (used inside a ventilation hood)
The
next key step is to sensitize the plate. This takes place in
a darkened room with a ventilation hood and safelights.
The plate is exposed to room temperature iodine vapors for
about 50seconds to create a sensitized emulsion. (Warning – Iodine
is a potentially very dangerous substance – you should
not attempt to handle it without instruction from someone who
is experience with using it). The plate is placed in a custom
designed iodine exposure unit to prevent the release of the
iodine vapors. We periodically removed the plates to evaluate
the sensitization visually – the plates would change
color from a warm orange, through magenta, and finally to a
steely blue.
We then placed the sensitized plates into glass
plate holders (or traditional 4x5 film holders) so we could
use them with our
view cameras for exposure.
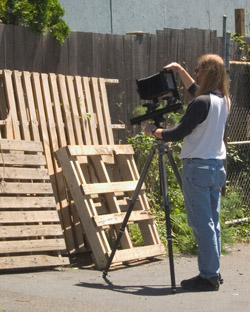
Image 4: Shooting Still Subjects
The exposure process is very
similar to shooting any photographic material using a view
camera – except that these Daguerreotype
plates have an ISO much less than 1 (the Becquerel Daguerreotypes
used in the course have an ISO around .0002; traditional mercury
Daguerreotypes are significantly faster, around .01). This requires
exposures of around 3 minutes at f3.5 in open shade on a sunny
day. (Open shade is preferred to full sun, as the Daguerreotypes
have an exposure latitude around 3 stops). Exposures in the range
of 3-10 minutes were fine for most of the students in this course
who were used to shooting a view camera; but portraits were more
challenging for the sitters. A number of successful portraits
were made during this course.
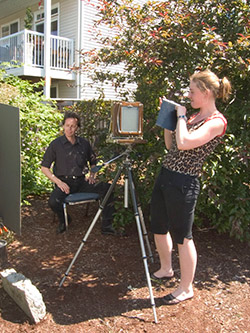
Image 5: Portraits
We returned with the exposed plates to the
darkroom and removed them from the film holders. These were then
placed under a
sheet of amberlith for development. The Becquerel Daguerreotypes
were develop by place each in full sun, but under a sheet of
amberlith for 1½ hours. This is one of the best (and
worst) aspects of this process; it is great to be able to ‘develop’ the
images out in the full sun, but the waiting could be tedious.
The prints did start to print-out and become visible within
10-15 minutes of being exposed to the sun, but full development
takes the full 90 minutes. It is possible to develop with various
types of Halogen heat lamps, but the sun is still the brightest
light source around.
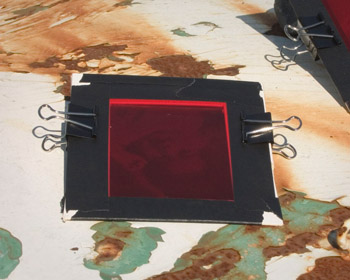
Image 6: Developing the Daguerreotypes in Full Sun
Once the plates
are developed, the image is fully formed, and the image can now
be evaluated. If you don’t like the
image at this stage, simple take a damp paper towel, wipe it
off, and go back to the buffing stage to start over.

Image 7: Jerry teaching the Gilding Process
If the image is acceptable,
the plates only need to be cleared, washed and gilded. The plates
are clear in traditional fix
(Sodium Thiosulfate), washed in distilled water, and gilded
with a solution of gold chloride and a blow-torch. For gilding,
the developed plates are place on a gilding stand to allow
access to the bottom of the plate, enough gold chloride is
placed over the top of the plate to cover the plate (surface
tension keeps the solution on top of the plate) and then the
plate is carefully heated with a propane blow-torch for about
2 minutes. This step does seem to require the touch of a master,
gilding too little produce little additional color, gilding
too much produces a gold plated images. Yet a properly gilding
plate is wonderful; blue and magenta tones appear in the highlights,
and a slight gold plate adds an overall sophistication to the
image.
The process from buffing, through sensitizing, exposure, development,
and gilding took most students around 3 hours to complete for
each print; but half of that time was spent waiting for the prints
to develop. Eventually, many students were preparing and
exposing one plate while a previous plate developed in the sun.
Everyone took home some beautiful plates from this workshop.
The Daguerreotype is not merely a historical oddity – the
images produced onto a Daguerreotype are among the most compelling
and interesting of all photographic processes – and the
uniqueness of this process makes it a very important expressive
tool for contemporary photographers. If you are interested in
new options for photographic expression; this is definitely an
alternative process worth investigating.
We need to remember the
value of alternative techniques for printing photographic images;
these provide rich and expressive opportunities
for presenting our vision. The Daguerreotype is one of the
most compelling of these options.
This article is not intended as an instruction guide for making
Daguerreotypes – this is not a process that I would recommend
learning through reading a magazine article – but I hope
it provides some education about the contemporary daguerreotype
and interests at least a few of you to try out a workshop on
this process. Jerry Spagnoli teaches several workshops per year
(I hope he will return to the Photographic Center Northwest in
Seattle, plus he also teaches at several other schools including
the Photographer’s Formulary in Montana). You can see a
selection of contemporary Daguerreotypes at www.newdags.com.
I
would like to thank Jerry Spagnoli for teaching this course
and for his inspiration as a photographic artist. Laurel Schultz
who helped assemble the Daguerreotype lab for this workshop,
and who is keeping Daguerreotypes alive in Seattle. And the
Photographic
Center Northwest for hosting this workshop.
A Postscript in Digital Daguerreotypes
I just had to try out making
Daguerreotypes from digital ‘positives’.
On the first day, I was successful in creating what may be the
first digital Daguerreotype. I started with a good grayscale
image in Photoshop, and printed out positives into Pictorico
White Film (the material that I use from most of my digital negatives).
Calibration turned out to be extremely easy; ultimately, I just
flattened out each image before printing by removing 50 points
of Contrast (using Brightness/Contrast!). The printed positives
were placed face down over a sensitized Daguerreotype plate in
the darkroom, and placed into a contact frame. I exposed the
prints for 60sec under my UV exposure unit. Otherwise the Daguerreotype
process was identical to the process described above.
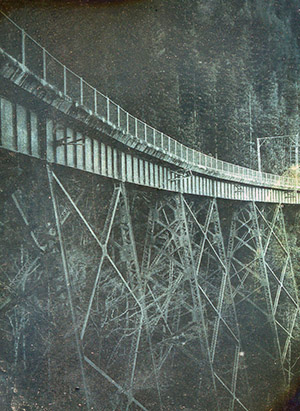
Image 8: My First Digital Daguerreotype (from a 4x5 original)
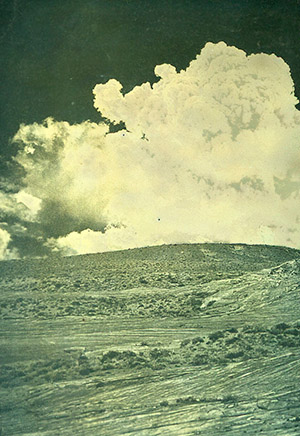
Image 9: Valley of Fire (from a 4x5 original)
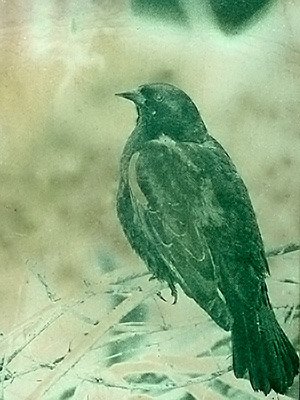
Image 10: Redwing Blackbird (original from a digital camera)
Other resources
|