If you look at most of the ways to convert to B/W they
hardly fulfill all these requirements. We show a technique that gets
close.
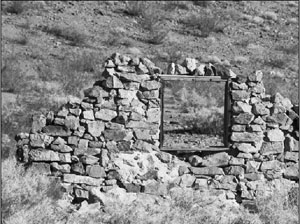
Ryolite near Death Valley
We start with a color photo that is ready
processed (including sharpening). Then we run this action (download
here as a ZIP file) and create 4 adjustment layers:
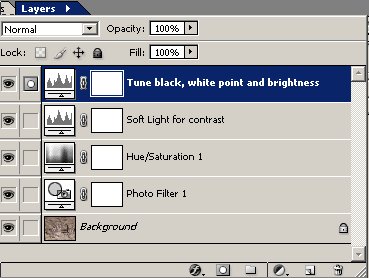
4 adjustment layers
The following instructions explain the
purpose of the different adjustment layers. Because everything is in
an adjustment layer you can tweak the values later.
1. Photo Filter layer
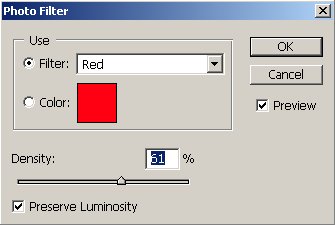
Photo Filter
Think of the Photo Filter as the classic
filters you used in front of your camera shooting B/W (yellow, red,
orange, green, blue).
2. Hue/Saturation layer
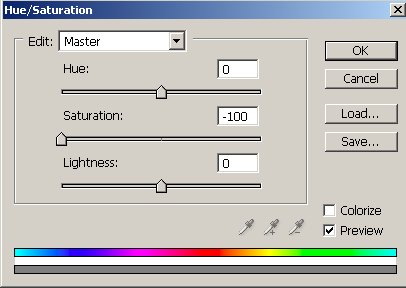
Hue/Sat layer to desaturate
the image
This uses a classic technique to create
a grayscale image. Combined with the Photo Filter layer this presents
a lot of flexibility for B/W conversion.
The next to layers are thought to prefect
the B/W image.
3. Levels layer in "Soft Light" blending
mode
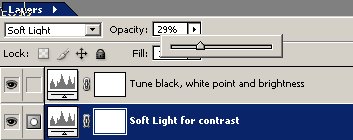
Tuning layer via opacity
We actually do not change any values
in the Levels dialog but use the "Soft Light" blending mode. The effect
is controlled via opacity. Opacity starts at 25% and is used to tune
the image black depth. This technique was inspired by some work of
David Riecks.
4. Levels layer for setting highlights,
shadows and midtones
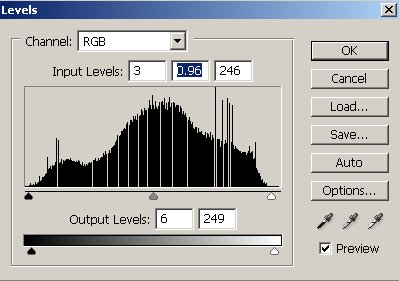
Levels adjustment
With B/W you can be more aggressive to
set the shadows and highlights than with color images. Using the midtones
slider you can then control the brightness of your B/W photo. We also
use the Output Levels to compress the image as hardly any printer can
produce real black and no paper is perfectly white.
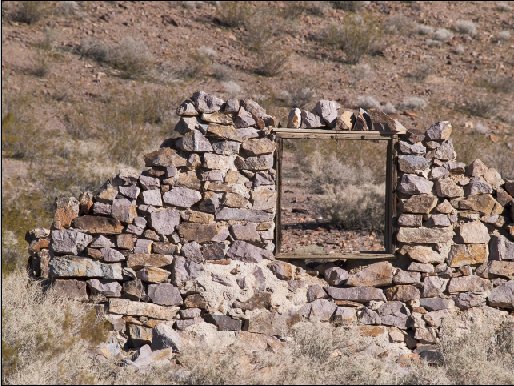
Note: Yes, we realize the spikes and
gaps in the histogram. They will not show up in most prints. But it
may be a good strategy to work in 16bit. Here is our final B/W image:

B/W version
Let us revisit our requirements:
- Systematic workflow
- Run action
- Select Photo Filter
- Set the highlights, shadows and midtones in the top layer
- Tune black depth in the "Soft Light" layer
- Intuitive steps
- Each layer is related to a logical part of the B/W conversion
process
- Easy steps
- Well, these are 4 layers but not complicated at all
- Non destructive (keeps the color image)
- No change to the underlying color image
- Easy to fine tune
- All can be tuned in adjustment layers
We ourselves use a variation of this workflow and also discuss alternatives
and refinements in our "Digital
Photography Workflow Handbook" |