One of the very powerful new features in Photoshop
CS2 are the new Smart Objects. We will not cover Smart Objects
in any detail here besides what is needed for our example. It's
best you read Ben Willmore’s book “CS2
Up to Speed” .
Overall we find Smart Objects more helpful
for Designers than photographers. But there is one feature
that is very powerful for photographers indeed. You can embed
a RAW
file into a Smart Object layer. The process is not complicated
but also not really obvious. The method we show was introduced
to us by Ben Willmore.
Creating a Smart Object layer that contains a RAW file
First we may need to change a setting in Photoshop
General Preferences:
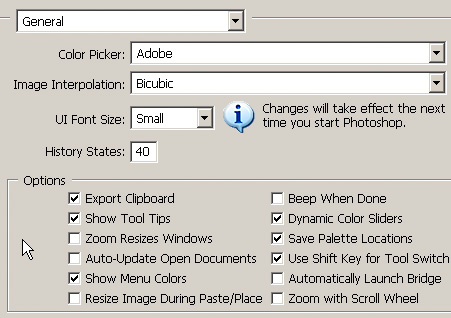
Make sure that the “Resize
Image During Paste/Place” property is not checked.
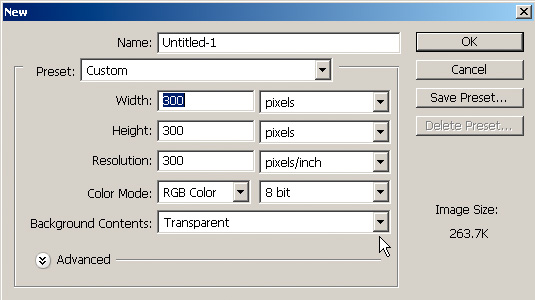
Create a new 16-bit RGB document
in Photoshop of about 300x300 pixels (as you will learn the size
does not really matter, just don't make it too large):
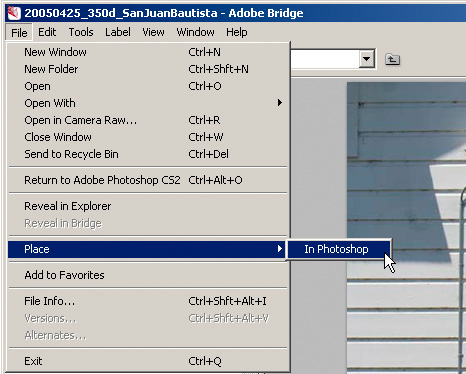
Next select a RAW file in Bridge
and place it into the new document by using the Place->Photoshop
command in Bridge:
This will open the Camera Raw dialog
in Photoshop:
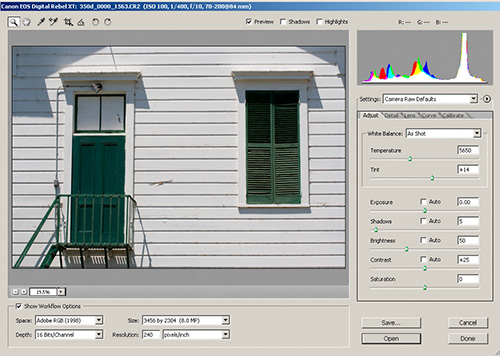
Change your RAW settings and confirm
with Open . Now you see the following image in Photoshop CS2:
At this point the image is not
yet really placed. To continue you need to confirm the placement
with the Return key.
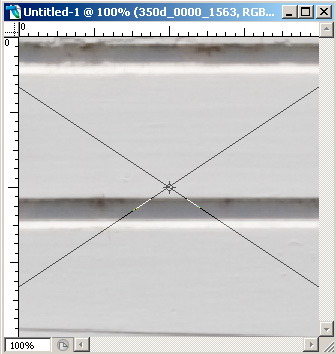
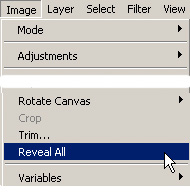
Because the RAW file is larger
then our new created document we see only part of it. Fortunately
there is the Image -> Reveal All tool in Photoshop available
to get the full size back:
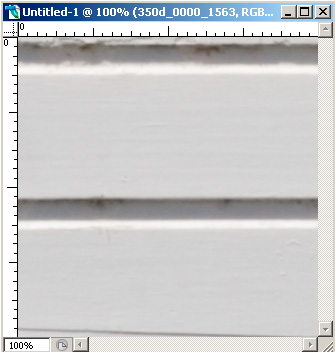
At this point we see the full sized
converted RAW image as if it would be a normal Background image.
A closer inspection reveals that we have created a so called
Smart Object layer that contains the original RAW file. The first
indicator is the different image title bar:

- The file name is still “Untitled-1” while
a normal opened RAW file would show the RAW file name.
- The
RAW file name shows up as a layer name which indicates that
we have
a layer and not simply a Background image
The Layers palette
shows more:

The symbol  flags
Smart Objects. flags
Smart Objects.
Now that we finally
have a RAW file as a Smart Object layer you probably ask: why
is it worth the hassle? What is the big difference to having
the converted RAW file as a normal Background image?
If you work with converted RAW files you have the
following limitations:
- If you wanted to change conversion parameters for the RAW conversion
you have to start all over again
- You also have to find the matching
RAW file first
The RAW file in the Smart Object layer makes
it much simpler. Double-click on the image thumbnail in
the Layers palette and Camera
Raw 3.x
will open up again so that you can fine tune your raw conversions
settings. There is no need to search for your RAW files
as it is contained in the Smart Object layer. Finally all the
information
needed for your work on a certain RAW file is part of your
image.
There is more to explore. You
can create a second layer using the "New Smart Object Via Copy"
command so that you can use it to have two interpretations of
a single raw file and then use layer masks to combine the two
images. Both RAW files can have completely different Camera Raw
settings (e.g. different exposure or different white balance).
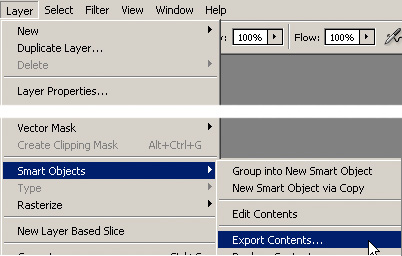
Exporting RAW files from a Smart Object
Because the Smart Object layer contains the
full original RAW file we can even get the original RAW file
back. Select the Smart Object layer that contains your RAW file
and
use Layer->Smart Objects->Export Contents:
We think that Smart Objects allow
a seamless integration of RAW files and the needed final tuning
in Photoshop.
Dr.
Brown's Services 1.0 contain a script "Dr. Brown's
Place-A-Matic" that makes this whole process much more easy
(check out the movie).
Please check out Ben Willmore's books and training:
|


