| |
Digital Outback Photo Contest #001

Upsizing Contest (terminated, see result)
|
| |
Published in cooperation by: 
&  |
| |
| |
Sponsored
by  |
| |
Which is the best upsizing method is discussed over
and over again in many news groups. We launch this upsizing contest
to learn from the shared experience of all our readers.
To share experience it is not enough just to show the results. We need
precise step-by-step descriptions of all image editing operations that
had been performed. That is why we need to limit the used tools to the
ones that are available at Digital Outback Photo (and they have to be
available for PC and Mac):
- Photoshop (this is the standard image editor we use)
- Genuine Fractals
- Fred Miranda's stair interpolation
- PowerRetouche Sharpening
- Nik Sharpener Pro
- PhotoKit sharpening tools
- Other tools (if the tool author provides a free full working copy
to Digital Outback Photo)
|
| |
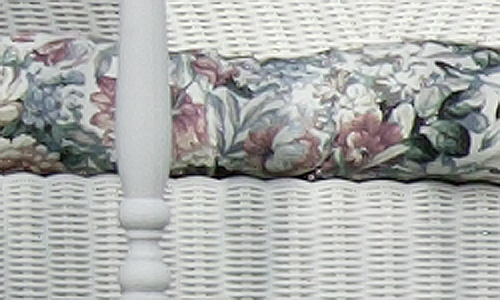
| Here is the original photo used (handheld with the Canon
EOS 1Ds + 24-70mm f/2.8 lens and converted with the Canon Fileviewer Utility
with no sharpening) |
| |
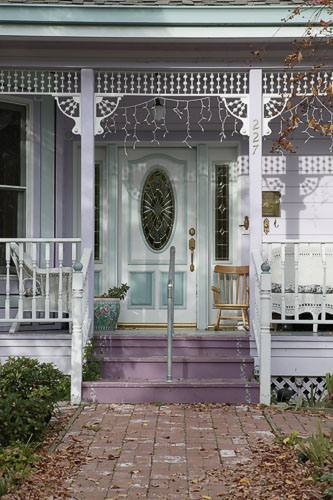
Purple Victorian in Los Gatos
|
| |
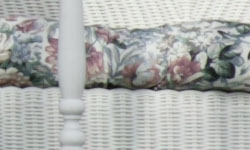
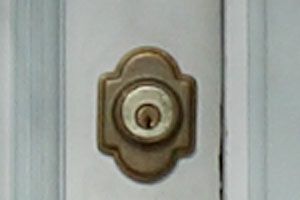
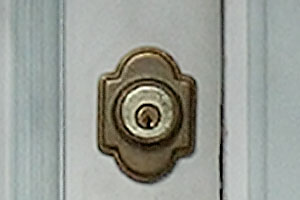
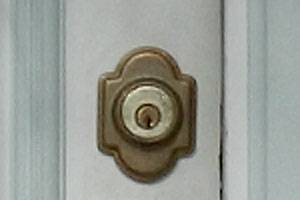
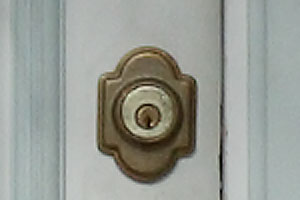
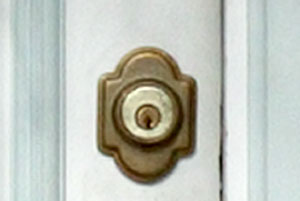
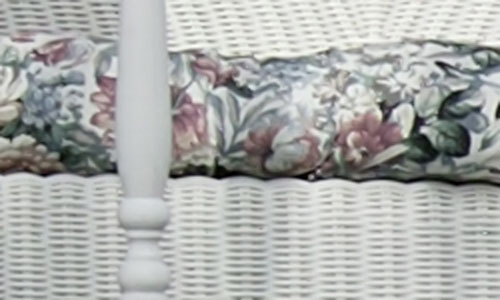
Crop 1 (not sharpened)
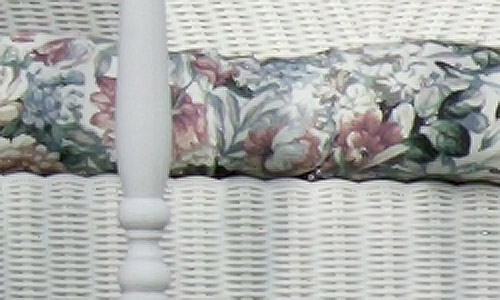
Crop 2 (not sharpened)
|
| |
| Here you can download the crops
(16 bit TIFF in a ZIP file). |
| |
| We will finally vote for a winner. Besides getting into
the contest hall of fame the winner will receive also a free copy of ThumbsPlus
5. |
| |
| Contest Rules |
| |
- Download original crops
(1 = 250x150 pixels, 2 = 150x100 pixels)
- Upsize crop 1 to 500x300 pixels and crop 2 to 300 x 200 pixels with
the ssame method
- Perform sharpening (same sharpening for both crops)
- Converted to 8-bit
- Email us
back in a ZIP file
- A JPG of the upsized crop (just for our info)
- Detailed instructions of your work (using only above mentioned
tools)
- Your name, email/web address (both optional)
- Contest ends 2/15/2003
We then will publish on this page your results. |
| |
| Sample Entry |
| |
| Author: Uwe Steinmueller |
| |
|
| |
Steps:
- Open in Photoshop in 16 bit
- Bicubic image resize in PS to 500x300
- USM Sharpening in PS (Amount 181, Radius 0.6, Threshold 0)
- Converted to 8 bit
|
|
| |
| #1 by Cid Dennis (PC & Mac) |
| |
|
| |
| Steps |
| |
- Open in photoshop
- Select images size and change resolution to 300dpi
- Upsize image at 5% increments until the desired size at 300dpi
is
reached.
- Upsize image one more time, if required, to match exact upsize
image
size.
- Change dpi back to 72dpi.
- Apply USM at 127, 1.1 , 0
- Convert to 8bit
- Save at JPG
|
| |
|
| |
| #2 by Kendall Helmstetter Gelner (PC & Mac) |
| |
|
| |
| Steps |
| |
- Load image in Photoshop 7.0
- Bicubic image resize to double targeted resolution (i.e. 1000x600
& 600x400)
- Apply unsharp mask (Amount 90%, Radius 6.0 pixels, Threshhold 2
levels).
- Bicubic image resize to targeted resolution (back down to 500x300
& 300x200)
- Convert to 8-bit.
|
| |
|
| |
| #3 by Derek Drury (PC & Mac) |
| |
|
| |
| Steps |
| |
- Open in P/S 16 bit
- Fred Mirandas Stair Interpolation - No Sharpening - interpolation
3.0xfull image
- Image Mode to 8 bit
- Bicubic to (1) 500x300 (2) 300x200
- NikSharpPro - Inkjet/Autoscan - Printer 1440dpi - Quality - Good
- Book - John
- Fred Miranda Intellisharpen - 10 Intensity
|
| |
|
| |
| #4 by Jay Patel (PC & Mac) |
| |
|
| |
| Steps |
| |
- Convert to LAB
- Select Lightness Channel
- Perform USM: Amount: 100, Radius: 0.4, Threshold: 0
- Perform USM: Amount: 140, Radius: 0.3, Threshold: 4
- Image Size using Bicubic Interpolation: 400%
- Perform USM: Amount: 100, Radius: 1, Threshold: 0
- Perform USM: Amount: 140, Radius: 0.6, Threshold: 4
- Image Size using Bilinear Interpolation: 50%
- Convert RGB
- Convert 8-Bit
|
| |
|
| |
| #5 by James Prouty (PC & Mac) |
| |
|
| |
| Steps |
| |
- Open in Photoshop 16bit
- bicubic resize to 200% of final size 1(600X400),2(1000x600)
- USM 200%R1.8 T-2
- USM 200%R1.2 T-4
- Downsize 50% to 1(300X200), 2(500x300)
- convert to 8bit
- duplicate background layer
- set dupe layer to soft light
- filter dupe layer -high pass - level 1.2 opacity 100%
|
| |
|
| |
| #6 by Jan Zabell Steffensen (PC & Mac) |
| |
| Favorite of the Jury: Congratulations! |
| |
|
| |
| Steps |
| |
- Upsize in 16 bit to 1000X600 pixel 300dpi ( 600x400pixel 300dpi)
- From the original make a duplicate
- Use the Duplicate to make a mask
- Level 0 to 55/ 255 to 242
- Channel mix R to 36 G to 30 B to 34 (grayscale checked)
- Image mode to grayscale
- Sharpen amount 251 / radius 0.5 / threshold 0
- Convert to 8 bit
- Stylize->Find edges
- Gaussian blur 0,3
- Invert
- Level 255 to 101
- Load original its still in 16bit
- Load selection
- Mode LAB Lightness
- Sharpen amount 500/radius 0.5/threshold 0
- Resize to 500X300pixel 72dpi (300X200 72dpi)
- USM Amount to 341 - Radius to 0.6 - Threshold to 0
- Mode RGB
- Saturation +12
- Mode 8bit
|
| |
|
| |
| #7 by Hans Lindkvist (PC & Mac) |
| |
|
| |
| Steps |
| |
- open in Photoshop 7
- resize in 20% increments up to almost target size
- do a final upsize to correct size
- adjust with levels to roughly 7 - 1.20 - 200, to cut off the empty
parts on each end of histogram
- use USM to increase contrast with these settings: amount 10 - radius
33 - threshold - 0
- use USM again, this time the normal way. Settings: amount 150 -
radius 1 - threshold - 0
- convert to 8 bit
|
| |
|
| |
| #8 by Jonathan Wienke (PC) |
| |
|
| |
| Steps |
| |
- Open files in Photoshop
- Enlarge 400% bicubic (2x final size)
- Save as uncompressed TIFF
- Open files in Neat Image Pro
- Open dc4800 noise profile (attached, this is just a starting point)
- Adjust noise profile to crop 1 with Auto Fine Tune button (The
resulting setting is used on both images)
- Noise filter settings:
Noise Levels: High -30%, Mid -20%, Low -15%, Y -10%, Cr +20%,
Cb +20%
Noise Reduction Amounts: High 50%, Mid 70%, Low 90%, Y 60%, Cr
100%, Cb
100%
Very Low Freq unchecked, Smooth Edges checked
- Sharpening settings:
Y channel only
High 70%, Mid 80%, Low 90%
- Save as 16 bit TIFF
- Open files in Photoshop
- Downsample to final size
- Convert to 8 Bit/channel
|
| |
|
|
| |
| And the winner is: #6 |
| |
| First of all we would like to thank all participants
for their submissions and we believe that we can learn from all of them.
The jury (from Imaging Resource & Outback Photo) selected #6
as a favorite. Other entries came very close. |
| |
| Jan Zabell Steffensen will receive a free copy of ThumbsPlus
5 from Cerious Software. |
| |
| |
| |
| |
| |
| |
| |