Digital Outback Photo Contest #021
Contest August 2006: LightZone RAW contest #1
sponsored by LightCrafts (producer
of LightZone)
See
also our previous contests.
20 of maximum 20 posted (contest closed)
1. Contest is open for submission till a maximum
of 20 entries
2. Published
LZN entries (so that you can
start learning and improving)
3. Gallery with current entries open
4. Contest closed.
5. Enjoy the results
A Note on Copyright:
This image can only(!) be used in the context of this contest and the
only site that has the right to publish images is Digital Outback Photo
(or other sites that were granted permission, in this case also LightCrafts).
If you want to use this image for any other purposes (e.g. marketing)
you
can acquire
a license
from
us.
We start a series of dedicated LightZone contests.
This is the first time that all of our readers can share all(!) imaging
steps (including selective corrections) with other readers. How that?
You will just send in a LightZone LZN file and this file contains all
steps
and operations
you performed
on this image. If you don't own LightZone please install a demo version.
Contact
LightCrafts if your demo already expired. Also remember
that you can buy LightZone through our banner links and receive a discount.
(you help to sponsor our work at DOP).
The main goal is to share imaging techniques and visual
interpretations among all our readers.
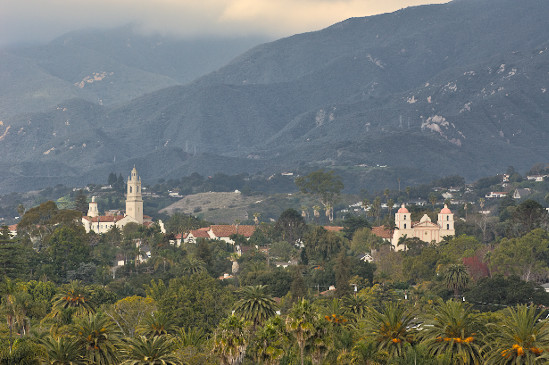
We provide the original RAW file of the title image:
- Scene: Santa Barbara Mission 2006
- Camera: D2x
- Lens: AF-S 70-200 f/2.8 VR (shot freehand)
You produce your interpretation
(color, B&W, colorized) of this image
using
only LightZone 1.5x or newer. Finally you send in only(!) your
final saved LZN file to us (the LZN file should be no larger than just
150-300KB).
Your contest assignment
Your task is to create your interpretation
of the following properties:
- Download the original D2x NEF RAW file from
here (read the above copyright
notice)
- Only LightZone 1.5 or newer maybe used
 The
photo should be ready for print (including noise removal, dust removal,
crop, straighten, sharpening, cloning) The
photo should be ready for print (including noise removal, dust removal,
crop, straighten, sharpening, cloning)- You grant the free public use of your instructions used in the
LZN file
- Name the LZN file like: first_lastname_d2x_0487.lzn
- You may also add a short descriptive outline of your workflow in
your email. We plan to publish some selective samples.
- Do not send images (we will create them via your LZN files)
- Send only the LZN file and your full name to: contest@outbackphoto.com
Rules and procedures
- Contest is open for all people that do not work for or a in affiliation
with LightCrafts Inc.
- We will publish no more than 30 different LZN files for all readers
to download
- We
may publish some of these entries even during the submission timeframe.
Don't just copy other entries)
- We publish also an LZN file used the create the title image
- We will open a gallery with images that we created using the selected
LZN files (max 20)
- All readers can vote on the results to find out their favorite
interpretation
- LightCrafts may select one of these LZN files and feature the result
on their own website.
In this case the person that submitted the selected LZN file will
receive a free LightZone license from LightCrafts (this has no relation
to the winner of the
voting).
Reader's Workflow annotations
1. Ed Wolpov
Please read this full article.
2. Martin Doonan
"Description of the adjustments (my tool names
in parentheses):
1. Crop out some of the foreground - I found it distracting
and pulled focus from the main (town) part of the scene.
2. Zone map (Open range)
to expand the range as much as possible. Exactly as described by
ed Wolpov: this has been a standard first adjustment for me in any
software
3. White balance and colour cast
(neutralise colour) to cool the colours a little. These were
actually later additions after I decided the whole thing was a
4. 2 times Hue / saturation (Lift foreground & drop
background). From the outset I wanted to increase the feeling
of depth and bring the town up front. An effect I have used successfully
before is to increase foreground saturation and lower background saturation,
using luminosity to balance the blend area. For this I needed a region
defined with a wide feather area running through the mid-ground.
5. Colour balance
(Green lift) to add a little "pop" to the
foreground foliage. Dodge blend gave the most pleasing effect
here by controlling effect elsewhere.
6. Sharpening (Sharpen edges & Sharpen:
contrast) - general USM style sharpening and contrast lift to
finish.
....
Have been impressed with the ease of work flow with
Lightzone these past few weeks. Enables me to get some great results
for little effort and far more intuitive to use than other tools. There
are still a few things
I lean on Photoshop for, but more and more that is only for 2
or 3 key add-ins, rather than main work flow. For light-touch,
fast adjustments to large groups of photos I find Lightzone wins
hands-down."
|


