Introduction
Have you ever wanted to mat your
favorite photographs only to put it off due to the difficulty
of cutting a mat yourself? If
this sounds familiar welcome to QuickMats, the matting solution
which does not require that you actually cut a mat!
If you have tried matting you know that without experience finding
the right materials for the job and using a mat cutter can both
be daunting tasks. Maybe you considered going to a frame shop
but didn’t afraid of how much this will cost you and unsure
of how to express your needs in the unfamiliar and somewhat arcane
language of framers and matting experts?
Well, fear no longer. There is now a matting solution which
will not require you to either go to a frame shop or have contact
with any matting materials or matting tools whatsoever. This
solution is called QuickMats, a program created by John Hartman.
QuickMats relies on an arsenal of Photoshop files, actions, textures,
etc. to create professional looking mats which, visually, are
undistinguishable from the "real" thing.
QuickMats allows you to create what I would call virtual matting
for your photographs. You design the mat in Photoshop, using
a multitude of options which we will look at more closely in
a second, and you either save the mat for viewing on screen or
print it on your favorite printer. You can use any printer you
like since the mat file is no different when completed than a
regular digital photograph. More importantly you will be printing
the photograph and the mat at the same time, thereby saving additional
time and materials. The mat can be printed in any size you like,
up to the maximum width of your printer.
The quality of the QuickMats files is such that once printed
the mat will look very close to an actual mat except that it
will not be three dimensional. Call it trompe l'oeuil matting
if you like!
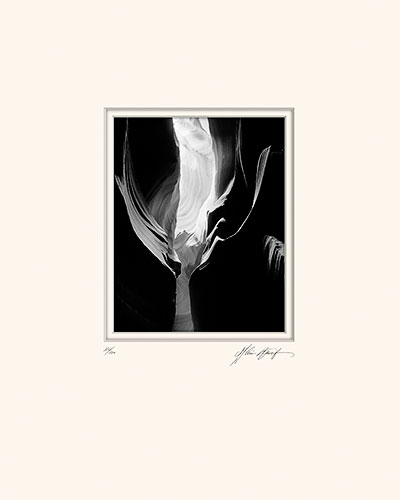
A
museum-like presentation of Antelope Black & White,
an 8x10 photograph
in a 16x20 mat.Off white color, signature, numbering, off-centered
opening
and bevel cuts were all created using QuickMats. This
tool easily
lets you visualize how your photographs will look like matted
and signed without having to actually do any “real”
matting.
Don’t be fooled
by the low resolution of the jpeg above. QuickMats delivers
impeccable
quality as shown by the close up at the end of this article.
How QuickMats works
QuickMats uses layered Photoshop files. The 2 install CD's
come with ready made files in all different standard and
non-standard
mat sizes from 8x10 to 16x20 to 10x20 and many other sizes.
Each file is designed as a double mat and has separate layers
for the top mat and the mat liner (bottom mat). To use any
of the provided QuickMats files all you have to do is open
your photograph at the size you want it to be once matted
(for example 8x10), open the mat file at the size you want
the mat
to be (for example 11x14 mat size), then drag and drop your
photograph into the background layer of the QuickMats file.
The double mat layers are instantly positioned over the photograph.
If you like the color and appearance of the matting all you
have to do is save the file and you are done. It's that simple.
If you want a different color mat, or a textured mat, all you
have to do is use the provided Photoshop actions. Those are loaded
in the Photoshop Actions Palette during installation. The two
most often used actions, in my experience, are the select outside
mat and select inside liner actions. Those allow you to select
either the top or the bottom mats so you can change the color
or the texture of the mat.
Depending on your personal matting preferences you may use different
mat colors and textures or you may standardize on a single color
and texture. For example, many fine art photographers like to
mat their work nearly exclusively in off white, smooth archival
matboard. Creating a QuickMats that matches this appearance is
very easy. Just select the top and bottom mat, alternatively,
and simply give them an off-white color (white with a touch of
very light yellow). Don't add any texture. You can create a double
mat by keeping the two layers or create a single mat by turning
off the Inside Liner layer.
You may like the look of a mat more than one size larger than
the photograph, for example a 16x20 mat for an 8x10 photograph.
I personally love this look because it gives a lot of room for
the photograph to “breathe”. Not a problem. All you
have to do is resize the canvas of your image to the size of
the mat you desire to create (image>canvas size), make the
top mat layer active, select the color of the top mat with the
eyedropper, and use the paint bucket tool to fill the empty space
with that color. That's it. A larger mat without having to remount
your photograph!
Similarly, you can create a mat with the photograph offset from
the center -closer to the top than to the bottom of the mat-
the way photographs are often presented in museums and galleries.
Virtual signature
You can also add your own signature, as well
as a number if you want to create the look of a limited edition,
by simply scanning
your signature and numbering and opening the scan in Photoshop.
In my case I did multiple signatures and numbering types in
pencil on a letter size page, scanned the page in grayscale on
my Epson 4870 flatbed scanner, and cropped out the specific signature
and numbering I wanted to use. I then used the Magic Wand to
select the area around the signature (at a setting of 18), inverted
the selection, then copied and pasted this selection to my matted
photograph file. I created a separate layer called "Signature
layer" and another called "Numbering layer". I
then used the opacity control to adjust the darkness of my signature
and numbering to my liking (60% opacity works great). The result
is amazingly realistic. The finished piece looks like I photographed
an actual matted piece and brought the image into Photoshop.
In fact, that is how I have depicted matted pieces for web display
until now. I am inclined to believe that this approach is now
a thing of the past.

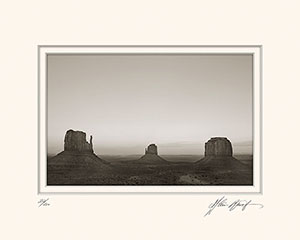
Monument Valley Dusk Sepia matted in a double, off-white mat
with my signature and a number indicating this is a limited edition
Use your photographs as Matting
You can also use your photograph
as overlay on the mat. This is achieved as easily as changing
the color of the mat. You first
enlarge the photograph to the outside mat size then select the
top mat and the inside liner. This is similar to changing the
mat color except that this time you copy the photograph and paste
it over the mat (Edit>Paste Into) instead of filling the selection
with color. You can do this for both the top mat and the liner
mat. To make this matting presentation work you have to choose
a photograph in which the center of interest is framed by the
mat opening.
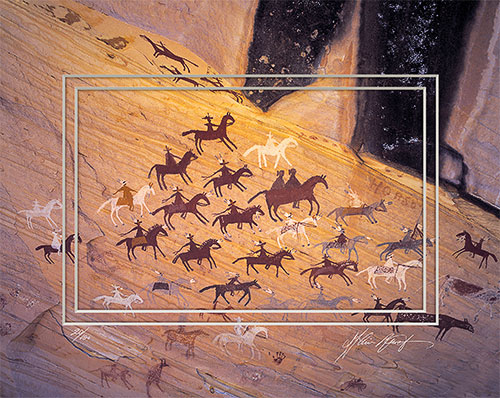
Riders Panel one of the 25 photographs in my just released
Navajoland Portfolio
used creatively on photographic mat. For this mat I inverted
the color of my
signature so it stands out from the dark background
Creative variations and possibilities
As I said QuickMats allows
you to create an infinite variety of mat sizes as well as a
multitude of multi-opening mats. While
I use multi-opening mats less often than single opening mats,
I do so on occasion, usually with Triptychs. These are quite
popular with my customers and the real challenge is to find 3
photographs that work well together. In the past I would print
many different photographs that I considered to be "good
candidates" then try them in all different combinations
possible until I found the arrangement I liked the best. This
approach works fine but requires that you print many images,
most of which may never be actually used.
Enter QuickMats. Now I can try all the arrangements I want at
no cost in materials. All I have to do is open a three openings
panoramic mat (10x20 is the size I use most often), give it the
color, signature and numbering that I like, then drag and drop
all the photographs I want until I find the perfect combination.
Not only do I save the cost of materials that would otherwise
have been wasted, I also make it possible to try many more variations
than I would have ever tried before when I had to print each
photograph. Why? Because I am no longer afraid to try things
that seem "off the wall" since doing so hardly takes
any time and costs me nothing in materials.
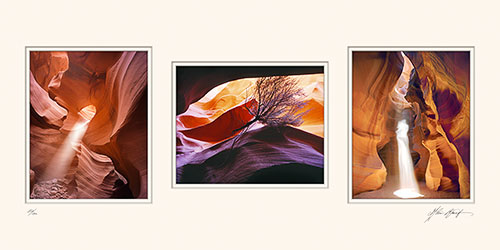
A 10x20 triptych panorama created with QuickMats
featuring three of my best-selling Antelope Canyon photographs.
For portraits and much more
QuickMats was originally designed
for the portrait industry and some of the mats it features
are reminiscent of the matting
one can expect to find at a portrait studio. Multi opening
mats, oval openings, multiple openings for family portrait
collections, even standard-size photography album pages available
on a separate QuickMats Album CD. But, the good news is that
a mat is a mat, and Quickmat is just as useful for landscapes,
wildlife, or any other type of photography. And, if you also
do portrait photography, your investment will be twice useful.
QuickMats is also very useful if you prepare photographs for
the web as it will allow you to create realistic looking mats,
in a variety of styles, in a very short time. All the image here
were created with QuickMats and they would look very good on
a web gallery.
Where to purchase
You can purchase QuickMats at http://www.jhartman.com or by emailing John Hartman directly at jhartman@coredcs.com
QuickMats retails for $239 including UPS shipping. It comes
on 2 CDs accompanied with one of the most complete and most helpful
manuals I have ever read. The manual is letter size and spiral
bound. I found that working along with the manual and the QuickMats
files was both easy and pleasant. While I don't mind the new
approach to manuals (PDF files or Help under the Help menu) I
find that having a nicely presented physical manual is quite
pleasant.
Conclusion
I love the creativity QuickMats gives you. You can
try matting ideas on a whim and see the finished product after
only a few
minutes of work. This allows you to visualize exactly how the
finished piece will look much faster and without any of the
cost associated with cutting a real mat. I own a computerized
matcutter, a laser mat cutter and a C&H Limited Edition
table cutter. I have some of the finest mat cutting tools at
my disposal. Yet, when using QuickMats I create mats that I
have not created before and I explore matting ideas that I
have not tried before. The ease of use, the fact that there
is no expenses in materials and the fact that the results are
so realistic entice me to continue working with this system.
Above all, QuickMats is quick and simple. The actions provided
with the program allows you to make the necessary selections
instantly and with perfect precision. There is no need to fool
around with selection tools. All you need is to do is run the
provided Photoshop actions. The only thing you need to bring
are your ideas and your creativity.
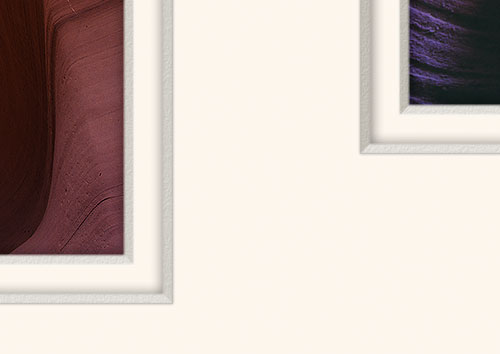
Photographic quality matting effect virtually indistinguishable
on screen from an actual mat.
This is one of the areas where QuickMats shines as shown on this “actual
pixels”
crop of the Triptych above. I am tempted to add as a disclaimer
“
Warning:
simulated mat. Not an actual object.”
Alain Briot, Sonoran Desert, Arizona
http://www.beautiful-landscape.com
|