| Imagine this scene. You are hiking up a new trail to
get to a scenic spot you want to shoot. As you round a corner in the
trail, you come to a considerable creek crossing. The water is deep,
mid thigh, and moving fast over a broken rocky bottom. The total crossing
is over 15 yards wide. Your view of the bottom is obstructed since the
water is off color due to recent rains in the area. The shot you are
after requires you to cross this creek so you zip up everything, hitch
your pack up tight and start across. About half way across you left foot
slips, you spin around trying to regain your balance and as you do the
force of the water knocks you over on your back……… as
the water closes over your head, you think, “Oh no, what about
my camera!”
For photographers who carry camera gear in the field, I feel this
is a subject that is often overlooked. If you are working around water,
you need to be able to focus on the task at hand; the crossing, not
if your gear will be OK. When you consider that you also may be carrying
as much as 30 to 35 pounds on your back, then the pack you pick becomes
even more important as you need security for you gear but comfort for
your back.
Personally, I want to be able to carry everything I will need for
the day’s shoot in a comfortable platform. Since most times I
am in the outdoors either on trails or bushwhacking, I prefer to use
a backpack. I want this pack to provide easy access to everything,
but at the same time provide a secure and well padded environment for
my gear. I also want to be able to secure this pack from any water
penetration that may come about during a fall while working around
a creek or sudden cloud burst. I need my pack to have enough space
for the camera gear but also to leave room for other gear I may need
to carry for that day. This could range anywhere from rain gear, wadding
shoes, or a laptop and of course lunch.
Lowe Pro Dry Zone 200
My current pack is actually a combination of two different packs,
the Lowe Pro Dry Zone 200 and a Dana Designs Far Flung. I use the interior
camera bag compartment and water proof enclosure from the Dry Zone
200 and use the Far Flung pack to carry it. The Dry Zone is unique,
in that it offers a fully water tight design. It has two zippers; the
outer zipper provides a water tight seal around the bag. For my work,
this is critical as I am often forced to cross creeks where one slip
may allow the pack to get immersed in water. The last thing you want
is to find yourself in the same situation as I describe at the beginning
of this article. Net result---an entire day is ruined not to mention
a considerable amount of camera gear. Here is a view of the Dry Zone
200.
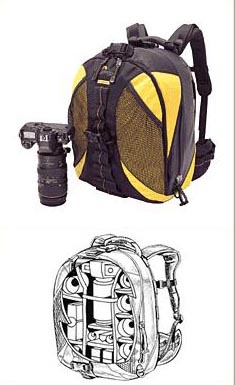
Dry Zone Pack, Image from Lowe Pro
The Dry Zone pack consists of the inner camera bag compartment and
then an outer waterproof enclosure which the camera bag fits into.
The camera bag compartment is very similar to the other bags that Lowe
makes. It consists of a well padded bag with adjustable dividers with
a zippered lid. This in turn fits inside the waterproof enclosure which
is made from ballistic nylon sealed by a waterproof zipper. The last
part of the Dry Zone 200 consists of a shell that fits over the waterproof
enclosure and provides shoulder straps, a waist strap and some additional
storage pockets. The dimensions of the camera bag are 14.5W x 11.5D
x 19H in. This is a nice overall size and allows me to carry all the
camera equipment I need for a day’s shoot.

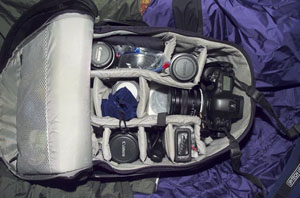
Caption: Camera bag for Lowe Pro dry zone
In this image you can see a view of my camera bag compartment laid
out for a day’s shoot. I have placed the camera at the top
of the bag. Currently in this view this bag contains the following:
Canon 1ds with Canon 24mm TS-E attached
Canon 45mm TS-E
Contax distagon 28mm and 35mm lenses
Filter pouch
Spare 1ds battery
Canon 100mm Macro lens
Mamiya 35mm F3.5 lens
Zoerk Lens adapter
I arrange my gear with the camera at the top of the pack. I prefer
to have the heaviest piece of gear well up on my shoulders, not at
the small of my back when I carry the pack. I may occasionally change
this up slightly depending on the situation, but in the picture shown
above you can get a pretty good idea of my standard array. This amount
of gear weighs in at around 35lbs. The lid of the bag has a separate
zippered compartment to hold smaller stuff. I use it to carry some
of my miscellaneous adapters and cleaning materials.
With the camera bag zipped closed, you then seal the outer protective
shell with the waterproof zipper. Lowe Pro provides a T-Zip for this
which gives you a better grip on the zipper pull. Always make sure
that you have fully closed the zipper as the slightest gap will allow
water into the pack. It’s also a good idea to keep the waterproof
zipper lubricated. Lowe kindly provides a tube of lubricant for this
purpose.
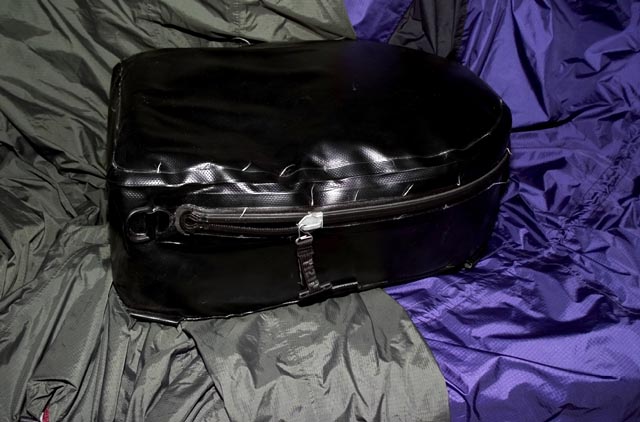
Waterproof enclosure & zipper
Dana Far Flung
Here is where I change things up. I found that the soft shell that
fits over the Dry Zone 200 didn’t offer me a very comfortable
fit as I am 6-1 and have broad shoulders. I never could get the pack
to fit where I liked it. I also didn’t like the waist band that
is provided. The waist strap is very critical in providing an overall
good fit for a pack. You want the waist strap to fit right around your
hips and to have enough padding so that over time it won’t dig
into your hips. The padding that was provided on the Dry Zone 200 wasn’t
very impressive to me. If you have carried a backpack in the field
you will understand this.
Because of this, I decided to keep the waterproof enclosure and camera
bag, but use a different pack. I choose the Dana Design Far Flung,
mainly because it has a fully zippered opening and has an internal
frame design. It’s my opinion that the Dana pack has a far superior
suspension system than the Dry Zone. It also fit my frame much better.
With the fully zippered opening, it is easy to place the Dry Zone enclosure
inside the Dana pack and then head off to your destination. With the
Dana Far Flung, I also have more room for other items such as water
bottles, rain gear, food and other non-critical gear.
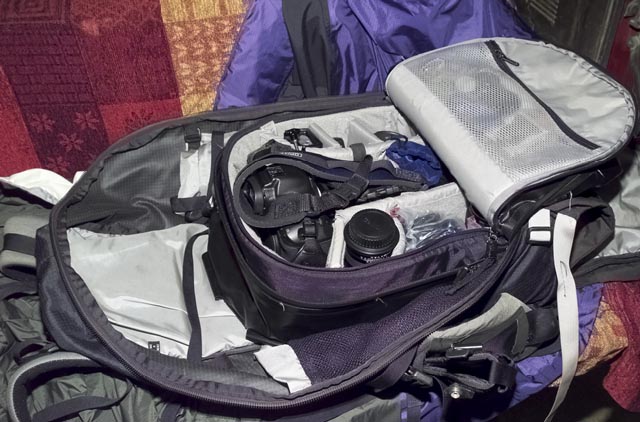
Dana Far Flung and Lowe Pro Dry Zone Bag
I have used this combination now for almost 3 years. On a couple of
my trips I have had occasion to test the Dry Zone for water tightness
and each time the seals held. I don’t want people to get the
impression I am carefree when I attempt a crossing, but with this
pack setup I can focus more on the crossing, and not worry about
my gear. When attempting a crossing of a swift creek, you really
only want to have to be concerned about where each foot is placed
and even that can get tricky. One note, I tend not to seal the outer
waterproof seal unless I am fording a creek or in a hard rain. The
inner zipper will work the rest of the time and you also have the
outer cover provided by the Far Flung.
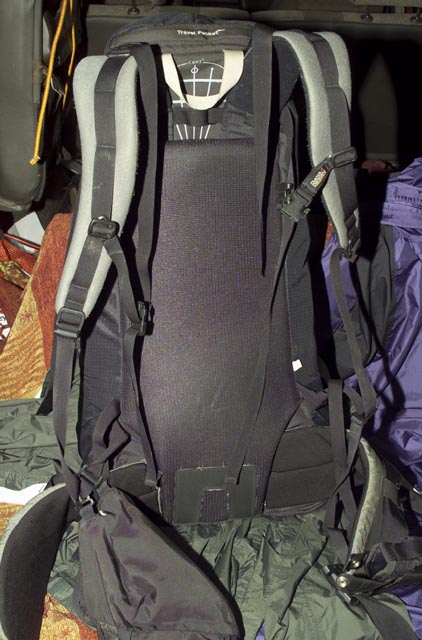
Dana Far Flung pack showing the suspension and support
In this last image you can look at both the full suspension system
provided by Dana Designs and the considerable amount of padding provided
by the pack. The Far Flung comes in several sizes so if you order one,
make sure you consult with a local dealer.
The only issue I have found with my Dry Zone is that the black color
will absorb heat very quickly. So when you are in the field keep the
back out of direct sunlight. Both Dana Designs and Lowe Pro offer strong
warranties on their products. More details can be obtained on their
respective websites.
For further information on either Lowe Pro or Dana Designs, I have
provided the links to their websites.
www.danadesign.com
www.lowepro.com
Feel free to email any inquires to me at pcaldwe@aristotle.net
|