I created a different way of midtone sharpening actions
that can be downloaded here.
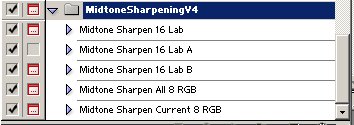
Here is a list of what each action in the attached file does:
Midtone Sharpen 16 LAB
This action works on a 16-bit per channel file. It converts the image
to LAB color and creates a mask to use with the USM filter. Since the
mask has to be 8-bit, the image is temporarily converted to 8-bit mode,
and the mask is created and pasted into a new file. Then the original
image is reverted back to its' 16-bit state. A selection is applied
to the 16-bit image, using the
8-bit mask file as a guide, and then the USM filter is invoked. The
way the mask is created, it focuses the USM filter on the midtones of
the image, and keeps it away from the shadows and highlights. This means
that the USM filter can be applied much more aggressively without causing
halos or sharpening image noise in shadow areas of the image, resulting
in much more micro-detail in the image without objectionable sharpening
artifacts. This action does have one significant quirk; before running
it, close all images except the one you intend to sharpen, and tile
your document windows. Otherwise, after creating the temporary mask
document, Photoshop may not switch back to the correct image document,
and the action will halt with an error. If anyone has any advice to
overcome this, I would be very interested in hearing it. Useful settings
for the USM filter in this action are 100-300%, radius 1-3, threshold
0, depending on the image being sharpened.
Midtone Sharpen 16 LAB A & B
These actions together are the same as the plain midtone sharpen LAB
16, A ends right after the temporary mask document is created, and B
picks up where A leaves off. This is useful when sharpening portraits,
where you may not really want to sharpen the subject's face. Simply
airbrush the mask black where you don't want to sharpen, then run action
B.
Midtone Sharpen All 8 RGB
This action is intended for multi-layer 8-bit RGB files. It makes a
new layer called Midtone Sharpen that is a merge of all currently visible
layers. This layer is moved to the top, and its' blending options are
set so that it is 51% opaque in the midtones, and transparent in the
highlights and shadows. USM is applied to this new layer, and the blending
options focus the sharpening effect on the midtones of the image. There
are no quirks with this action, you can use it with as many open documents
as your computer can handle. Useful settings for the USM filter in this
action are 100-300%, radius 1-3, threshold 0, depending on the image
being sharpened.
Midtone Sharpen Current 8 RGB
This action is the same as the previous one, except that only the current
layer is duplicated and sharpened.
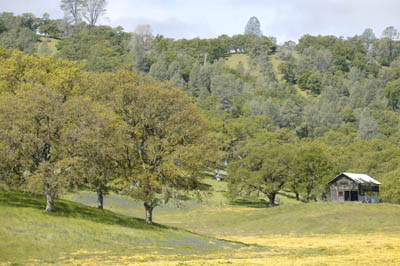
I hope you find these useful, I use these actions on all of my photos
now. |