First, lets get the names of the movements straight.
In a conventional view camera, you have four basic lens movements.
They are:
- Tilt: This is the vertical angling or “tilting” of
the lens plane forward or backward relative to the film plane.
- Swing:
This is the horizontal angling or “swinging” of the
lens plane sideways relative to the film plane.
- Rise/Fall: This is vertical “raising” or
dropping of the optical center of the lens relative to the center of
the film plane.
- Shift: This is the sideways “shifting” of
the optical center of the lens relative to the center of the film plane.
Many view cameras also allow for most or all of these same movements
on the film standard as well, giving even greater flexibility and
image control.
So, what do these movements do?
TILT Tilt alters the normal POF (Plane Of Focus) from parallel to the
film plane to an angular wedge-shaped “V” extending from
an imaginary point directly below the film plane, and angling forward
at approximately twice the angle of the tilt set on the lens. Just
as the aperture chosen will affect the thickness or “depth” of
the POV, it will affect the width of the now wedge-shaped POF when
a lens is tilted. (While the above is an oversimplification, it is
essentially a description of the Scheimpflug rule.) What this does
for the photographer is to allow them to greatly extend the perceived
DOF (Depth Of Field) in an image. To wit, assume you have a 45mm
lens with just a few degrees of forward tilt – you can keep
an object that is just a few feet in front of the lens in perfect
focus while at the same time keep a subject at infinity in perfect
focus – and all this can be accomplished without stopping the
aperture down to more than f5.6 or f8.
No tilt
Lens in 0 position
Some tilt used
Minor tilt does the trick
Swing
Swing works on the same principle, only in a sideways fashion. Using
swing I could position myself at the corner of a building, dial in
a few degrees of swing and get the entire face of building all in
perfect focus.
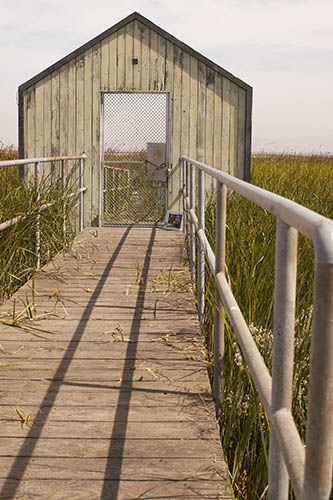
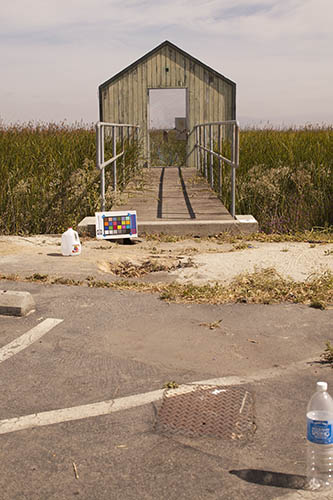
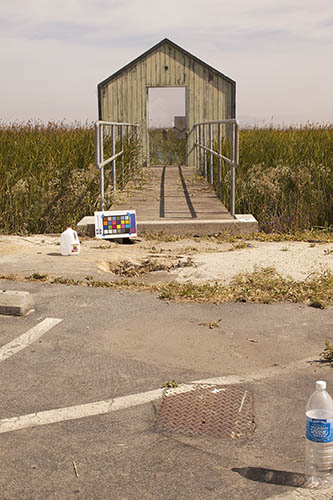
No swing
Lens in 0 position
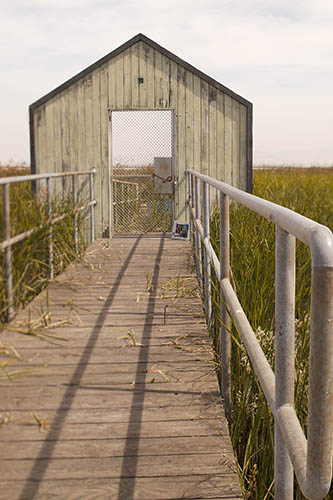
Using strong swing
Strong swing
You will notice that with swing the
elements here on the left side get out of focus.
Rise/Fall
Rise/Fall moves the center of lens, which alters the image so that
it appears as though the camera was repositioned to a spot SEVERAL
FEET in the direction the lens was shifted. The common use for this
is in architecture. Any time the film plane is not perfectly perpendicular
to the ground, for example angling up or pointed down, the resultant
image will have some degree of perspective distortion. This is true
for ALL lenses, regardless of focal length, but is more readily visible
when wideangle lenses are used. The common example is the photo taken
of a tall building with a conventional wideangle lens pointed up
to include the entire building. The resultant image shows the sides
angled in towards the top so significantly it appears the building
is leaning backward. By using rise, we correct this distortion and
it appears we have taken the photograph from a much higher viewpoint,
pointing more squarely at the building.
Shift
Shift accomplishes the same
feat, but in a lateral direction. I use shift when I want to
limit a shadow or reflection in an image. If you have ever seen a
perfect
photograph of a mirror where the camera was not a visible reflection
in the mirror, you have most likely seen a first-hand example
of shift in use. By positioning the camera to one side of the mirror,
and shifting the lens back toward the center of the mirror,
we can
accomplish this feat. I use this most often with the longer
TS lenses to get the exact framing I want without casting an unwanted
reflection
or shadow of myself in the image. Clearly, as digital photographers, we can correct for perspective
distortions in PhotoShop and we can even clone reflections out of
the final image. However, in the case of the former, the image does
degrade rapidly as the pixels get pushed around and cloning out a
reflection can be rather time-consuming. Some will argue that as
you shift the TS lenses they lose resolution too, so using it or
correcting later in post is a neutral-sum game. I happen to agree
with this in part, so as a result I will often use a combination
of rise at the time I take the picture and some final tweaking in
PhotoShop to correct distortions – get it close with shift
and fine-tune it later in post.
Canon TS-E lenses With Canon TS-E lenses, the Tilt and Shift standards come from the
factory oriented 90º out of phase with each other, meaning you
can use rise and swing together but not rise and tilt. You can however
change this orientation so that both movements operate in the same
plane. In this configuration you can get rise and tilt together,
but not rise and swing. Often, this generates the question of which
is the best configuration best for any given purpose. Here is what
I have found for my shooting style:
24: I use the 24 primarily for landscape and once I have the framing
set just the way I like it, I then crank in the tilt needed to keep
all the elements in focus. However, when you crank in tilt, the image
framing will move slightly due to the tilt. With the rise set to
the same axis I can easily correct the framing back to where it was
originally by cranking in the opposite direction. Hence I prefer
this lens altered so the movements are in the same plane.
90: I use this lens a lot for macro and nature up close. As such,
I often want to get the framing from a vantage point where the sun
is behind me, and that means I am often in a position to cast a shadow
in the image. By lateral shift in conjunction with a bit of tilt,
I can keep my shadow out of the image with a bit of shift yet maintain
added DOF from tilt. Hence I prefer the 90 in the standard configuration.
45: With this lens, I can argue for either orientation. In reality,
I do not use this lens very often so for now it maintains the factory
orientation – and to date that has not presented any significant
inconveniences in use. The good news is that the orientation is fairly
easy to change on any of these lenses should you ever find the need
to do so.
Reorienting the Tilt and Shift axes of a Canon
TS-E lens
Note: at your own risk only.
In their standard configuration, Canon’s Tilt/Shift or TS-E
lenses come with the Tilt and shift axes oriented 90° from each
other. Many photographers prefer to alter that orientation so that
both Tilt and Shift operate coaxially, or in the same plane. Below
is a brief tutorial explaining how to perform the modification.
First off, this is a relatively simple process involving only the
need for basic mechanical skills. HOWEVER you will need a QUALITY
jeweler’s style Phillips–head screwdriver in size “00”.
The chrome-plating on hardware style Phillips drivers is slick and
can allow the driver to slip in the slot and strip the head making
it very difficult to remove. This will result in possibly requiring
a professional repair, so I recommend you start with the proper style
screwdriver. The one I use is available from www.micro-tools.com
as a small set of slotted and Phillips head drivers in a convenient
pouch: Check
here.
Now that you have the proper tool, we are ready to begin. I perform
this operation on the inverted lid from a banker’s box. In
addition to providing a clean working surface, it serves as a safety
catch for the small screws you will be removing.
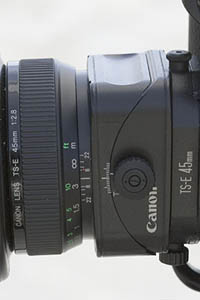
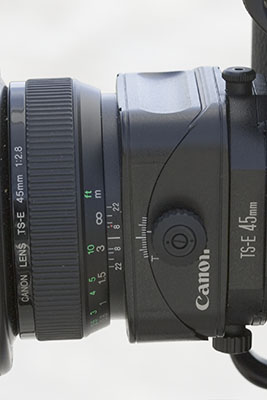
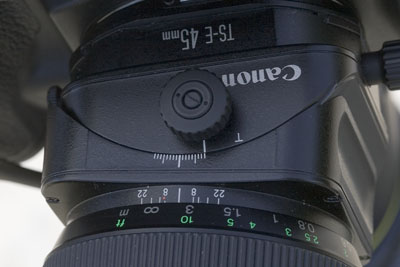
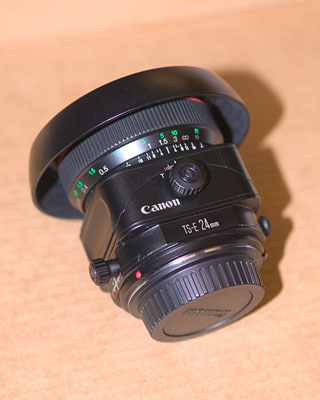
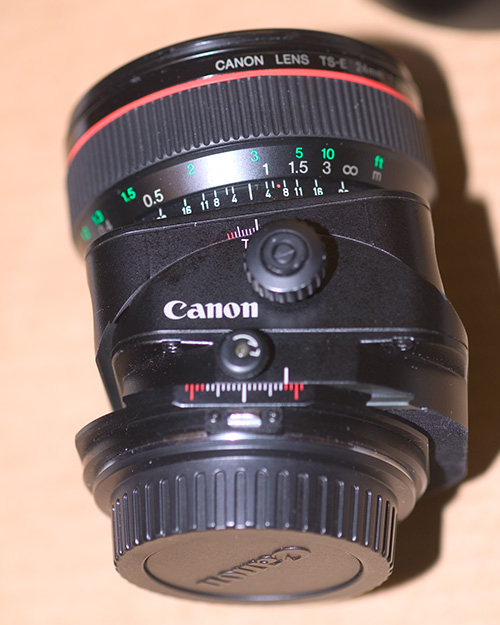
Here is the lens as it comes form Canon:
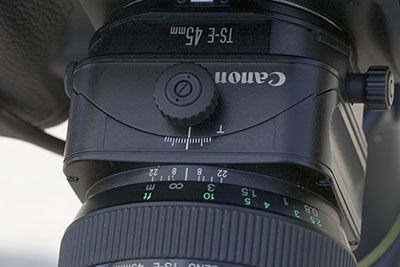
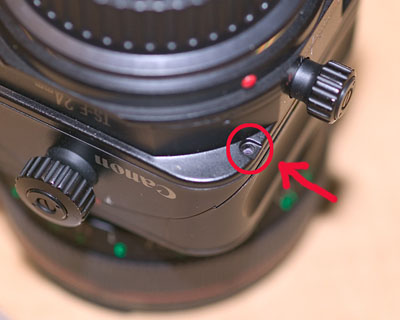
First remove the four screws located here:
Next carefully rotate the of the lens 90° in a COUNTER-CLOCKWISE
direction from the rear of the lens as shown in the photo. (You go
counter-clockwise as the small electrical ribbon harness inside can
get strained of you rotate in a clockwise direction.):
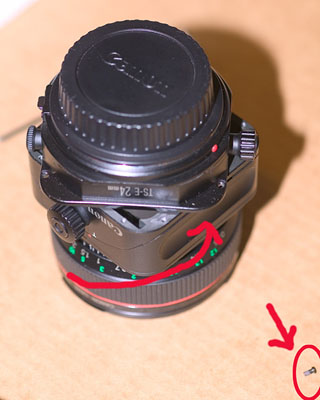
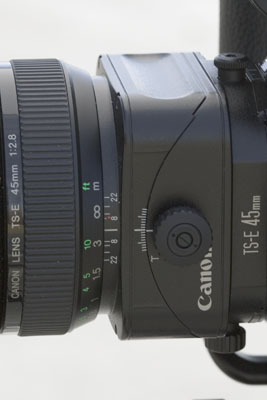
Reinstall and tighten the four screw in an “X” pattern
until they are snug. Presto, you are done! Here is the lens as it
appears after conversion. Note that the control knobs for Tilt and
shift are now located on opposite sides of the lens:
|