Introduction
I started photography with a 35mm camera. It lasted about a month
before I purchased a used Omega 45F view camera. I’ve been in
love with the format ever since. The ritual of setting up and shooting
a 4x5 image suits my personality and photographic style. The other
important aspect of large format photography has been the available
detail that can be captured, and printed. Landscapes have traditionally
been printed large (I’d say that 90% of my images sold are 16x20
or larger).
After moving to digital, I began to seek a similar feel and resolution.
I’ve used a Betterlight scanning back, but it still isn’t
the ultimate solution for me. The new Phase One P25’s might be
getting close.. but still much too expensive for mere mortals. I ended
up purchasing a Canon 1ds and have been experimenting with combining
multiple 1ds frames to end up with a final, high-resolution image.
Traditional Method
Up until now, the primary method I use to capture images for stitching
has been the combination of the Canon Tilt/Shift lenses and the 1ds.
With the camera mounted on a tripod in the portrait orientation, I
shift the lens fully to the left… then shoot, middle.. shoot
and fully to the right… and shoot. Both the 90 and 45 T/S lens
will allow you to capture two full 35mm frames worth of data, adjacent
to each other. I shoot one additional frame (center) to allow for overlap
when stitching.
Using this method I get about a 22Mp image, with an aspect ratio of
4:3 (which I prefer much more than the 3:2 you get with full frame
35mm)
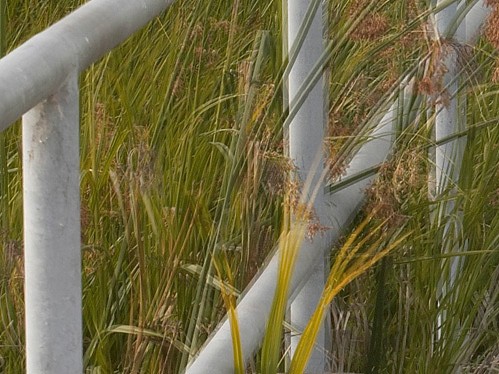
Problems with Traditional Method
The major problem with this method is a result from shifting the lens,
rather than the camera. As you move the lens from left to right, the
point of view changes slightly, and therefore you end up with images
that don’t exactly line up when stitching. This is called parallax
error. It is most obvious when you have a large difference between
your foreground and background.
Example:
What’s needed is some way of holding the lens stationary and
shifting the camera… left and right, up and down.
A Solution
Studiotool*Stm is
a small company in Finland that has come up with one approach. Using
a Sinar P, P2 or X view camera, you can replace the rear standard with
a Canon 1ds camera. You then attach a bellows from the Canon’s
lens mount to the Sinar’s front standard. This allows the Canon
to use all of the movements that you would normally use with a Sinar
view camera. With this method, you can use large format lenses that
have much more coverage than the Canon tilt/shift lenses. They also
have an adapter that will allow you to use medium format lenses with
this setup (I tested the Mamiya 67 adapter and a Mamiya 90mm f3.5 lens).
Calumut offers a similar solution, however the Studiotool*Stm solution
can be obtained at less cost (a lot less if you already own a Sinar
P/P2/X view camera), and the Sinar has the ability to shift to a greater
distance. If you don’t already own a Sinar camera, they can be
bought at a major discount on Ebay. I’ve been shooting with an
Arca Swiss for years, and as a result of this adapter, I sold that
setup, and bought a Sinar P in very good condition from Ebay for $900.
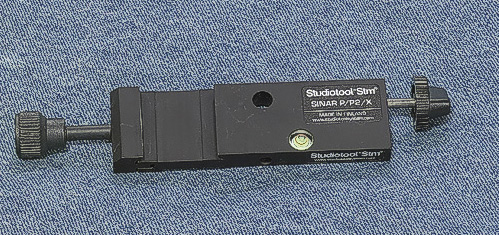
Description of Sinar adapter
The Parts

The base plate attaches to the bottom of the Canon 1ds. I’ve
only used this camera in testing, but I don’t see a reason why
any other camera with a Canon mount couldn’t be used as well.
The base plate attaches to the camera’s tripod socket.
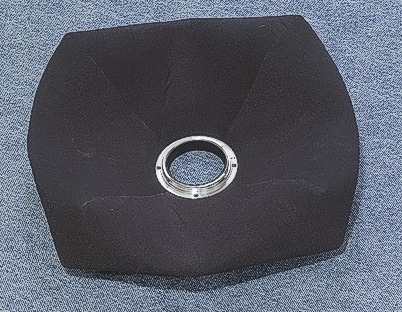
This is the Sinar carrier adapter. It attaches to the rear standard
of the Sinar camera in the place of the rear standard. Both this adapter
and the rear-focusing standard are very easy to attach and remove.
This allows for the composing of the image using the normal view camera
ground glass, and then replacing it with this adapter and attaching
the Canon.
The bellows is made of neoprene, and is both light-tight, and lightweight.
The fitting above attaches to the lens mount of the 1ds. It is very
important to keep the bellow clean and dust free. Since the camera
is much more open to dust in this setup, the cleaner you keep it,
the less time you will need to spend cleaning your sensor.
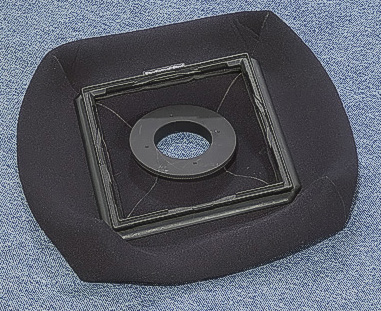
In the above image, you can see the bracket that attaches to the Sinar
camera front standard.
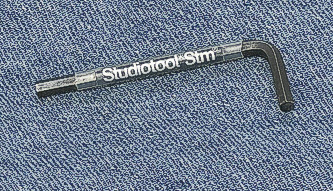
Studiotool*Stm also provides you with a hex key to mount the bottom
bracket onto the Canon.

Lens plate adapters can also be bought to attach medium format lenses
to the Sinar view camera. They have a larger coverage than the normal
35mm lenses, and can be a cost effective way of shooting.

Here is a working setup with a Schneider 90mm lens and a Sinar P2 view
camera.
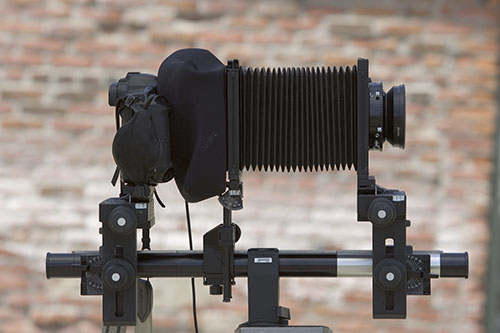
For closeup and longer focal length lenses, the bellows supplied with
the kit will not be long enough. In that situation, you would attach
that bellows to a multipurpose standard and then use a normal Sinar
bellows to go from there to the front lens standard. The image above
shows that configuration with a Schneider 300mm lens
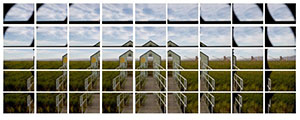
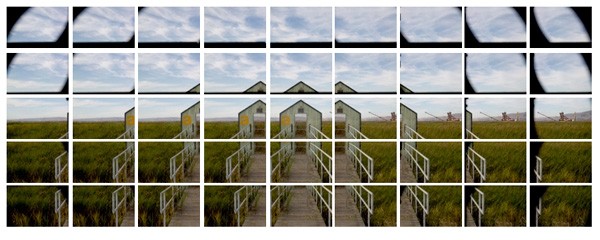
Sample stitches for image
Once you have it set up, it’s just a matter of ‘calibrating’ your
setup and lens combinations. Overlapping is necessary to ensure adequate
image coverage. The further from the center axis, the greater the overlap
is necessary. The image below shows individual 35mm frames taken to
get the main image at the beginning of the article. You should develop
a progression of shooting and maintain that. It will make the stitching
process later easier, and also ensure you don’t miss a spot.
Issues
All is not perfect with this method. The Canon 1ds is not the perfect
tool for capturing large stitches.
The depth of the mirror box causes some difficulties. A major one
is the focal length of the lenses you can use. I was able to use a
90, but am not sure how much wider you’ll be able to use before
you hit the back of the lens against the camera when focusing at infinity.
The other problem can be seen in the sample images used for stitching.
As you move the sensor further away from the center axis, you end up
with a shadow across the image. This can be worked around by having
a greater amount of overlap as you move further out. It hasn’t
proved insurmountable, since I’ve been able to stitch together
images greater than 100Mp in size (which beats what I was getting with
my Betterlight scan back).
There appears to be an occasional Err-01 that comes up when shooting.
Re-attaching the bellows to the camera fixes this.
Conclusion
This solution is not everyone’s cup of tea. It adds a lot of
bulk and weight to what you carry around with you. However,if detail
and final image size is something that is important to you, then this
is a very good solution. It does take a lot more work to get the final
image, as well as more final processing in Photoshop. If you’ve
come from a large format background, then this really won’t be
much different than what you are used to. I would spend as much time
setting up a 4x5 and film, and then creating masks for my transparencies
as I do with this configuration. And the image quality can far surpass
that of a 4x5 chrome.
I’m sold on this solution (at least until the price of 22 or
48 Mp medium format backs come down a lot in price). It won’t
be the only method of image capture. It all depends on what is necessary
for the final image. I have a Canon 1ds for 11Mp images, the Canon
Tilt/Shift lenses for 22-28Mp images, and now the Studiotool*Stm adapter
for 30-130Mp images. For situations where the environment is rapidly
changing, I can still load a sheet of film in the 4x5 and process it
as well.
Thanks
I would like to thank Patrik Raski, the owner of Studiotool*Stm for
loaning me the adapters, and for the technical assistance provided
during the testing. I would also like to thank him for developing the
adapter, since I purchased one as a result of this review.
Thanks as well to Keeble and Shuchat Camera
store in Palo Alto for loaning me the Sinar P2 and lenses used for
the testing. They have always provided top notch assistance. Thanks
go to Don for his
help.
|