| For any image two factors play an important role: Tonality
and Colors. Actually B/W images are so demanding as they need the highest
level of tonality tuning because no color can hide poor tonality. What
makes up the tonality of an image?
• Brightness (shadows, midtones, highlights)
•
Contrast (local and global)
Most of us have the desire to get the final image from the raw converter
and we probably can get close. But once you start printing and want
to get optimal quality you will start tuning. This article will deal
only with the aspect of tonality tuning. In principle it all comes
down to some sort of subtle dodge & burn. But with many images
it can get very tedious if done only manually. Fortunately Photoshop
provides powerful tools to streamline this process. The whole process
is based on layers in Photoshop. If you want to learn more to understand
layers for the use in photography then have a look
at our e-books.
While we talk here about the principles we also have created a commercial
Tonality Tuning kit. The “DOP_Tonality_Tuning” set consists
of two parts:
• Photoshop automation plugin to create the needed masks
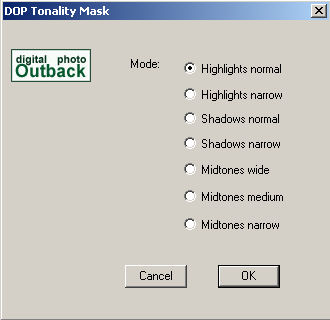
DOP Tonality Mask plugin
The plugin helps to create seven different kinds of selection masks
(and will be used by our actions):
o Highlight normal: reaches from highlights into the midtones
o Highlight narrow: reaches from highlights very little into the midtones
o Shadows normal: reaches from shadows into the midtones
o Shadows narrow: reaches from shadows very little into the midtones
o Three different Midtone masks (from wide to narrow)
•
Photoshop actions that use the plugin and streamline the workflow
DOP Tonality Tuning action set
What these actions do will best be visible in our sample session below.
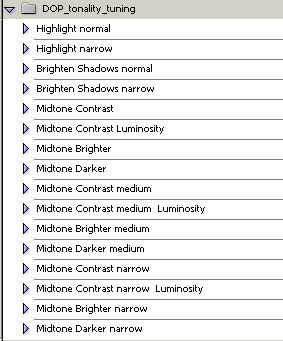
The “Shadows” and “Highlight” actions create
new grayscale layers in “Overlay” blending mode. The “Midtone” actions
create S-Curve Adjustment Layers with attached Layer Masks. The actions
with “Luminosity” in their name create a layer that uses “Luminosity” blending
mode to minimize color shifts for contrast changes.
To say it again, this toolkit is not thought to correct major tonality
problems.
You best experience the toolkit with some example image.
Sample Session
Here is our start image
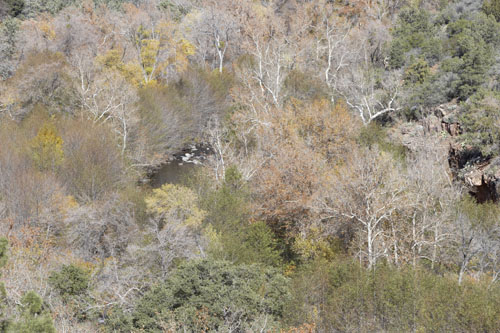
Grasshopper Point in Sedona (Canon 1Ds Mk. II)
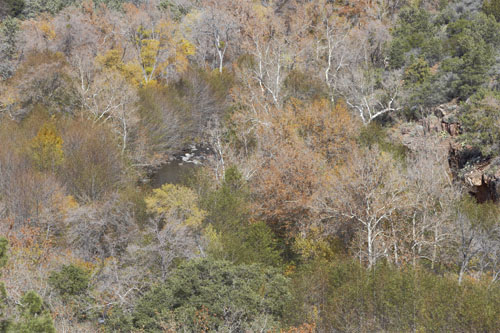
and here a final version
final version
Shown at this small size it just seems to be darker. But there is
way more to it and we show this in some sample crops.
To better help understanding what we did we show the final layers
Tuning layers
Here is what we needed to do (below we will show with real crops the
subtle differences the layers created):
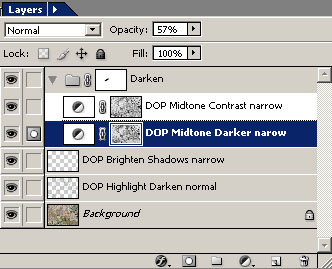
• Tune down slightly “hot” highlights (using the “DOP
Highlight Darken normal” action at 78% opacity)
Note: One very important aspect of this toolkit is that all the tuning
layers can be easily tweaked using the opacity sliders. The default
in the actions ranges from 40-50%)
• Brighten the shadows (using the “DOP Shadows Brighten
narrow” action at 58% opacity).
•
Darken the midtones (using the “DOP Midtone Darker narrow” action
at 57% opacity).
•
Add midtone contrast (using the “DOP Midtone Contrast narrow” action
at 25% opacity)
We did not want the last two layers to change the tonality of the
creek (shows up daker in prints than on the screen). How to do
this? You
create a new layer set and add the two layers to this layer set.
Then you can create a Layer mask for the whole layer set: • Use the Lasso tool to select the creek
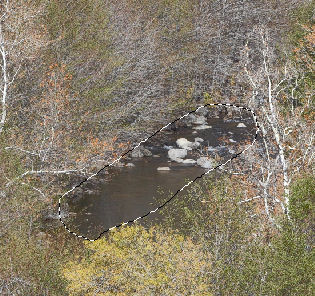
• Feather the selection by 20-40
•
Invert the selection and create the Layer Mask
Here are now some comparison crops to show the effectiveness of the
tuning layers. Remember all the changes may look subtle but that is
the whole point here.
Highlights
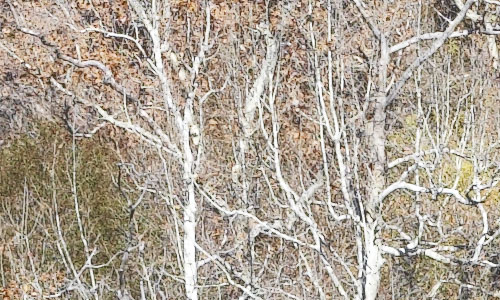
original
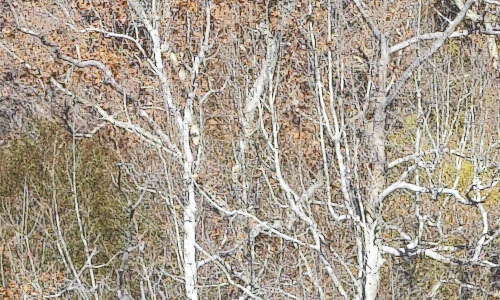
toned down
The Creek
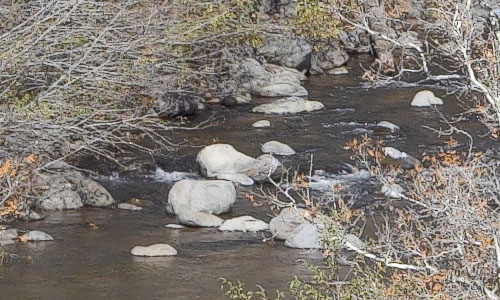
Start
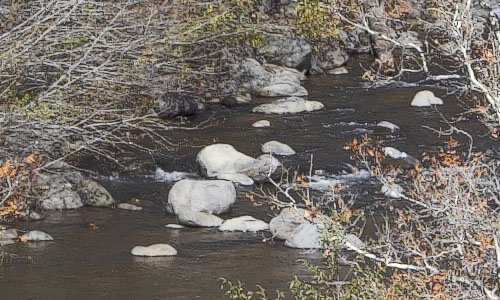
Layer Mask disabled
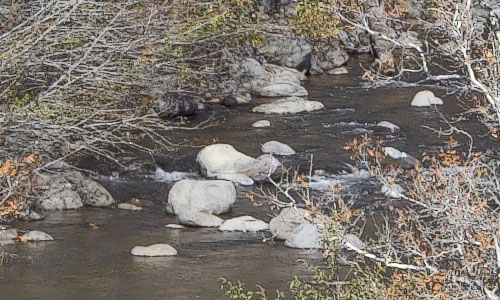
Layer Mask enabled (final)
Shadows
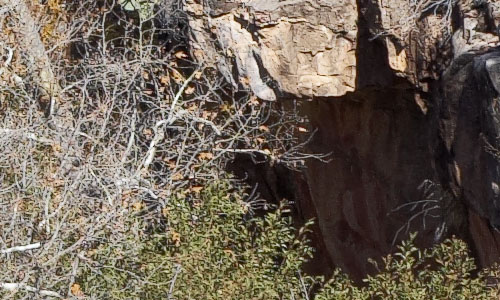
Shadows start
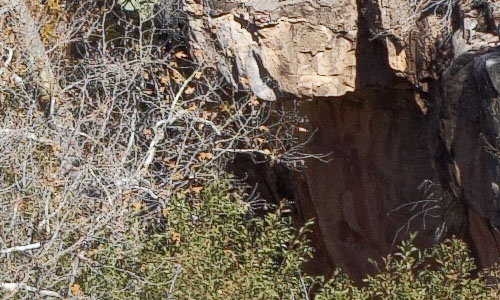
Shadows final
The best way of course to experience the toolkit is to use own images
and the demo version (see below, limited to 2000x1500 pixel images).
More Use cases
Actually the above use case is just one sample hot to use the masks
provided by the automation plugin. These masks are way more general
useable:
- Limit sharpening to the midtones
- Limit noise removal to the shadows
How would that work? You duplicate the image and perform sharpening
or noise removal on the new layer. The create a selection via our plugin
(midtones for sharpening and shadows for noise removal) and create
a Layer Mask from the selection. That is all you need to do.
Demoversion
We have a demo version of the full set available. The demo version
is full functioning but limited to 2000x1500 pixels. To experience
the toolkit just crop or downsize your test images.
How to Order
You can order the full version from here.
|


