| Digital Outback Photo - Photography using Digital SLRs |
|
 |
|  |

|
 |
|
CRW Conversion Contest 02 (closed) Moderator: Uwe Steinmueller last updated 04/18/2001 |
|
<c> Uwe Steinmueller |
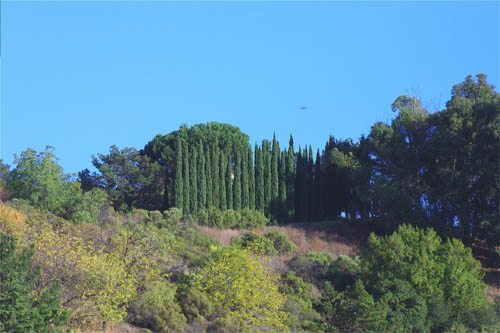
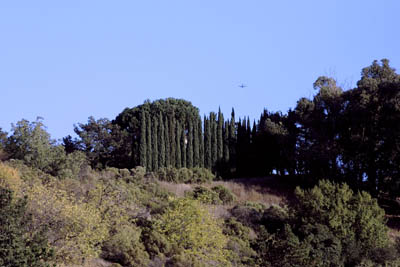
| Now there are some more options to convert Canon D30 CRW files (Zoombrowser, Bibble and the Raw Image Converter). But the secret is the strategy to choose and what postprocessing is done in Photoshop. |
| The original CRW file can be downloaded here. |
|
Before you start read the following articles:
|
| Rules |
|
| Results |
| The resulting files are available here in full size. |
| 1 |
|
Jim Dawson |
|
I just converted the CRW to 8 bit .tiff with the new Canon converter, left everything as shot. Photoshop 6: Duplicate layer Levels until I liked it Selected the aircraft (rectangular marquee) Copy Pasted in new image Enlarged Copied Pasted in original image Merged down Ultrasharpen Pro 3.0 (default settings) Flatten image Save as jpg quality 9. |
| 2 |
|
Frederico Torchia |
|
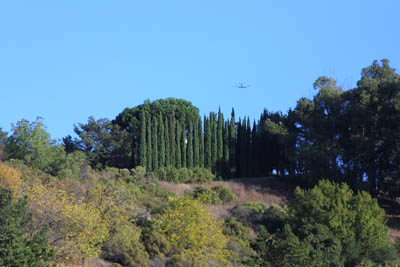
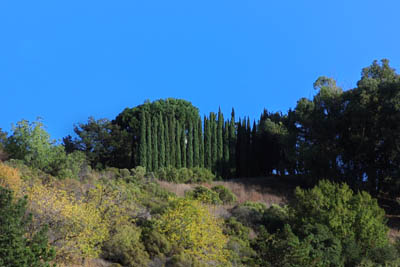
Used the Canon Utilities RAW converter for the RAW The in Photoshop: Adjusted levels from each separate channel (red, green and blue). Used curves to increase the detail in the shadow areas only. Converted the image to 8bits so that I could use more Photoshop tools. Selected the sky with color range and used hue and saturation to give a nice blue color to the sky. Adjusted the leaves and earth using the same method. (color range+hue and saturation). For the leaves increase the saturation +20 of yellow and green channels. For the earth increase the red and yellow +13. Finally used Unsharp masked with 200, 0.5 and 0 (amount, ration, threshold). |
| 3 |
|
Timo Autiokari |
|
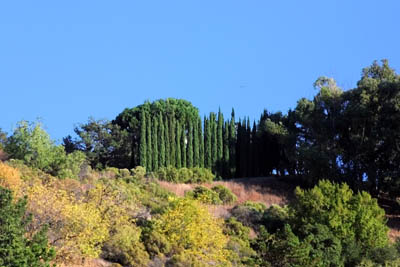
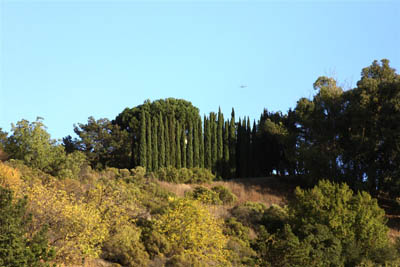
1. With the Canon software converted the CRW to TIF using the following settings: 16-bit/color, linear and daylight. 2. Opened the TIF into Trinitron, D65, gamma 1.0 ICC-space (AIM RGB -profile). 3. Increased saturation by +65% using the ChannelMixer. 4. Adjusted Levels, RGB-input:0-116, to set the whitepoint. 5. Applied Gaussian Blur at r=0.3. 6. Applied Levels R-input:2-255 G-input:2-255 B-input:3-255 to set the blackpoint. 7. Applied USM a=500, r=0.7. 8. Applied up-gamma 2.50. 9. Assigned Trinitron, D65, gamma 2.50 ICC-profile (nativePC). 10. Converted to 8-bit/channel. 11. Saved as JPEG at q=9. |
| 4 |
|
Justin Rhodes |
|
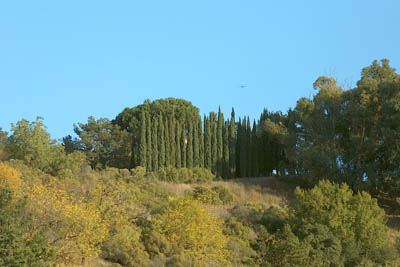
1. Used Bible to convert the raw file to 16 bit TIF, using camera settings. 2. In Photoshop I converted to 8 bit, used a curve adjustment layer and a level layer to adjust contrast and color. Adjusted the saturation slightly too. 3. Sharpened with Nik Sharpener Pro, internet setting. |
| 5 |
|
Mel Hill |
|
Used PS 6.0.1 plug-in set for 16-bit
|
| 6 |
|
Winfryd Andringa |
|
| For Comments post in our News Group |