Actually what you want is to softproof also your
B&W
prints as this saves you a lot of print iterations (means paper, ink
and time).
Roy
Harrington came up with a nice solution as part of his QTR package.
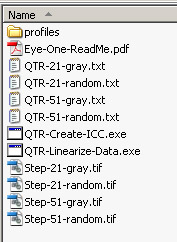
The package comes with the target and also a program to create the
B&W
profiles. What you also need is the GretagMacbeth Eye One spectrophotometer
and a version of Profile Maker’s Measure tool (a demo will
do).
Charts,
targets and tools
First you print a 21 gray target on your printer with
exactly specified B&W settings (all B&W settings, paper type, toning, DPI,
...) for your B&W capable printer.
Let the print dry over night for optimal results. 
21 gray target
We then launch the Profile Maker Measure tool and select the “QTR-21-random.txt” reference
chart:
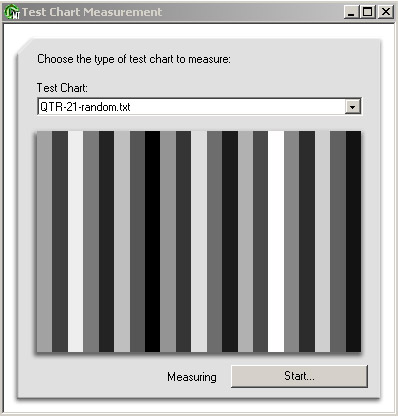
Selecting the chart in Measure Tool
Note: MeasureTool settings: Spectral
OFF, Reflective ON.
Start the measurement and read the line with the Eye One in strip
mode:
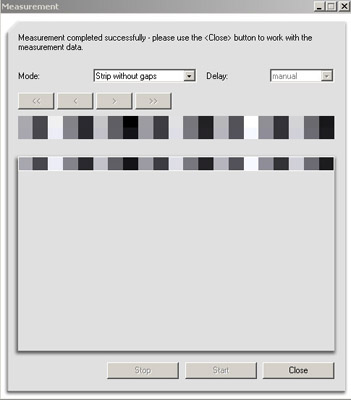
Read the strip
Finally we export the LAB values to a text file. Best
you give it some meaningful name that let you remember your driver
settings (e.g. “Eps_semigloss_neutral.txt”:
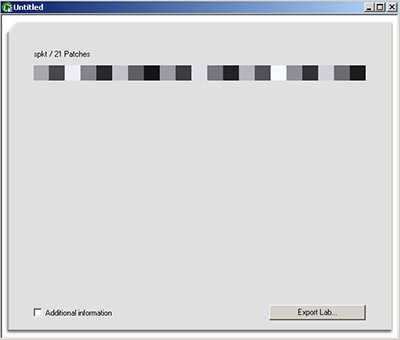
Export LAB values
Now you just drop the text file onto the “QTR-Create-ICC” application
and it will create a B&W ICC profile “Eps_semigloss_neutral.icc” for
you. Install this profile into you system profile folder.
Now you can
use this B&W profile for your softproofing in Photoshop:
Here is how a typical proof setup looks like: 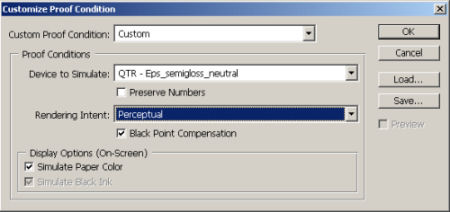
Proofing setup in CS2
Because these are real ICC profiles you can (changed
to "should" !)
even use them as profiles in the printing dialog for PS and PS Elements.
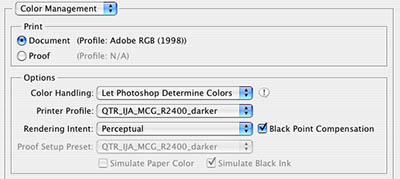
We now always follow Roy's instructions and print using the following
Photoshop settings:
Thanks to Roy Harrington this problem now also has a simple and yet
elegant solution. If you have licensed QTR then feel free to share
your profiles with other QTR users.
Some comments from Roy Harrington posted in our news group:
"As the article demonstrates the basic procedure for these grayscale
ICC profile is very much like the color profiling methods and produces
a profile that is used very much like color profiles.
All standard profiles have two parts -- one set of curves that are
used for printing and convert Lab values i.e. colors to numbers for
the print driver, and the other set that is used for soft-proofing
that show the actual color (Lab) that is produced for numbers that
are sent to the driver.
On first glance these two sets of curves are just inverses of each
other. But in fact they can be and usually are slightly different.
In color the obvious difference is the mapping for out-of-gamut colors.
In soft-proofing the idea is to map a Color to the best the printer
can do and then map back to what that actual is so you can see it on
your screen.
The grayscale profiles do nearly the same thing. There is no gamut
limitation -- black is mapped to dMax and white to dMin with a "perceptual
intent" mapping of everything in between. This direction is pure
grayscale the result being the grayscale values that are sent to the
driver (QTR, Epson ABW). The softproof side though is gray to Lab values
and therefore a color mapping. So in the softproof you see the actual
tint of the print. In the softproof setup you can also Simulate Paper
White and/or Simulate Ink Black that will show those colors.
So the profile making procedure actually creates two functions that
are both in one iCC profile. Usually one would use them both -- print
with the profile and soft-proof with the same profile. But the soft-proof
setup has a check box that says whether or not you will be printing
with the profile. Preserve Color Numbers OFF means show the output
using the profile in printing, ON means show the output as if you are
not using the profile in printing.
As in all soft-proofing no screen output is identical to a print.
The idea is to get a view which is easier for you to make the jump
to what a print will look like.
There was also a question about the MeasureTool settings. Should be:
Spectral OFF, Reflective ON."
With permission of Roy we publish here one
sample profile for:
- Epson R2400
- Premium Semigloss paper
- Advanced B&W at neutral and darker (all other settings at default)
|