| Digital Outback Photo - Photography using Digital SLRs |
|
 |
|  |

|
 |
Olympus P400 Printer Experience Report |
|
Last Updated (01/13/2001) |
| Review methodology (or lack of :-)) here. |
| Here you find other printer reviews (Here you find an in-depth review by Imaging Resource) |
| With a price just below $1000 the P400 has the lowest price for a 7.6 x 10" dysub printer. |
| Although the printer can even be used to print directly from CF cards (using a PC card adapter) and Smart |
| Media card this was not our interest as we believe that quality printing needs some more work in Photoshop or other programs to get the best out of your photos. That is why we did not even had a look at this capability. |
| Our initial impression was very positive. The printer was setup in minutes, the prints felt well and also the handling is easy. First we used the printer from Win2000 with the parallel port and were surprised about much longer print times than the advertised 90 seconds. But switching to USB we could enjoy prints taking just about 2 minutes (which is so much faster than our Epson 1270 inkjet). |
| The P400 laminates the print in its final step which makes the photos very resistant to scratches and dirt. How long the P400 photos last is not known right now but the coating is designed to reduce the effect of UV radiation. |
| With most printers the main problem is to calibrate. Although the colors of the P400 are not very bad without any changes also this printer needs profiling. All the fiddling with the printer setup did not result in pleasant improvements (we spent hours and many prints). Finally using Monaco's EZcolor we seem to have a sufficiently good profile for this printer and can enjoy it's prints. |
| The web can transport many ideas and impressions but unfortunately not the correct impression of prints. To give you some idea about the photo quality we will show a print captured with a flat bed scanner (we are not very experienced with this scanner yet, so the scanning results could be even better) |
|
Original D1 photo |
|
Scanned P400 print |
|
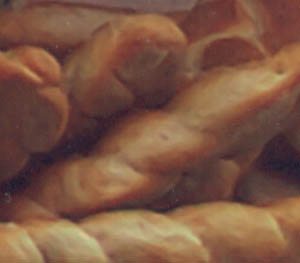
Crop of the 600DPI scan |
| Tip: It is not a good idea to let the P400 resize the photo to its odd 314 DPI. This is much better done in programs like Photoshop or using Genuine Fractals (which is our standard tool for up-sizing). |
| There is one thing to watch for: You have to be very careful inserting a new package of ribbon as they can be damaged very easily. Otherwise the printer is very easy to use. On some few prints were small artifacts of probably damaged ribbons. |
| Actually we never found it to be a problem that the printer does not print full 8x10". This might be related to the fact that the D1 photos have a 2x3 ratio. |
| Conclusion: From the beginning this printer was fun to use and after the profiling even more so. Highly recommended. |
| For Comments post in our News Group |