The use is easy:
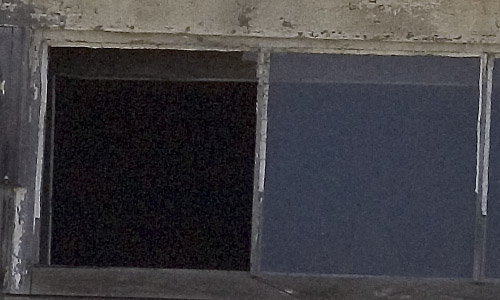
Canon 1D Mk. II 1250 ISO photo
We converted this photo in Adobe Camera
Raw 2.2 without any Luminance noise removal.
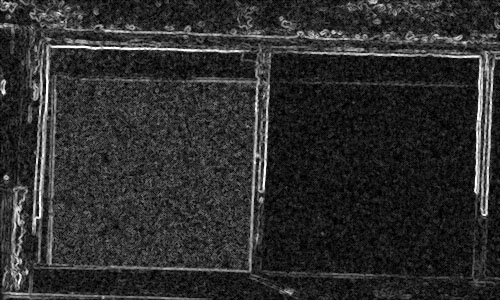
100% magnification before sharpening

Sharpened with EasyS and no masking
As you can see sharpening would amplify
the noise (if you would use the actions that come with EasyS the results
are better but we think that you gain with EasyMask even more control).
How to use EasyMask?
There are two ways to use EasyMask.
1. Create a layer with an alpha mask
(works in PS Elements 2)
Create a new layer (it won't work on
the background image) that contains all the information of the layers
below. (If you don't feel
comfortable
to work with layers we recommend that you get our e-book DOP2000.).
Now run EasyMask:
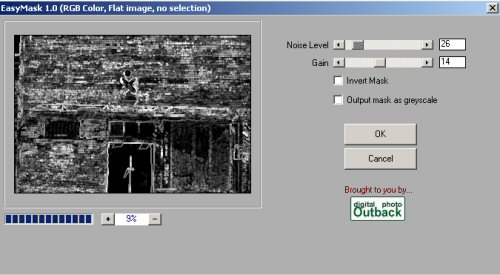
Easy Mask
- Noise Level: This control adjusts the
noise threshold for the created mask. A lower value will include
more pixels in the final mask. A higher value will exclude more values.
- Gain:
This control adjusts how fast the transition from masked (black)
to unmasked (white) occurs. For low values, the transition is gradual.
For higher values, the transition occurs more quickly.
- Invert Mask:
Enabling ?Invert Mask? will include (show, or unmask) flat areas
and exclude (hide or mask-off) edges, the opposite of the usual
behavior.
- Output
mask as grey scale: Enabling this control will make
the final output be a black /grey / white image instead of the
usual
transparency mask.
This will be more useful in full Photoshop, rather than in
Elements, where this mask can then be used as a selection mask
on other layers.
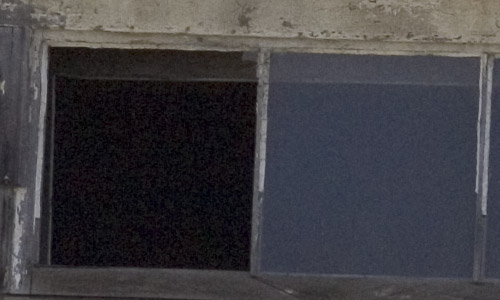
EasyMask will then create an alpha mask on that layer:
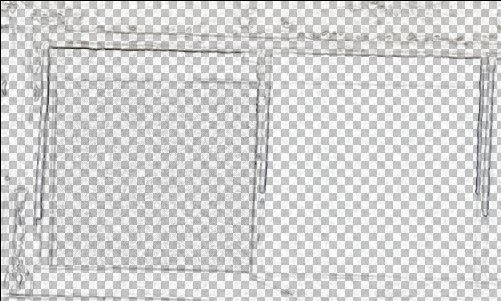
The layer will look like this
Now you can sharpen with any sharpening
tool you like. This way you only sharpen the edges and hardly any noise.
Using EasyMask and EasyS
|