I strongly recommend that you learn to properly
profile your monitor and to use profiles for your printer and papers.
Profiles will make the process much easier to get good prints; the
monitor can be a very good representation of your printer output if
you learn to use color management well. But the monitor is not a perfect
proofing tool for your final print; it provides the first step for
creating a good print, but once you have decent prints, how can you
create the final exceptional print. I use test strips to allow me to
easily evaluate the effect of minor adjustments to my prints; these
allow me to quickly fine tune my prints to that one exceptional print.
Steps for Making Printer Test Strips
1) First make the image look as good as possible on your computer
monitor; then make the best print possible using your print process
onto the specific
printer and paper that you intend to use for your final prints. You
should be able to create a print that is a fair representation
of the image
you see on the screen. From now on, the evaluation of your image
will be on the prints rather than via the monitor. It is critical
that all
of you printing steps (profile, driver setup, printer & paper) remain
unchanged throughout this process; as any small change will render the
test strips useless and require you to start again.
2) Evaluate the physical print under good light and determine some
options for improving the print. Generally, these will be minor
overall adjustments
to the image’s color or tone. The steps for creating test
strips work best for adjustments in brightness, contrast, color
balance, or
saturation; you can use test strips for any adjustment layer available
within Photoshop. One adjustment that I commonly need to make is
a set of subtle adjustments to just one color (ie. add a little
saturation
to the reds in the image); remember that you can use the Hue/Saturation
adjustment and localize the effects to a specific color range by
changing the Edit option to a specific color – you can then
change the Hue, saturation, or brightness of just that color in
the image.
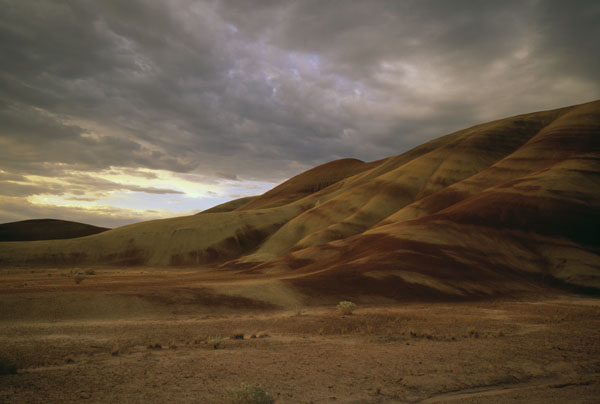
For my example image, I will be adding red to the overall image.
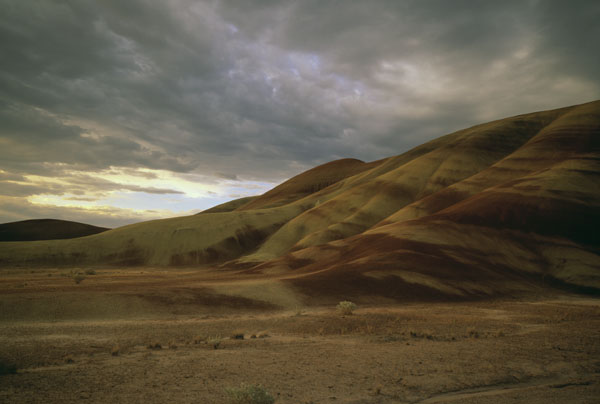
Starting Image
3) In Photoshop, create a new adjustment layer for the adjustment
you are trying to achieve (ie. a color balance adjustment to
add some red).
Select Layer/New Adjustment Layer/(an adjustment).
Apply the desired adjustment to the image until it seems more
than you would possible want for that image; ie. if you are
adding red
to the
image, apply too much red; just like printing a test strip
in the darkroom, you need to make sure you will print a digital
test strip
that goes
beyond the desired adjustment. Hit Ok to accept this adjustment.
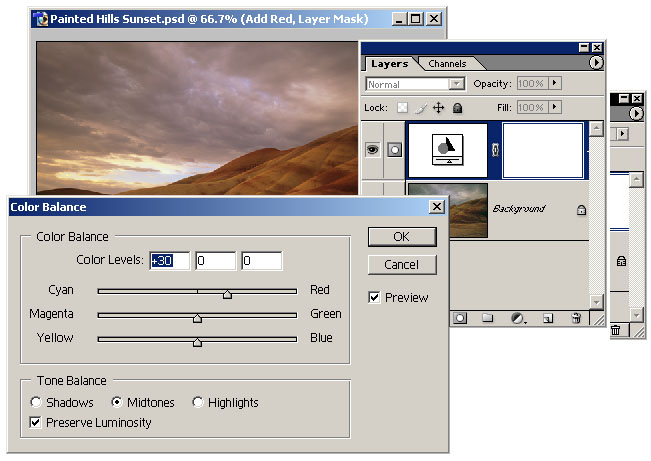
Applying an Adjustment Layer
Adding an Adjustment, make sure the added adjustment is too strong.
4) Now the adjustment has been applied to the entire image; and
the effect will be too strong if printed. We now need to
make a test strip
that applies this effect in steps from no adjustment up to the
strongest adjustment. Make sure that the mask is selected for the
adjustment
layer; the title for your image window will show the name of the
adjustment layer and ‘Layer Mask’ in parentheses (here ‘(Add
Red, Layer Mask)’) .
Then select the gradient tool, and click
on the default colors icon to set the colors to black & white; hitting the ‘D’ key
on your keyboard will also set the default colors.
5) Using the mouse, click and drag a line across
your image; do this on the image itself. This will paint a gradient
from
black
to white
on the mask for the adjustment layer you just created. This
mask will cause the adjustment to be applied in a gradient
across
your image.
You could drag the gradient either vertically or horizontally
depending on the direction of the test strip you desire.
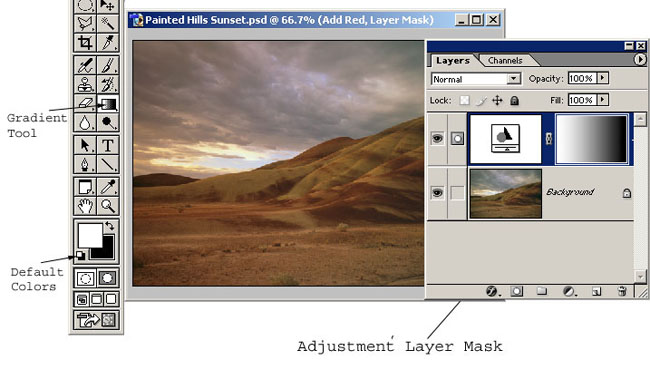
Adding
a Gradient to the Adjustment Layer Mask
You image now has an adjustment that is masked so the image
is unchanged on one end of the image, and too much adjustment
is
applied to the
other end. The ideal adjustment lies somewhere within
that gradient.
6) We can leave the adjustment gradient as is, or
convert it into discrete steps. To convert the gradient into
steps just
select
the adjustment
layer masks, and posterize it; Image/Adjust/Posterize.
In the Posterize, just enter the number of steps that
you want
on
your final print,
4-8 works fine here. I typically do not posterize the
test strips, but
many people prefer the discrete steps that it creates.
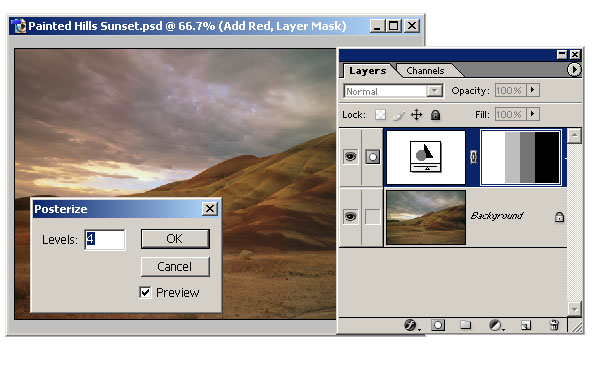
Posterizing
the Test Strip
7) Now you have a test strip, print it as you printed
your original final print. The precise evaluation
of the image
and the test
strips needs to happen by reviewing the print itself.
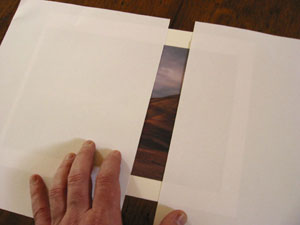
8) Take a close look at the print and determine
the test strip that provides the best overall
result for the image.
Again,
I evaluate my digital test strips in the same
ways as I evaluate my darkroom
test
strips; I use two white sheets of paper to localize
each strip and
help determine which strip I prefer. In the unlikely
event that
I like one of the strips on the end (either the
least
adjusted or the
most
adjusted) – I will need to return to the
adjustment layer in Photoshop and either increase
the effect of the adjustment
or decrease
it and print the test strip again.
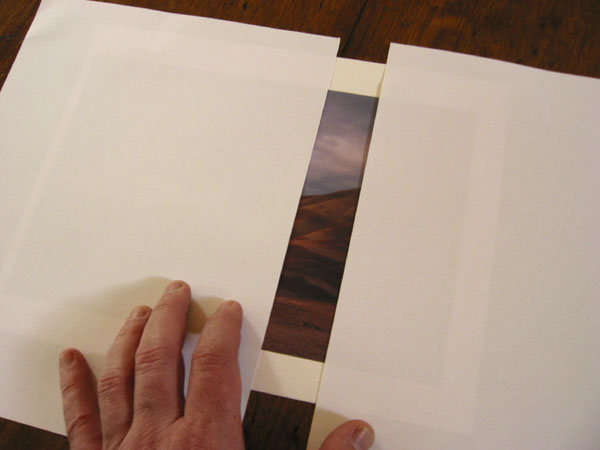
Evaluating
the Test Print
9) We will now convert the
adjustment layer mask so that the adjustment
for the preferred strip
applies evenly
over the
entire image.
10) In Photoshop, select
the eyedropper tool and make sure the
adjustment layer mask is still
selected.
Position
the
eyedropper tool within
the area of the image covered by the
strip that produced the best adjustment
in the print. Click with the eyedropper
tool on the image. This
will change the foreground color in Photoshop
to match the gray level
in the adjustment layer mask for the
test step.
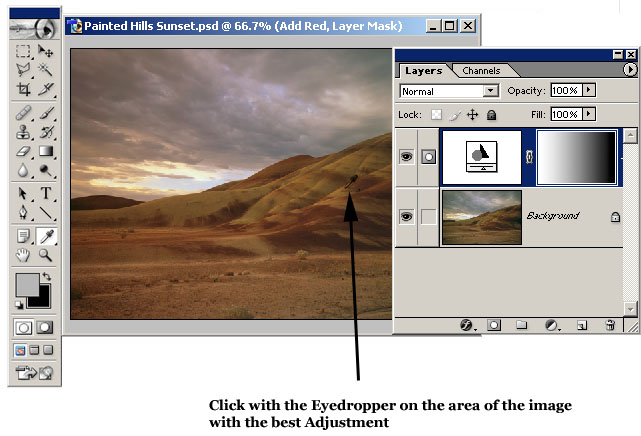
Click with the Eyedropper tool
on the Area of the Image with the Best
Adjustment
11) Fill the entire
adjustment layer with this gray level;
Edit/Fill and set
the
Contents to Use Foreground
Color.
The mask is now
a single value everywhere throughout
the image.
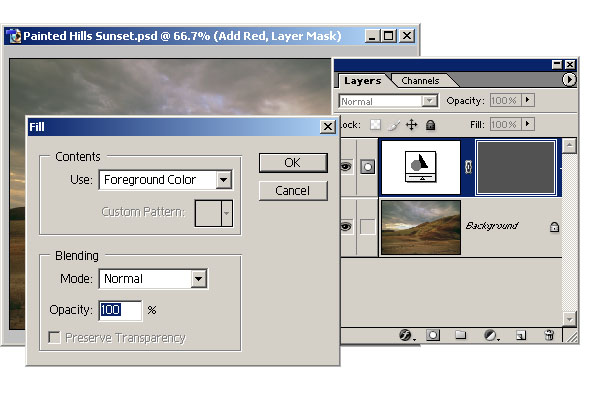
Filling the entire Adjustment
Layer Mask to Match the Best Density
12) You should now print the image again and examine it carefully.
13) If necessary, go through this entire process again with a different
adjustment. Experiment with a few adjustments to produce the best
print that you can, this is the final step for producing your final
print.
14) Once you have produced you final print.
Save the file, and make sure that you save all the information
about the final print
settings
for that file. I typically write all the appropriate settings on
the back of a proof for the final print; including the filename
for this
print, the profile used, paper and printer settings.
The Final Print
15) If your print is fairly large (8”x10” or larger), you
may want to make it smaller temporarily just to make the test strips.
Use Image/Image Size to make the image something that will
print faster and use less paper & ink; I suggest something
like 5”x7” works
well. Make sure that the Resample option is not selected,
this will ensure that no sampling artifacts appear in your
image. You will not
be printing your test strips at the ideal printer resolution,
but for test strips this is not an important issue. Restore
your image to its
full size to make your final print.
More Options
Remember, you can create a test strip for any type of
adjustment available as an adjustment layer within Photoshop – you
can choose options that are well beyond those that were previously
available in the
traditional darkroom. Common options include adjustments to add
minor amounts of contrast (using a traditional S-curve), to add
shadow
detail (using curves), to add saturation to the one color (using
Hue/Saturation), or dozens of other options.

A Test Strip to
add Contrast
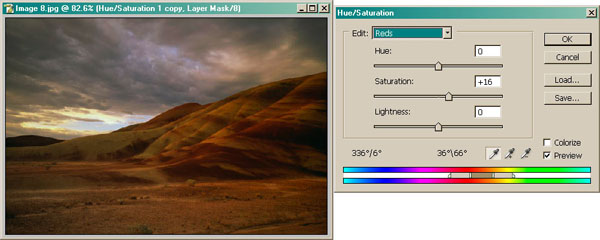
A Test Strip to Add Saturation to the Reds
Test strips can even be used on image layers to add adjustments & edits
that aren’t available via adjustment layers; including sharpening
(something that is notoriously difficult to evaluate well on the screen).
But I’ll leave sharpening test strips for later…
|