Correcting colors and tones in an image comes in the end down to selectively tune them. Our classic method was using Photoshop Hue/Saturation as outlined in this article. But there are quite a few cases where you want much more control and still would like to avoid painting masks. We know and have the Photoshop plugin Ozone for a while but think that the new version for CS3 is a huge improvement:
- Excellent UI
- Mac Universal and Windows
- Can be used as Smart Filters (read about Smart Filters here)
Ozone are so powerful that we will only be able to provide a first glance how to use Ozone. We hope our real world example will get you started. For more info you can download a demo version from DFT (Digital Film Tools) and also the complete manual.
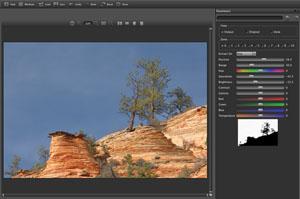
Ozone

Ozone UI
The main parts are:
- Preview pane
- Parameter pane
Preview pane
The preview pane allows all the sorts of previews you like:
- Full picture
- 100% pixels
- Zoom
- Mask view (see later)
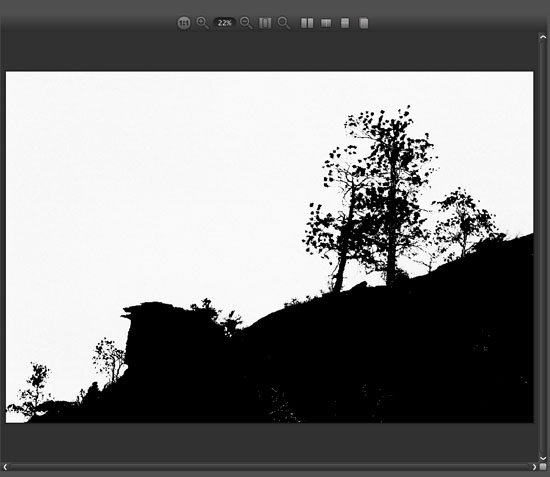
Mask View
- Split view (before and after
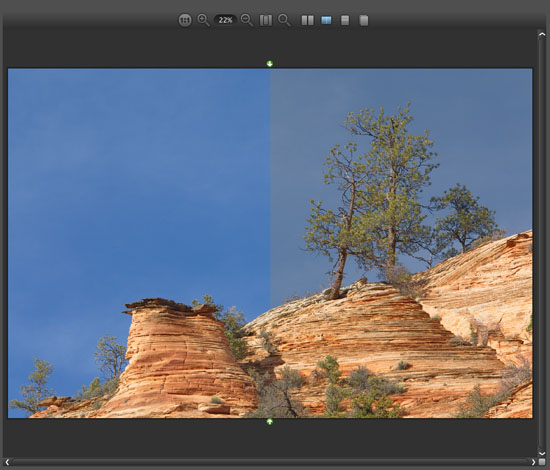
Split view
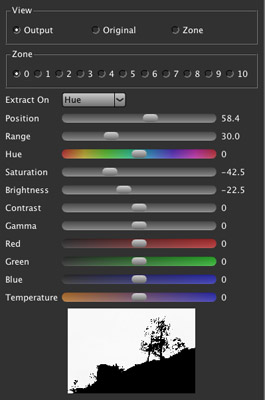
Parameter Pane

Parameter pane
a) View

- Output: shows the tuned image
- Original: image before filtered with Ozone
- Zone: shows the zone mask
Note: if you set the view to Zone you will also see the Zone as the result of the Ozone filter in Photoshop. This opens even more possibilities with Ozone as you can use Ozone for creating very useful masks.
b) Zones

Zones
In each of the "extraction modes" (see below) you can break the whole range into 10 different zones that all get a different treatment. If the extraction mode is "Luminosity" you can think of them in the same sense as you may know from the Ansel Adams Zone system. We start from zone 0 upwards and use them as we need (most zones won't be used). We will demonstrate what we mean in our sample session.
c) Extract On
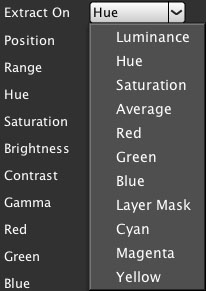
Extract Modes
Our most used modes are:
- Luminosity
- Hue
- eventually saturation
We did not really explore the other modes.
d) Position and Range

Position and Range
Depending on the extraction mode you define where in the spectrum (e.g. Luminosity or Hue) you center your extraction and the range defines how wide the selection is. You can define Positions and Ranges for each of the 10 zones differently.
e) Tuning Parameters
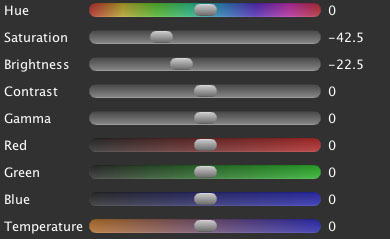
Tuning parameters
All the corrections will only be applied to the selected area (see Position/Range and the Zone mask below).
f) Zone mask
Shows the mask for the selected zone
Sample workflow with Ozone
We use Ozone mainly as Smart Filter in CS3 (read here). So we start with a base layer that is a Smart Object:
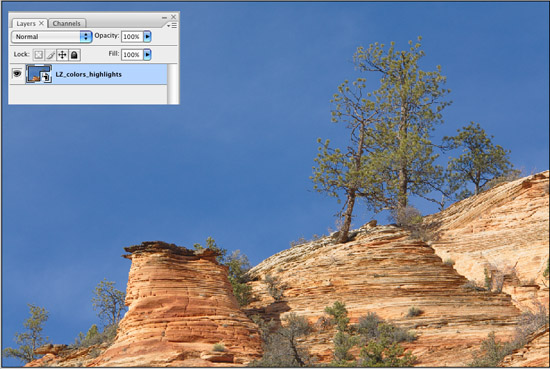
Start Image as Smart Object
Here is what we plan to do:
- Change the blue of the sky
- Tune the greens
- Get some more red touch into the rocks
- Tune down the more washed out highlights
We have to use two Ozone Smart Filters because the first 3 corrections are based on hue extraction while the 4th is a Luminosity extraction.
Ozone Step #1
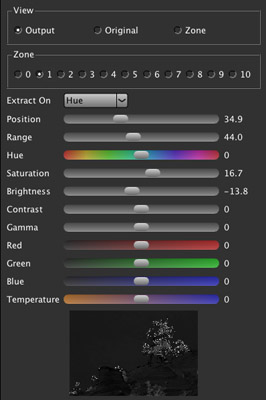
We set "Extract On" to "Hue" and use (watch the zone masks):
a) Zone #0 to correct the blue sky:
Zone 0 (blue)
b) Zone #1 for the greens
Zone 1 greens
c) Zone #2 for the red rocks

Zone 2 reds
After we applied this first filter we get the following layers and image:
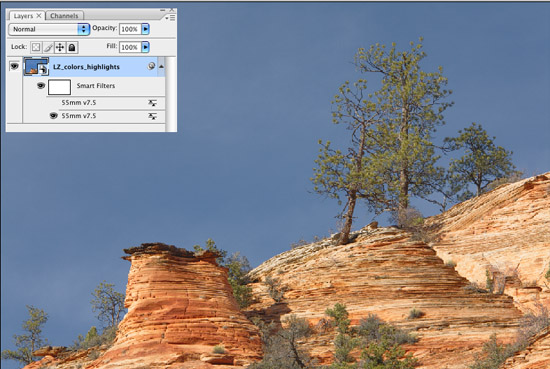
Image after the first 3 corrections
Ozone Step #2
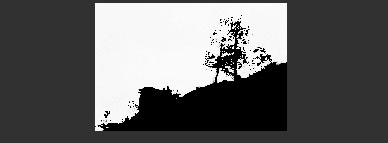
In this step we tune some more washed out highlights.
The changes we make are rather subtle (hard to see on the screen shot yet important). "Extract On" is set to Luminosity and we change only the saturation and Brightness in the highlights (see the mask).
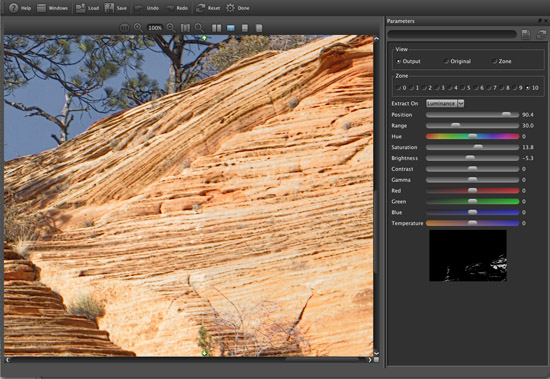
Tuning the highlights (split view)
We have now this final image:
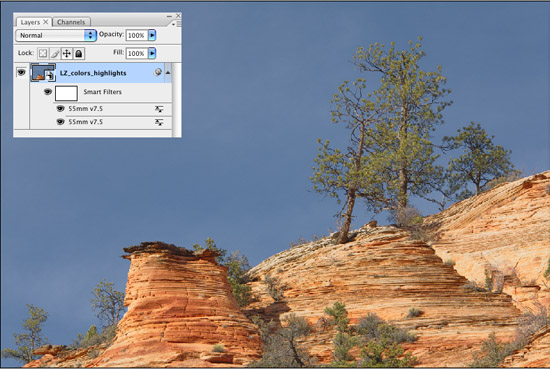
Because we are using Smart Filters we can still change all the settings later.
Conclusion
DFT Ozone is an excellent Photoshop filter for all sorts of color and tone corrections. We also find Ozone very reasonable priced.
Highly Recommended
Note: Before you buy Ozone also check out the DFT 55mm plugin. 55mm includes Ozone and also features many other filters:
- Gradients
- Effects
- Other color correction filters
55mm is quite a bit more expensive but also excellent (same UI as Ozone). We will continue to watch new tools by DFT (Digital Film Tools) because we find their tools very well designed and engineered.
|