Working on Edges
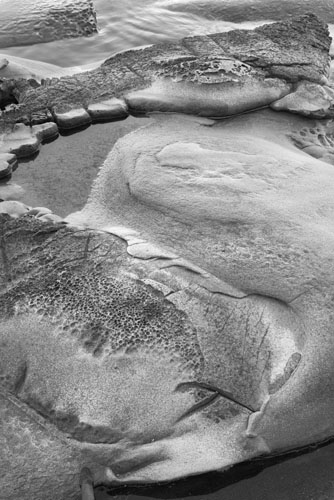 
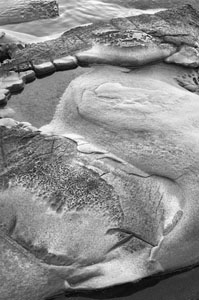
Left: original, Right: cropped
The pair of images included here are a good example of working on edges. First, note that the cropped version lost only about 50 pixels in width, this in an image over 3000 pixels wide, this is less than 2% of the image. On a 2 inch LCD, this amounts to .04 inch or 1 mm. - in other words, not very much and hard to adjust for when framing. Most cameras would be pleased to offer framing that is accurate to within 2%.
Yet, I think there is a huge difference between the two images. In the full size image, the peaked rock at the top right of the image comes to it’s end and there is a fairly bright border to it. The peak of the rock doesn’t make it near the top of the print. In addition, there is a fairly bright band across the top left of the print which looks ok against a dark background, but which I suspect is going to look a bit odd against the white of the paper or matte board.
Note that in the cropped version, the peak of that rock in the upper right does come close to the edge but doesn’t touch it - I felt (rightly or wrongly) that this was important - it should be associated with the edge, just not sitting on it.
But what if it had been the other way round, what if I hadn’t given myself that 2% breathing space and it worked out in the end that I’d really rather have had just a tad more room. The same image I think shows that on the left edge a third way down where those small rocks lining the pool are clipped just a little tighter than I think ideal - It’s ok, and perhaps I might have cropped it to here, but since I didn’t give myself any breathing room on the left, I’ll never know.
Cropping 2% of an image is inconsequential when it comes to making prints - losing half an inch off of a 25 inch wide print, not much of an issue quality wise. ON a 16 megapixel chip, we are throwing away .3 megapixels - probably a pretty good bargain to give us the flexibility and breathing room to get the image just right.
By the way, this is actually part of a 4 image stitch so I can actually get back that left edge if I really want it. Always give your self an option. It could be a second shot just a tad wider on the zoom just in case, or simply breathing room in the one image if two aren’t practical.
|