Merging multiple exposures is easy these days using either Photoshop CS3 or Photomatix. You just load the RAW files and the software does the rest, right? Over the last month or so we worked on more than 100 HDR files and learned that all is not that trivial as it sounds.
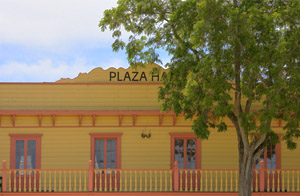
Usually we start with 2 or 3 bracketed photos:
-1 1/3, 0. +1 1/3 EV bracket
Note: We currently use a method which we call "High Speed HDR" (HS HDR). We photograph with a Canon EOS 1D Mark III (set into Highlight priority mode) and shoot the brackets at the highest possible frame rate (10fps). The lenses we use are image stabilized and we shoot freehand or use a monopod. This way all slow movements are frozen in all 3 frames and also the images are not far off in alignment. We get sometimes 2 shots that are only 3-4 pixel misaligned.
RAW is often not good enough
Photoshop even warns that converted TIFFs may not benefit from the larger dynamic range that the original RAW files have. This is of course true and we would only start from RAW if there would not be a catch.
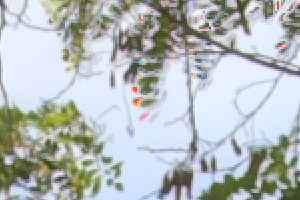
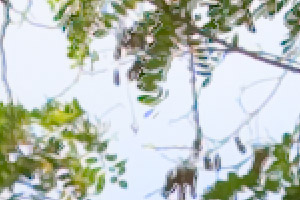
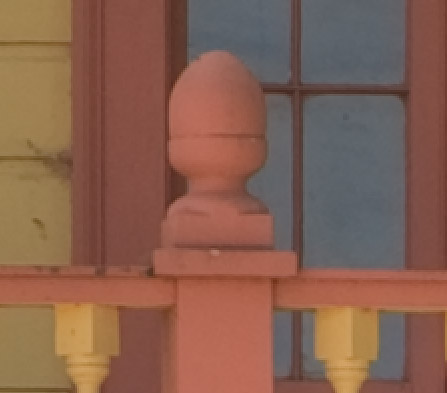
We learned that even with quite good lenses the CA (chromatic aberration) of lenses will spoil the HDR images. To make thinks worse the "Merge to HDR" process and also the final Tonemapping will show all the CA you have in your files. Here are some samples:
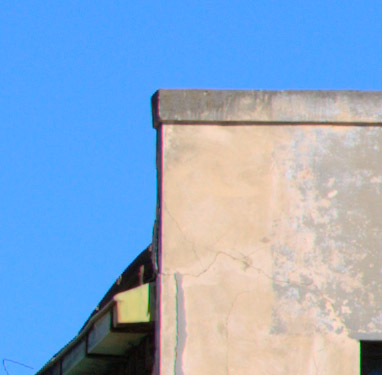
Classic CA artifact
Mixture of CA and other artifacts
As a result of this experience we fix (better say minimize) CA in Camera Raw 4.1:
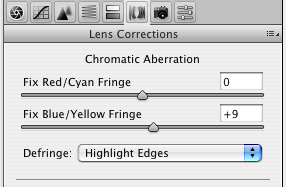
CA correction and Defringing
We also often use the new Defringe option to avoid fringing and CA as much as ever possible. As far as we can tell it seems that Photoshop CS3 "Merge to HDR" ignores the CA settings in the RAW files. Of course Photomatix cannot use the ACR 4.1 CA corrections and also does not help to remove CA itself. CA can be really very nasty.
This leaves as only option to convert the files to TIFF (16bit) and then merge in Photoshop CS3 or Photomatix.
Photoshop CS3 or Photomatix?
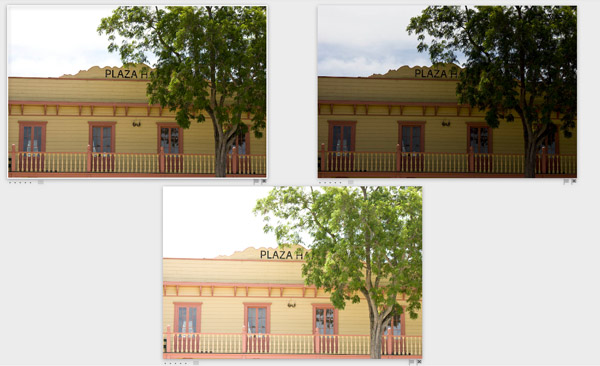
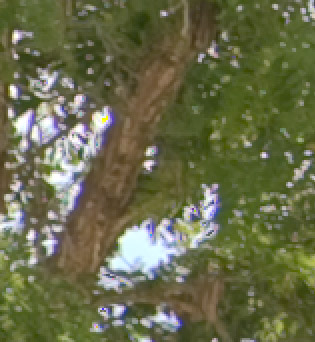
Actually in most cases Photomatix because we found that Photoshop CS3 can produce nasty artifacts with moving leaves in the trees.
Artifacts created in CS3 "Merge to HDR"
Photomatix is not perfect either (but that is expected with these moving leaves) but way more forgiving:
Result from Photomatix
Whether it makes sense to use these images anyway is an artistic decision. I think these images can be used if you intend to show that the wind moves the leaves.
Image Alignment
While in some cases (see above) CS3 "Merge to HDR" maybe not the right choice there are also sometimes issues with Photomatix alignment.
In our case here (and most other cases) Photomatix does a good job to align images.
Automatic alignment in Photomatix
In this case the Photomatix alignment worked very well:
Photomatix result after alignment
Advanced alignment
If CS3 would not show these damned artifacts we would use it more often to create HDR files. On the other side the alignment in Photoshop CS3 is very good now.
Fortunately we can combine Photoshop CS3 alignment and Photomatix Merge to HDR.
We use the CS3 script "Load Images into Stack" (can be found at File->Scripts):
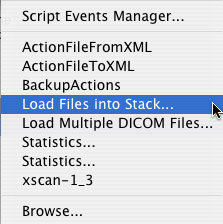
Load files into Stack
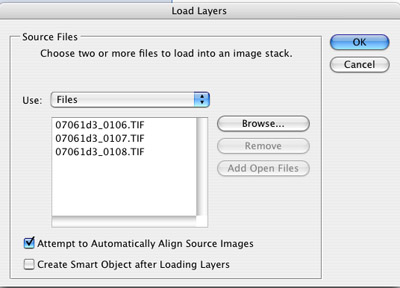
This function performs two tasks:
- Loads the files into a layer stack
- Also can align the images (that is what we want here)
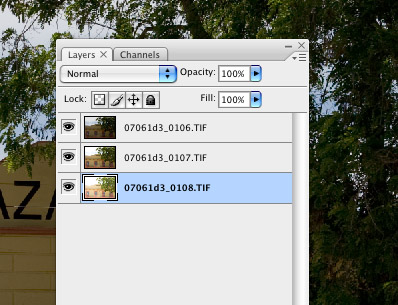
Layer Stack with aligned images
Because the images got aligned we need to crop the layer stack. Only a few pixels are lost on the borders. We then perform the following for each layer:
- Select one layer only
- Flatten layers
- Save file as 16bit TIFF
- Undo flatten to save the next file
We have now 3 TIFF files that are most often very well aligned.
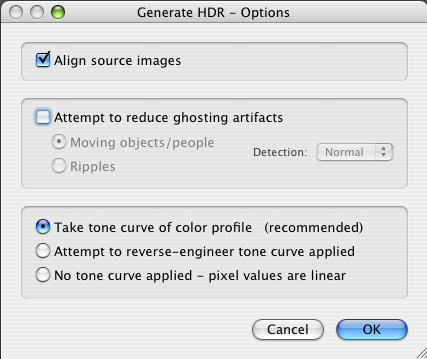
Merging these files to HDR in CS3 does not work because we lost the correct exposure data (EXIF) and CS3 does not work with improper EXIF data. We could go through the trouble and copy the original EXIF data but it is much easier to use Photomatix.
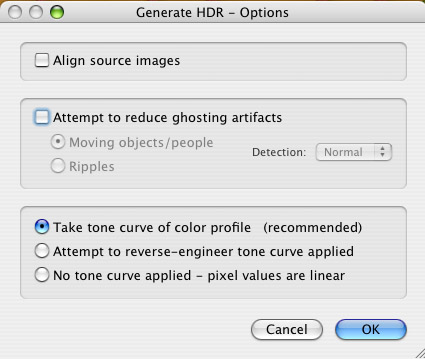
No Align selected in Photomatix
Because the images are very well aligned we don't want Photomatix to try again (just does not make sense). Also Photomatix relies on the original EXIF data and cannot find them. Unlike Photoshop Photomatix allows a different manual strategy:
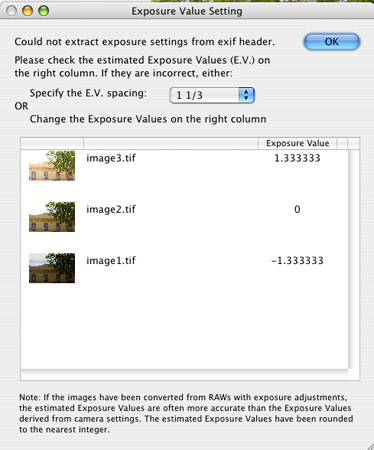
Set the EV spacing in Photomatix
We know our exposure spacing was 1 1/3 EV and we enter it here. After that Photomatix does its job as usual.
Conclusion
We showed in this article that generating HDR images is not always as easy as it looks. But overall we find all this trouble worth it more often than not. We shoot nearly always brackets of 2-3 shots right now. |