In this article we show how Photoshop Layers can help to work with the Photomatix Tonemapping plugin. We often use Tonemapping to improve local contrast and open up the shadows. We also like the fact that the colors get somewhat more saturated. Even if the latest version of the Photomatix Tonemapping plugin provides many controls it is often hard to predict the final result just using the Tonemapping preview. Also once we have confirmed the settings is is not that easy to fine tune the result later.
The technique we describe here can be used with many other tools (even Photoshop Curves).
Note: Even if the main purpose of the Tonemapping plugin (we use only the Detail Enhancer method) is to convert HDR images to 16-bit we use it very often for normal 16-bit images to improve detail and open up the shadows.
The start image was created via PhotoAcute (save as DNG) and opened in ACR 4.2 (also downsized to 10MP).
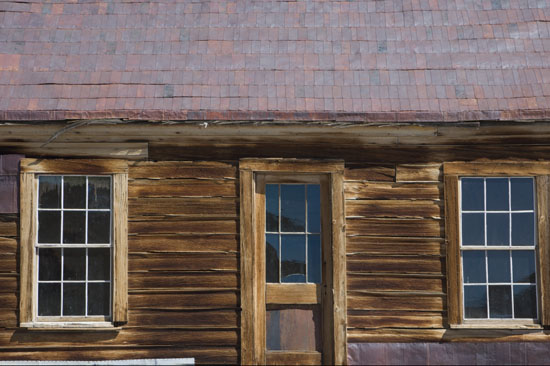
Start
As a first step we duplicate the layer and apply Tonemapping to this new layer (we nearly forgot this step because we use actions that create a new layer automatically).
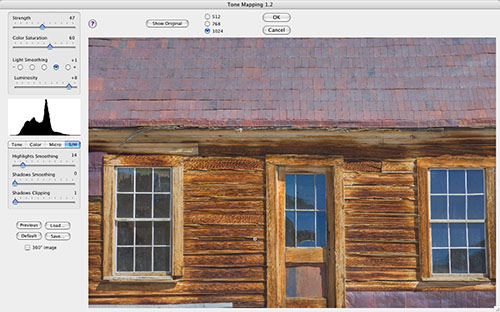
Tonemapping Detail Enhancer
We always watch that we don't get any clipping in the highlights and shadows. The saturation can be slightly too strong because we fix this later.
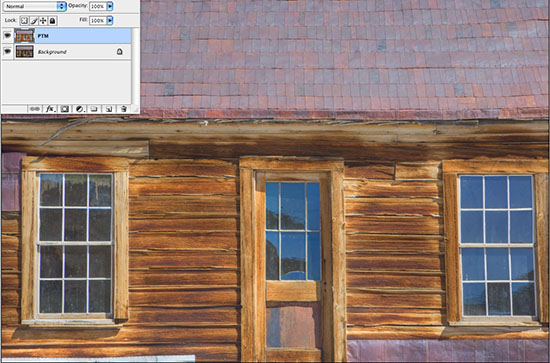
Tonemapped layer
The Tonemapping results in two effects:
- Different tonality
- Stronger colors
We want to control both aspects separately. And here is how we do this.
As a first step we change the blending mode of the PTM layer to "Luminosity".

Layer in Luminosity mode
Using the opacity of this layer we now can control how much tonal change we like.
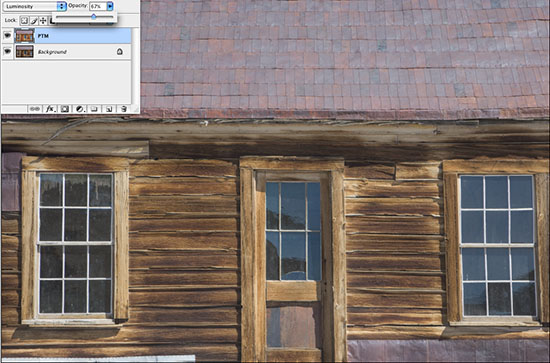
Opacity at 67%
Now the colors are a bit too muted. We change this by duplicating the PTM layer and change the new layer's Blending Mode to "Color".

With layer in "Color" mode at 67% opacity
Now we can control the tonality and colors by changing the opacity of the layers separately.
There is more to using layers here. Sometimes we want to concentrate the tonal changes to the midtones only. We use a simple Midtone mask and apply it to the Luminosity layer.
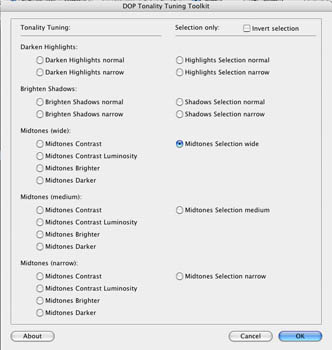
Creating a Midtone Mask with our DOP Tonality Tuning Kit
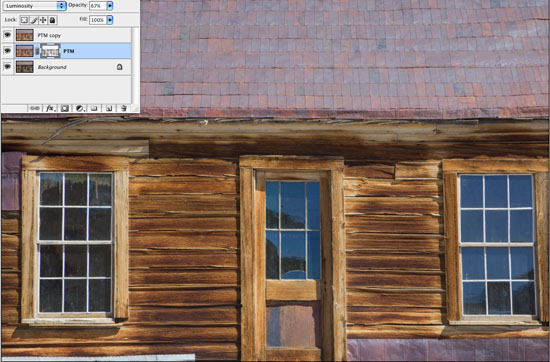
Mask applied to the Luminosity layer
Conclusion
Using Photoshop allows a lot more control using Photomatix Tonemapping. The very same technique can be used for all filters that change both tonality and colors. We do this all the time.
|