9/4/2011 Initial Findings
There is no single HDR application so far that gets the best results for our work all of the time. The core issue for us is the tone-mapping process. That is why we are always on the search for new and improved tone-mappers. Our goal is to be able to create tone-mapped images that have not that much halos and don't look to grungy.
Ok, we like grunged images sometimes but then consider it to be second step after the initial tone-mapping. From so called "natural" looking images we can can create a grunged look later but you cannot de-grunge you photos.
Disclosure: The creators of HDR Darkroom Pro are sponsors of this site (as of 9/1/2011). All what we write here is still our own opinion.
HDR Darkroom Pro

HDR Darkroom Pro is a new HDR application that features interesting tone-mappers. We know the people behind HDR Darkroom Pro now for some years so the development of this app is not entirely new to us.
You can find HDR Darkroom Pro in the Mac App Store. They also have a Windows version (even more advanced) that they sell on their own web site.
HDR Darkroom Pro Sample Workflow
The workflow is a bit different than most other HDR tools. Right now there are no plugins for Lightroom and Aperture. Hopefully this will come later.
Getting started
The first step is to drag/drop images we want to merge to HDR from Lightroom to the preview pane of HDR Darkroom Pro (we call it now HDR_DRP). Dropping the images on top of the dock icon does not work you have to drop them onto the preview pane. You can use directly Raw files (works fine) but we always pre-process them in Lightroom first.
After drag/drop
We select all the images we want to use for our Merge to HDR on the left thumbnail view.
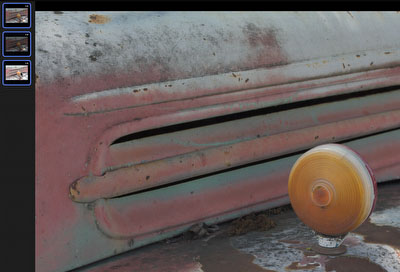
Selected images
If you drag the selected thumbnails onto the preview pane you get an alignment dialog:
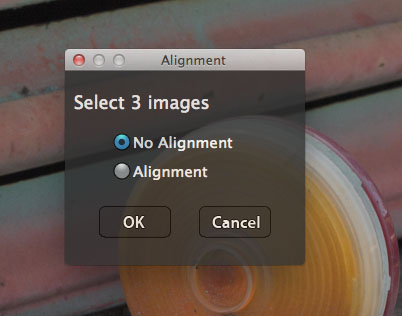
Alignment dialog
We often align images in Photoshop CSS (best you read this article) before and so leave the option to "No Alignment". The alignment in HDR_DRP works fine in many cases but we know that aligning in CS5 is excellent.
Once you confirm this dialog HDR_DRP starts the default tone-mapping process.
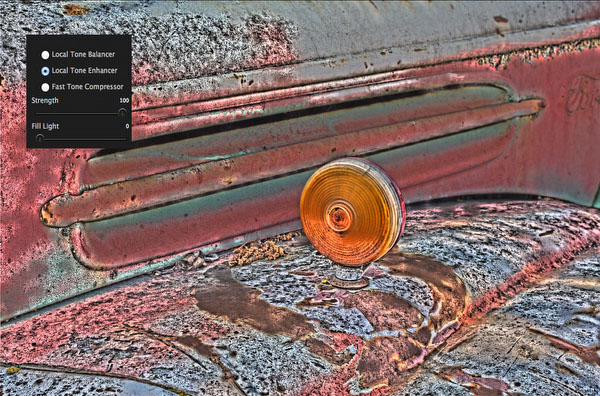
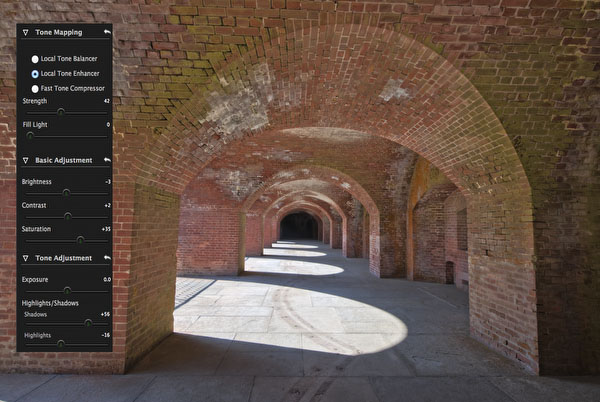
Tone-Mapping Methods
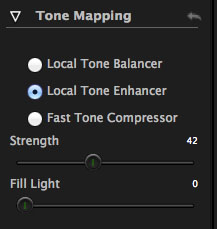
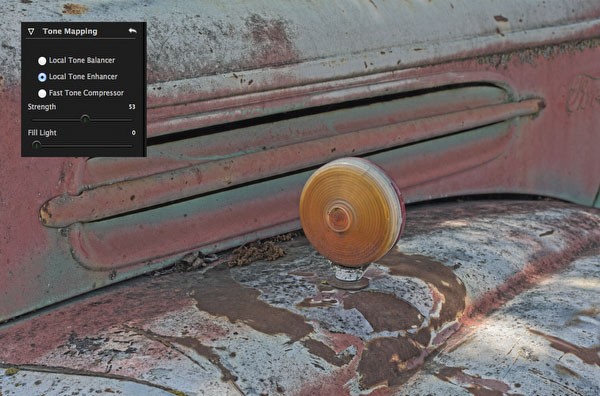
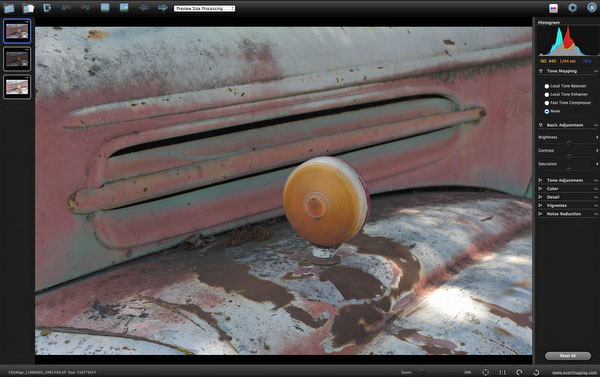
Setting your Tone Mapping parameters
We get nice results from the first two methods (quite different though). Here we only use the "Local Tone Enhancer" method. The strength defines the tone-mapping strength. We seem to get best "natural" results by using values between 40-60. Over time we may settle more for the lower values.
High Strength values can get you a more grunged look if you like. This is not what we are after though.
Grunged Look
Basic Adjustment
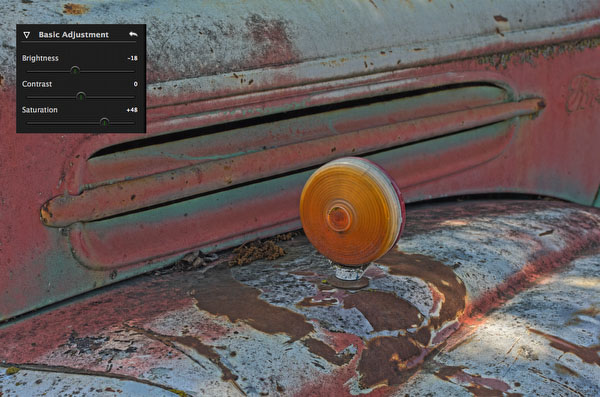
Here we mainly use Brightness and Saturation. Contrast seems to be a global contrast setting.
Advanced Tone Adjustments
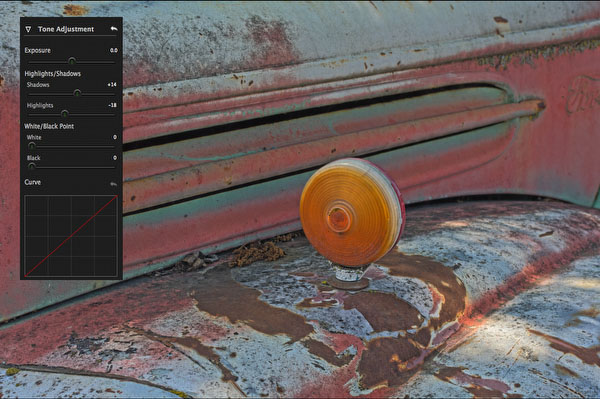
Tone Adjustments
Exposure, Shadows and Highlights are crucial settings to optimize the HDR image look. The other settings are not changed by us much.
Color (WB)
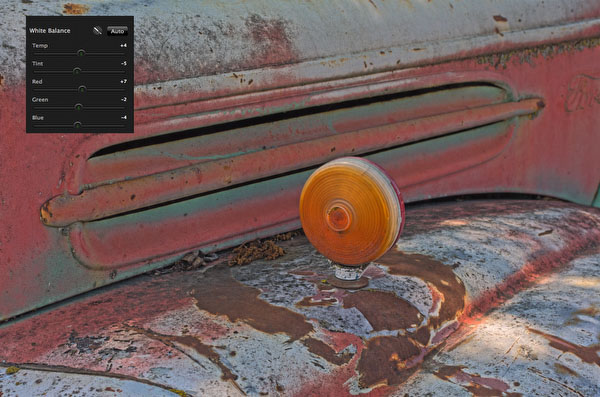
WB tuning
Nice to be able to fine tune the WB a bit even as we have done this before in LIghtroom.
Detail, Vignette and Noise Reduction
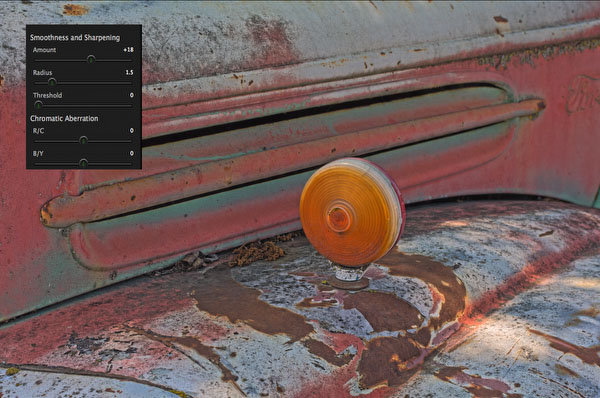
Detail/Sharpening
We hardly use these settings because we post-process all images in Photoshop with our own scripts.
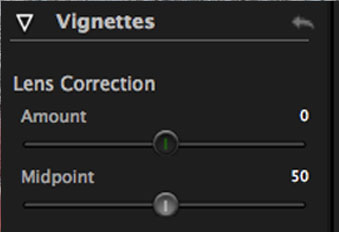 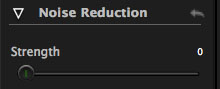
Vignettes and Noise Reduction
These tools are more important if you start with Raw images.
Post-Processing in Photoshop CS5
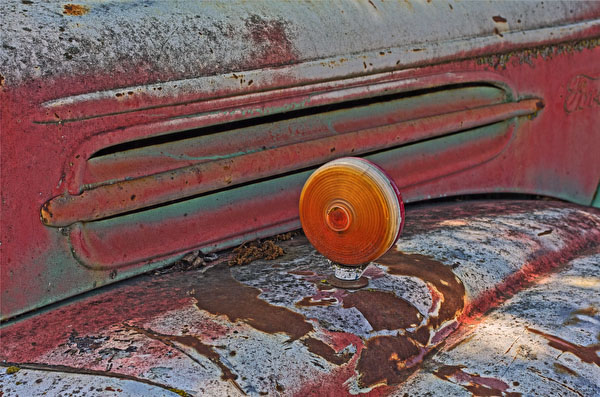
After Tuning in CS5
As mentioned before we always perform a final tuning in CS5 using our own scripts.
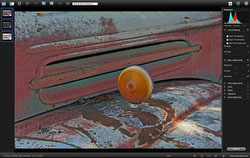
We used this sample image because other HDR tools had a hard time to deal with the bright spot in the bottom left corner. HDR_DRP did a very nice job.
Two more Tone-Mapping samples

Fort Point
Fort Point
We have processed these images with other HDR tools before and think that these results are some of the best we got so far and it was quite easy to do. We have yet to see some nasty halos if Strength is used at moderate levels.
HDR_DRP has many sliders which can be seen as complex. But all the sliders are easy to understand and make sense in terms of our photographic vision. This cannot be said about all the HDR tools in the market.
What are we missing
There are quite a few things we would like to see improved. Here are just our top issues:
- Saving and restoring Presets (there maybe a fair chance to see this soon)
- Open after save into Photoshop
- LR/Aperture plugins
- Improved naming in Save As dialog
Conclusion
We are glad to report that HDR Darkroom Pro provides new very interesting Tone Mapping options.
We will follow this application how it improves in terms of usability. But even as it stands right now HDR Darkroom is part of our main HDR tool set.
|