There is no single best workflow if it comes to image processing. If the final result looks good all is fine. Over the last years we created a collection of Photoshop scripts that help in our workflow to get us the results we like. Many of our customers have asked us where all these tools fit into our workflow. This article explains how we work on our images and of course use our own tools.
0. Get your Images organized
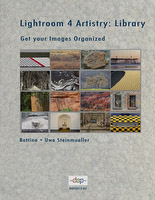
We import and organize all our images with Lightroom 4 (right now about 155,000 images in our catalog). We cover all you need in our e-book Lightroom 4 Artistry Library:
1. Raw processing in Lightroom 4
In the past we only performed very basic raw processing in Lightroom and left the rest to Photoshop. We recently changed our approach and try to get as much done as possible in Lightroom 4. THese are the main tasks we perform in Lightroom 4
- Debayering of the raw files: Built-in into LR4 and ACR 7
- Color Calibration (based on internal or other profiles): Calibration tool
- Copping and Straitening
- White Balance (objective and subjective): WB in the Basic tool
- Global Tonality: Basic and Tone Curve tools
- Sharpening: Detail tool
- Noise handling: Detail tool
- Selective tonality tuning: Brushes and Gradients
- Selective Colors: HSL tool
- Lens Corrections: Lens Correction tool
- Vignette: Effects tools
- Selective Retouching: Spot and Red-Eye tools
This book represents our Lightroom 4 Develop workflow:

2. Fine Tuning in Photoshop
All the following operations are done later inside of Photoshop (we use CS5/CS6).
a) Dust or disturbing elements removal
Here we use the Photoshop CS5 Content Aware Fill (our new favorite), Clone or Healing Brush tools.
b) Rotate, Crop and Perspective corrections
We perfomr some perspective corrections in Lightroom 4 but leave some to Photoshop. If we need Perspective Corrections our DOP Perspective Crop Helper tool can be very useful.
c) Remove unwanted Elements with Content Aware Fill
Content Aware Fill or Content Aware Patch are an amazing tools in Photoshop CS5 to clean you image from unwanted and disturbing elements.
d) Improve Highlights and Shadows
We often use the DOP Highlight Resolver V2 to improve the highlights (getting them less aggressive)
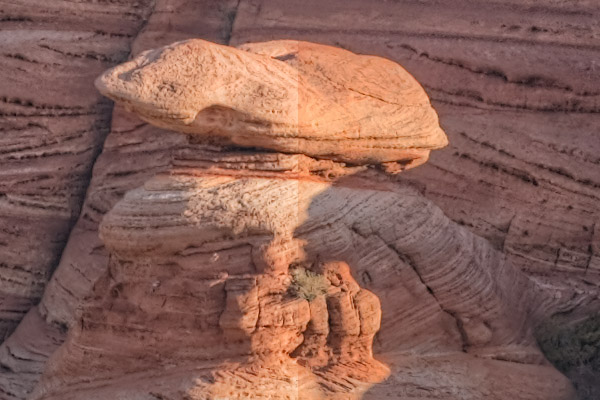
Before on the left and after on the right
We are not a fan of washed out highlights and this script does the trick.
Note: The Highlight Resolver cannot recover highlights. If the highlights are clipped you are out of luck. All highlight recovery needs to be done in Lightroom 4(see above).
If important parts of the image are in the shade we treat the image with our DOP Shadow Optimizer.
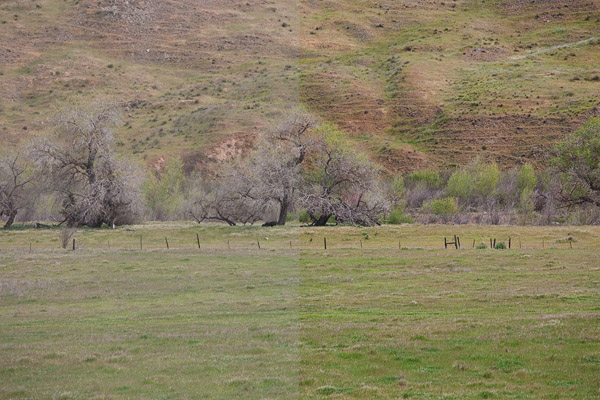
Left before and right after the treatment
The Shadow Optimizer can bring these shadows to life.
e) Overall Tonality Optimization
We sometimes use the DOP Tonality Master script.
Soft out of Lightroom
After tuning with DOP Tonality Master
f) Resolving Details and Sharpening
We offer different tools for this purpose and it very much depends on the image which one to chose:
Note: We personally use most often DOP Optimal Sharp V3 and the DOP Detail Extractor if we want very strong details.
g) Final Touches
Using our DOP Optimal Snap as a final step we optimize ourimages for presentation (print or web).
i) Artistic Effects
Over the last year we used more and more our Texture Blending Technique.
k) Upsizing (peformed on a copy)
In case you want to print bigger than easily supported by you native image size you can use use our DOP Upsizing Plus.
3. Save as TIFF and import back into Lightroom
We started from a RAW file in Lightroom. Now we save the result as a TIFF file into our TIFF master library folder structure. From that location we import the TIFF files back into Lightroom. We have different folder structures for RAW and TIFF files. Due to our naming conventions we can easily find the RAW files the belong to any given TIFF image.
Example:
0905D700_2299_FortPointHallWay_V003.tif
0905 = 2009 month 05 (May)
D700 = Camera used (Nikon D700). This implies that the RAW file is a NEF.
2299 = In camera sequence number
These data let us find the RAW file very fast in Lightroom.
Note: We know that all of this is part of the RAW file's metadata. So why code it into the name? First we use this method long before Lightroom was out and second we have a lot of info by just looking at the file name.
Short image title = only TIFF or PSD images of our master collection get short image titles
V003 = Version number of this master image
Let's assume we need the RAW file for "0905D700_2299_FortPointHallWay_V003.tif". We just search for the text "0905D700_2299 NEF" in Lightroom. Even searching for "2299 NEF" will have the original RAW file as one of the hits.
4. Printing
We either print from Lightroom directly or CS4.
5. Check out our Bundles to save some money
You can find all our tools (often with articles about them) here. Always try before you buy. We want happy customers.
|