EasyS Plus Sharpening Toolkit V4.0 (PC & Mac)
Advanced sharpening solution by Digital Outback Photo
4/20/2009 Version V4.0 released
Version 4.0 now also supports CS4 on Windows in 64 bit. The new version may also run a bit faster. If the version 3.0 works for you and you don't need 64 bit support for CS4 on Windows there is not much changed. Functional the new script is equivalent to version 3.0 and should produce identical results.
10/28/2008 EasyS Sharpening on top at independent sharpening review
Hugo Rodriguez compared all the best known sharpening tools in the market (including EasyS Plus). The original review is written in Spanish.
We only support Photoshop CS3/CS4.
EasyS Plus Sharpening Toolkit V4.0
This is of course a biased article about our own product. We hope you may like it.
As we now know sharpening is needed for digital images and there are many good ones to choose from. In 2004 we introduced our first own sharpening tool EasyS Plus that many people love for high resolution photographs.
EasyS Plus Sharpening Toolkit V4.0 is based on the same technology used in EasyS Plus but uses a very powerful new script (script written by Bernard Frangoulis).
EasyS Plus Sharpening Toolkit now improves on EasyS and even EasyS Sharpening Toolkit:
- File size only limited by Photoshop
- Fast operation
- Flexible tuning
- Flexible Presets
Sharpening by the numbers
The EasyS Sharpening Toolkit does not support an interactive user interface with sharpening preview. This sounds limiting, right? But actually we work for a very long time with sharpening actions and create sharpened layers that we then tweak via opacity changes. Also if you use additional techniques like edge masking and/or halo tweaking then what you see in the (sometimes even small) sharpening window is not what you will get.
Installation
The DOP EasyD Plus LE comes as a Javascript file for Photoshop CS3/CS4 (we only support CS3/CS4).
- Full version is named: DOP_EasyS_Sharpening_V4.jsx
- Demo version is named: DOP_EasyS_Sharpening_V4_Demo.jsx
- The full version comes with a second script: DOP_EasyS_Sharpening_V4_NOUI.jsx. This script runs without UI and used the last settings used by the main script. This actions is for use in batch processes.
Installing the script
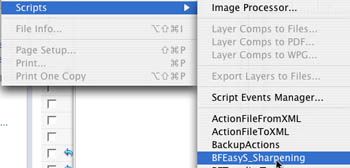
The script needs to be copied to the Photoshop CS3/CS4 folder and here to Presets/Scripts (or to the equivalent locations for other languages). After restarting CS3/CS4 you should find the script under File->Scripts. If you do not find it there you did not put the script into the proper location.
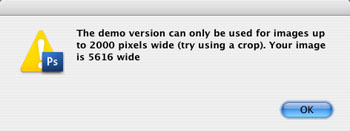
Note: The free demo version can only handle images up to 2000 pixels wide. The commercial version does not have this restriction. You will get this warning message if you use larger images with the demo version:
EasyS Plus Sharpening Script
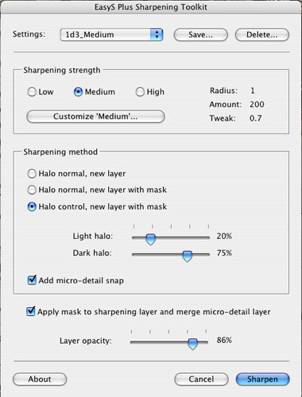
EasyS Plus Sharpening UI
Note: Never touch while the script is running. This can change the scripts behavior.
The actions come in 4 sections:
- Preset management (see below)
- Sharpening Strength Low, Normal and High) (all can be customized)
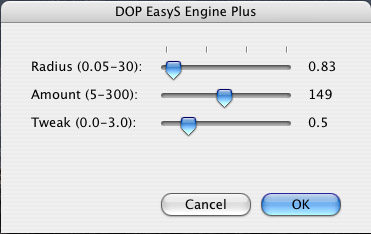
Customizing the EasyS Plus sharpening strength
- Sharpening Methods
- Flattening and Layer Opacity
Sharpening Strength
There are three levels that can be used. You can set your own values for these levels. On top of all of this you can even create an own preset for different cameras or situations (e.g. Printing, Web,..)
Sharpening Methods
- Create a new sharpening layer and use the defined strength
- Same as #1 but an edge mask is used to avoid sharpening noise
- Like #2 but the user can define how much of light and dark halos are show in the image (you can set this via the halo control sliders)
- Enable “Add Micro-detail snap” to show extra fine details
Flattening and Layer Opacity
- You can apply the edge mask to the sharpening layer and also flatten the “micro-detail snap” layer. This allows to add new layer masks to the sharpening layer.
- Select the opacity of the sharpening layer. This way you can tune the final sharpness up and down using the layer’s opacity.
Creating and using Presets
The most powerful feature presented in Version 3 is the new preset management. You will realize that the sharpening parameters depend on:
- Camera type
- ISO
- Image type (fine details or not)
But for the same camera, ISO and image type the sharpening parameters will almost be all identical for many photos. Now in version 3 you can save and recall these settings very easily.
Saving a preset

Save a Preset
Click “Save” and enter a name for your preset. From then on you can recall all these personal presets:
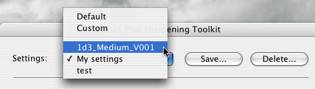
Recall a Preset
How to call the script via a keyboard shortcut?
We deliver a simple action that calls the script at Shift+F7. You can change the keyboard shortcut using the Photoshop actions palette.

Note: Because the action records the absolute location of the script it only works on the English CS3 version as shipped. You can easily re-record the action yourself:
- Delete the scripts step from the action
- Open a RGB image
- Click on the red button in the actions palette
- Run the script from File->Scripts->BFEasyS_Sharpening
- Click on "Sharpen"
- Stop action recording (small black button left to the red recording button).
- You are done
What about the old actions?
Version 4.0 comes only as a script and there are not more actions delivered.
Note on light/dark halo levels
What does sharpening actually do? It adds the impression of more sharpness by increasing the contrast at edges. This means some of the pixel will get lighter and some darker.
Note on sharpening and halos: We actually follow the philosophy that artifacts that don't show up at 100% cannot be visible in print. We know you can sharper stronger than that for most inkjet printers. But does it look natural? Try to avoid over sharpening and concentrate on the content message. Halos you see on screen may show up on print and best you try to minimize them at nearly any cost.
We allow you to control how strong you want to have the lighter pixels and the darker. We always find the lighter pixels to be more an issue than the darker ones.
For some images you may want to use only the dark halos and set the halo light to 0%.
You can buy DOP EasyS Sharpening Toolkit 4.0 here
|


