At PMA 2006 Nikon and Nik Software announced:
- Nikon invested into Nik Software (known for their sharpening
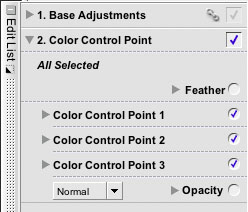
and filter plugins)
- Nikon Capture NX (next generation of Nikon Capture) includes
Nik's U Point technology
We have now a beta version on Nikon Capture on our Mac & PC
installed and had a chance to look closer at this new technology.
This review
won't touch any other features of Capture NX besides the "Color
Control Points" in this new software which is most likely the
most innovative part of Capture NX. Read our review of the previous
version Nikon Capture 4.
Selective Corrections
Almost all RAW converters only allow global tone and color corrections
(except LightZone).
In general for all serious work you need to perform selective corrections.
This is clearly the domain of Photoshop today.
What do we mean by selective?
- Selective by area
- By colors and tonality
- Using painting techniques
Nik Software's Control Point use a new approach to tackle this issue.
Best we show Control Points in action.
Using Control Points based on the U Point Technology
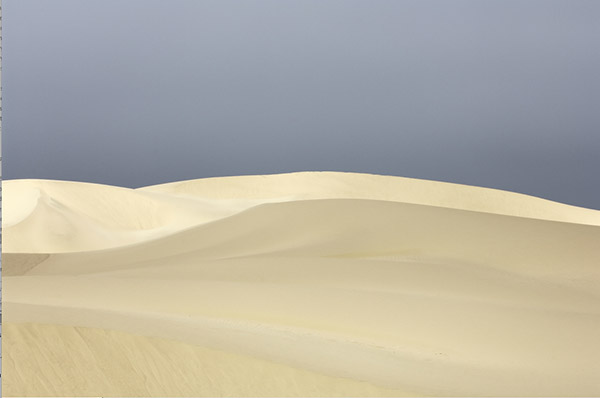
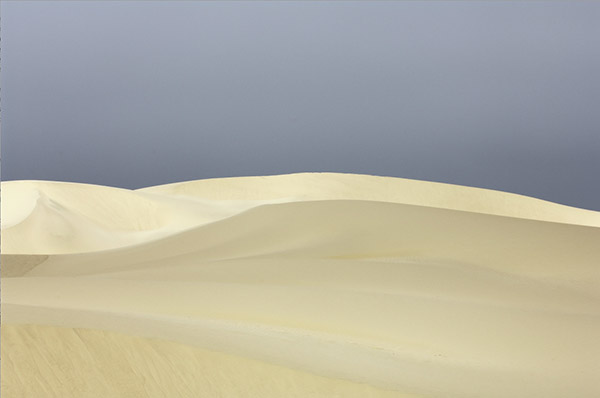
Sample file without corrections
The above image is the result from Nikon Capture
NX or any other RAW converter. Actually it looks nice but we would
like to tune the sky and the sand tones.
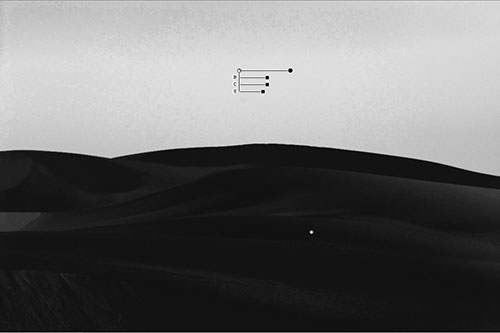
We start placing a Color Control Point into the
sky and tone down the saturation slightly:
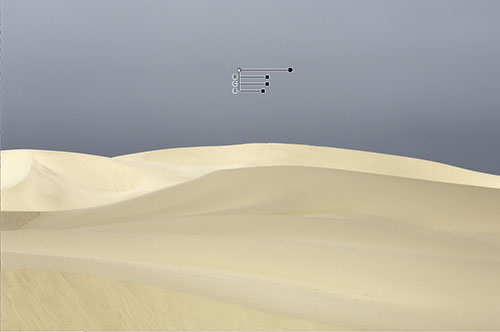
Control Point #1 (with lower saturation)
What this Control Point does is behind the scene magic.
The main idea is that the Control Point creates an implicit mask that
limits the effect of change to other colors and areas of the picture.
Capture NX allows you to show this implicit mask:
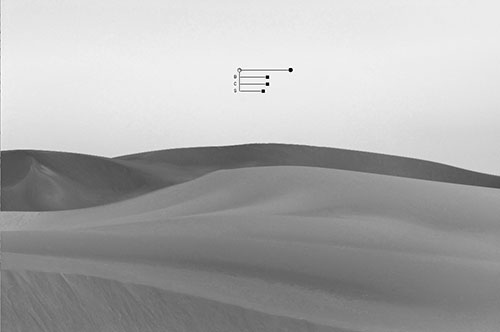
Mask for Control Point #1
The mask is quite intuitive. The Control Point has a much
stronger effect on the sky than on the sand of the dunes. But we
want that this Control Point does not influence the sand at all. This
can be done by placing a second Control Point on the sand:

Control Point #2 in the sand
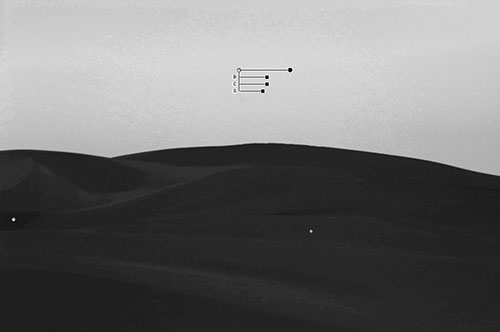
If we now revisit the mask for Control Point
#1 the effect on the sand is way reduced:
Mask for Control Point #1 after placing Control Point #2
One can think of the situation the
following way:
- Both Control Point potentially influence the whole image
- The effect is reduced if colors, brightness differ or edges
maybe separating areas.
Now these two Control Points compete over the control of all the picture
images. The sky Control Point wins in the sky and the sand Control Point in
the dunes because they are closer in color to their dominated areas.
Note: We hope we may get a white paper soon and
replace this heuristic view by a more found description. On the
other side we think that Control Points should be more used by having
some visual imagination than just analytical description (here
some people may differ though :-) ).
To even avoid the effect on the small
area left we place a 3rd Control Point: 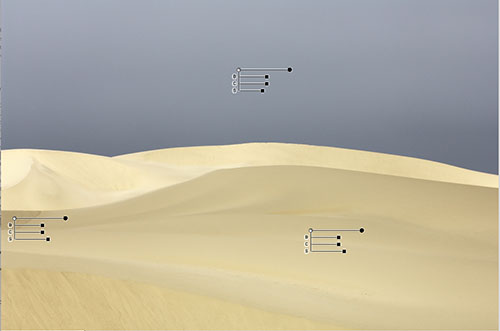
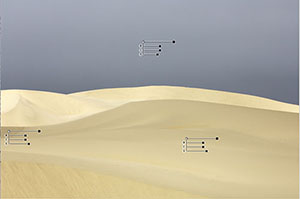
All 3 Control Points
Mask for Control Point #1 after placing all 3 Control Points
Now Control Point #1 only controls the
sky.
Fortunately we also can use Control Points
#2/#3 to control the rendering of the sand. In the end we added
some saturation to the sand and also made it a bit cooler. You
can actually change the settings for a set of Control Points at the same
time (if you want them to be the same):
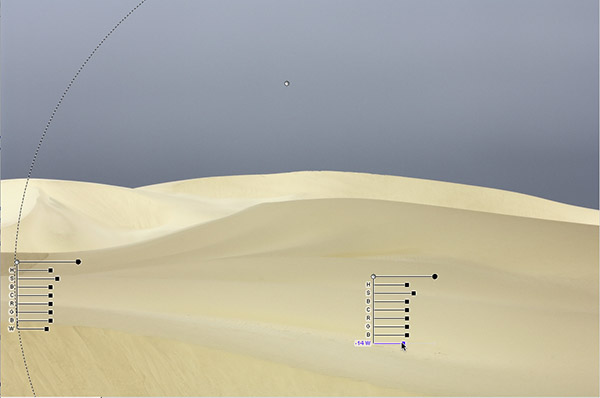
Change the Control Points in the sand at the same time
Now let us talk
about the properties you can control using Control Points: 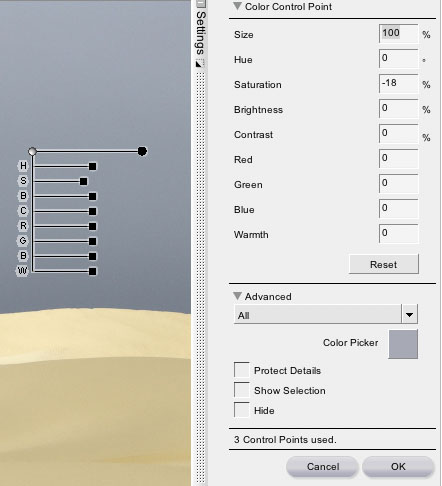
All Control Point properties
Most of the properties are quite
obvious. The size needs a bit more explanation though. At 100%
the Control Point will in principle effect all pixels on your image. Lower
values than 100% restrict the effect to smaller areas around the
Control Point. Having "Warmth" as a special property
is a very good choice.
Using these very simple steps we
could get some very effective corrections in our image. Try to
do the same thing with other tools that easily.
After image
Before
Some important things to understand
about Nikon Capture NX
- NX and this means Control Points can be used on all JPG and TIFF
files (likely they need to be flattened though). This means Control Points
are of interested to all photographers
- NX only stores instructions and the whole process is non-destructive
and can easily be changed later at any time
- Here is a screen shot of the operations stack:
Operations Stack
Any Control Point can be deactivated at any time without
the need to redo the rest of the corrections
Conclusion
Nikon Capture NX provides with Control Points a fresh and
very useful approach to selective corrections. We have no final
verdict right now but assume we might get a hang on Control Points.
|