| |
|
| |
Digital Outback Photo Contest #002
Sharpening Contest #1 (terminated, Winners)
|
| |
|
| |
We will open a new contest for
sharpening soon. |
| |
|
| |
Published in cooperation by:  |
| |
|
| |
|
| |
|
| |
|
| |
Which is the best sharpening method is discussed
over and over again in many news groups (it might even be different
picture by picture). We launch this first sharpening contest to learn
from the shared experience of all our readers.
To share experience it is not enough just to show the results. We need
precise step-by-step descriptions of all image editing operations that
had been performed. That is why we need to limit the used tools to the
ones that are available at Digital Outback Photo (and they have to be
available for PC or Mac):
- Photoshop (this is the standard image editor we use)
- Fred Miranda's Sharpening actions
- PowerRetouche Sharpening
- Nik Sharpener Pro
- PhotoKit sharpening tools
- Smarter
Sharpen X V1.0 or V2.0
- Other tools (if the tool author provides a free full working copy
to Digital Outback Photo)
|
| |
|
| |
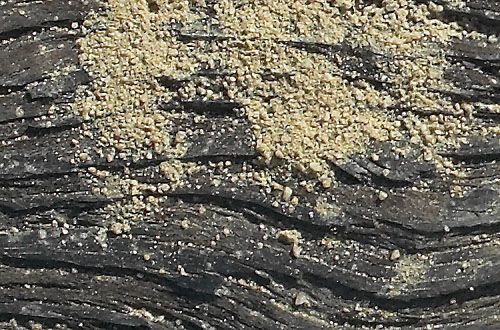
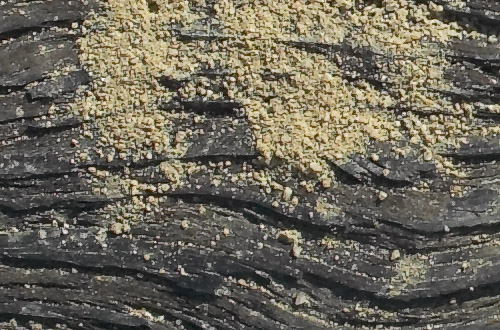
Here is the original photo used (handheld with the Canon
EOS 1Ds +70-200mm f/2.8IS lens and converted with the Capture
One DSLR with no sharpening) |
| |
|
| |
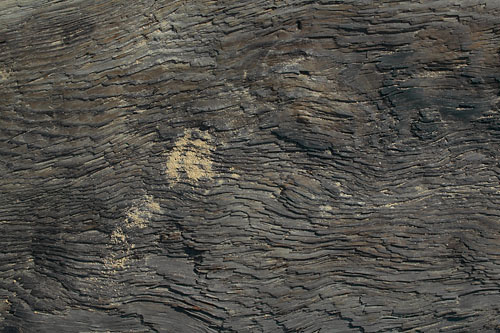
Wood with Sand at Point Lobos
|
| |
|
| |

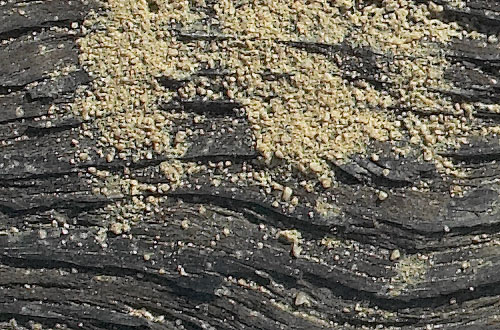
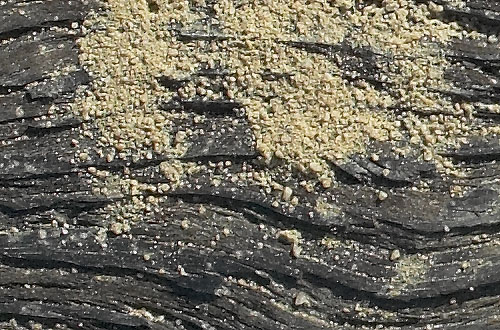
Crop (not sharpened)
|
| |
|
| |
Here you can download the crop
(16 bit TIFF in a ZIP file). |
| |
|
| |
We will finally vote for a winner. Besides getting into
the contest hall of fame the winner will receive also a free copy of ThumbsPlus
5. |
| |
|
| |
Contest Rules |
| |
|
| |
- Download
original crop (500x320 pixels)
- The image has to stay in Adobe RGB 1998
- You may convert to 8-bit here or later
- Perform sharpening (target is printing and not the web). This is
just a crop of the full sized image.
- Converted to 8-bit (if not done before)
- The final image has to be in 8 bit RGB
- Email us
back in a ZIP file
- A JPG of the sharpened crop (just for our info)
- Detailed instructions of your work (using only above mentioned
tools)
- Say if solutions is Mac/PC or even both
- Your name, email/web address (both optional)
- Contest ends 3/15/2003
We then will publish on this page your results. |
| |
|
| |
Sample Entry (PC only) |
| |
|
| |
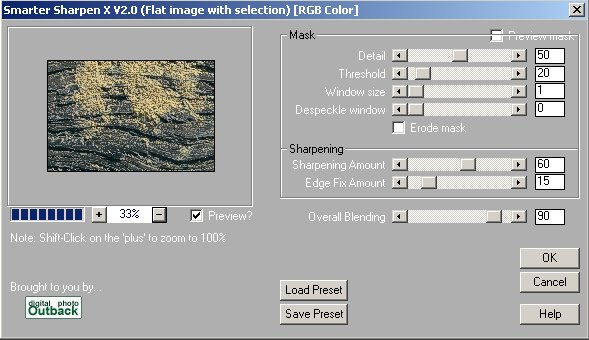
Author: Uwe Steinmueller |
| |
|
| |

The photo is intentionally not oversharpened
|
| |
|
| |
Steps:
- Open in Photoshop in 16 bit
- Use Smarter Sharpen X V2.0
- setting as shown below
|
| |
|
| |
#1 by Mike Hall (for Mac & PC) |
| |
|
| |
|
| |
|
| |
Steps |
| |
|
| |
- Opened file in Photoshop
- Converted to LAB colour
- Select lightness channel only
- Unsharp mask filter - Amount 140% Radius1.0 pixels Threshold 0
- Adjust Levels Input Levels - 0 -1.08 -255
- Convert to RGB mode
- Convert to 8 bit.
|
| |
|
| |
|
| |
#2 by Dan Sugars (for Mac & PC) |
| |
|
| |
|
| |
|
| |
Steps |
| |
|
| |
- Open in PS
- Convert LAB Color Mode
- Turn off A and B Channels
- Unsharp Mask – A=320% / R=.1 / T=1
- Unsharp Mask – A=160% / R=.2 / T=1
- Unsharp Mask – A=80% / R=.4/ T=1
- Unsharp Mask – A=40% / R=.8 / T=1
- Unsharp Mask – A=20% / R=1.6 / T=1
- Unsharp Mask – A=10% / R=3.2 / T=1
- Turn on A and B Channels
- Convert to RGB
- Convert to 8-bit
|
| |
|
| |
|
| |
#3 by George Barr (for Mac & PC) |
| |
|
| |
|
| |
|
| |
Steps |
| |
|
| |
- load into photoshop
- switch to 8 bit mode
- resample to double size (both dimensions) in photoshop
- sharpen more
- unsharp mask (150, 1, 4)
- resample to original size
- unsharp mask (80, .7, 4)
|
| |
|
| |
|
| |
|
| |
#4 by Moshe Vainer (for Mac & PC) |
| |
|
| |
|
| |
|
| |
Steps |
| |
|
| |
- Open the photo in PS7
- convert to AIM RGB-PRo Widegamut G1.0 linear profile (more
info here). The conversions are done using Microsoft ICM engine
(Or Apple's on MAC) and "relative colorimetric" settings.
- USM - Threshold 4, Radius 0.3, 400
- Convert back to Adobe RGB
- Convert to 8bit
|
| |
|
| |
|
| |
|
| |
#5 by Dave Phipps (for Mac & PC) |
| |
|
| |
|
| |
|
| |
Steps |
| |
|
| |
- Open in PS
- Adjust Levels 22, 1.00, 222
- USM A 165, R 0.2, T 1
- USM A 165, R 0.2, T 1
- USM A 165, R 0.2, T 1
- USM A 165, R 0.2, T 1
- Convert to 8 bit
|
| |
|
| |
|
| |
|
| |
#6 by Steve Szczecina (for Mac & PC) |
| |
|
| |
|
| |
|
| |
Steps |
| |
|
| |
- Open in Photoshiop 6.0 16 BIT
- Convert to LAB
- Lightness Channel- USM A:140, R:0.5, T:2
- Convert to RGB
- Blue Channel - USM - A:100, R:0.5, T:2
- Curves - minor S-Curve- Top of S: IP188 OP196 bottom of: IP68 OP59
- Convert to 8 Bit
|
| |
|
| |
|
| |
|
| |
#7 by Jouko Ruuskanen (for Mac & PC) |
| |
|
| |
|
| |
|
| |
Steps |
| |
|
| |
- Convert to 8 bit mode
- Create a mask channel
- find edges, curves, blur 2.5 (see the action)
- Duplicate layer
- Load selection using the mask channel
- USM 500/0.5/0
- Set layer styles
- luminosity
- modify blend ranges of the top layer 0/55, 128/255 (see the action)
- Flatten image
As this is quite coplicated Jouko also provided a complete action.
You can download the action for PC here.
Use the action "D60 Wide Simple". |
| |
|
| |
|
| |
|
| |
#8 by Kevin Dobson (PC only) |
| |
|
| |
|
| |
|
| |
Steps |
| |
|
| |
- Apply SmAR with "Detail Enhance" enabled, blending at
100
- Apply SmShX with settings 50, 40, 1, 0, Y, 75, 5, 50
- Apply SmShX with settings 77, 10, 1, 0, N, 30, 10, 50
- Convert to 8-bit
Note: Kevin is using his own filter plugins:
SmAR = Smart Artifact removal
SmShX = Smarter
Sharpen X |
| |
|
| |
|
| |
|
| |
#9 by Ferenc Harmat (PC & most likely Mac) |
| |
|
| |
|
| |
|
| |
Steps |
| |
|
| |
- Open in Photoshop
- Use Ferenc's actions
Note: We used Ferenc's actions and created the above sharpened image
ourselves. The actions are very, very complex. Unfortunately we can
not publish the actions here as Ferenc plans to make them commercially
available before end of February. |
| |
|
| |
|
| |
|
| |
#10 by Jeffrey Johnson (PC & most likely Mac) |
| |
|
| |
|
| |
|
| |
Steps |
| |
|
| |
- Open image
- Run Fred Miranda D60_CS-Pro_v2.0 Medium Intensity
- Image>Mode>LAB
- Select Lightness Channel only
- Nik! Sharpener Pro
- 1440x1440
- Printer Quality Above Average
- Book
- Anna
- Accel Off
- Select All Channels
- Image>Mode>RGB
|
| |
|
| |
|
| |
|
| |
#11 by Michael Payne (PC & Mac) |
| |
|
| |
|
| |
|
| |
Steps |
| |
|
| |
- Opened file in Photoshop 7.01
- Convert to 8 bit from 16 bit
- Create one Duplicate Layer = “Duplicate Layer 1” of
Original
- Change “Duplicate Layer 1” Mode to “Darken”
- USM on “Duplicate Layer 1” at A=500%, R=.4 pixels,
and Thers. = 0 levels
- Create another Duplicate Layer = “Duplicate Layer 2”
from previously already sharpened “Duplicate Layer 1”
- Change Duplicate Layer 2 Mode to “Lighten”
- Change Opacity on “Duplicate Layer 1” to 91%
- Change Opacity on “Duplicate Layer 2” to 57%
- Flatten Layers
- Used Minor S-Curves – Top: Input: 191, Output: 179; Bottom:
Input: 63, Output:68
- Save file with all changes
|
| |
|
| |
|
| |
|
| |
|
| |
|
| |
#12 by Jay Patel (PC & Mac) |
| |
|
| |
|
| |
|
| |
Steps |
| |
|
| |
- Convert to LAB
- Select Lightness Channel
- Perform USM: Amount: 150, Radius: 0.5, Threshold: 0
- Perform USM: Amount: 180, Radius: 0.3, Threshold: 2
- Convert RGB and 8bit
|
| |
|
| |
|
| |
|
| |
#13 by Simon Stanmore (PC & Mac) |
| |
|
| |
|
| |
|
| |
Steps |
| |
|
| |
- Opened in PS 6
- Power Retouche filter - PR Sharpness 6.0 - Pro
- Sharpen Method = Noise Filtered USM
- Sharpen Image % = 140
- Blur Size, pixels = 1
- Fix Edges % = 80
- Filter out noise % = 2
- Converted to 8-Bit
- Duplicate layer created
- Duplicate layer set to Luminosity blanding mode
- PS Unsharp Mask applied to duplicate layer
- Amount = 190%
- Radius = 0.3 pixels
- Threshold = 2 levels
- Flatened & saved
|
| |
|
| |
|
| |
|
| |
#14 by Jonathan Wienke (PC) |
| |
|
| |
|
| |
|
| |
Steps |
| |
|
| |
- Open in Photoshop 6
- save as uncompressed TIFF
- open in Neat Image Pro
I used one of my generic noise profiles, and turned the noise level
and
reduction amounts all the way down, so that the noise reduction was
effectively turned off.
Very Low Freq unchecked, Smooth Edges checked, Sharpening Y channel
only,
High 30%, Mid 40%, Low 50%
- Save as 16 bit TIFF
- Open in Photoshop
- Convert to 8 bits/channel
|
| |
|
| |
|
| |
|
| |
#15 by Jan Esmann (PC & Mac) |
| |
|
| |
|
| |
|
| |
Steps |
| |
|
| |
- Open in Photoshop 6
- PowerRetouche Sharpness Editor 6.0
- Method = Noise filtered USM
- Amount 100 %
- Blursize = 1
- Fix Edges = 40%
- Additional Noise filter = 0
- Convert to Lab
- Select the L channel only
- PowerRetouche Sharpness Editor 6.0
- Method = Noise filtered USM
- Amount = 100
- Blursize = 1
- Fix edges = 0
- Additional Noise filter = 0
- Convert back to RGB
- Convert from 16 to 8 bit.
|
| |
|
| |
|
| |
|
| |
And the winners are: #11 &
#13 |
| |
|
| |
First of all we would like to thank all participants
for their submissions and we believe that we can learn from all of them.
The jury (from Imaging Resource & Outback Photo) selected #11
& #13 as the favorites. Other entries came very close. |
| |
|
| |
Michael Payne & Simon Stanmore will receive a free
copy of ThumbsPlus 5 from Cerious Software. |
| |
|
| |
|
| |
|
| |
|
| |
|
| |
|