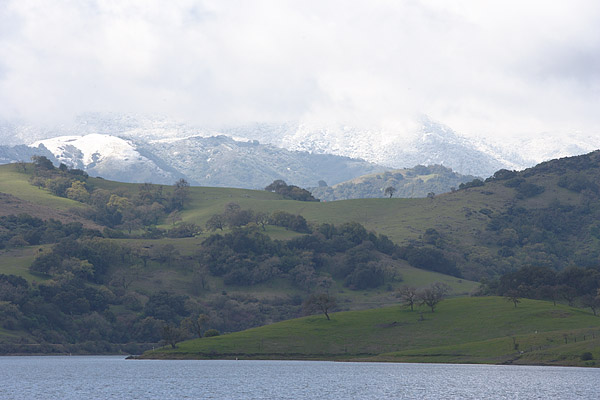
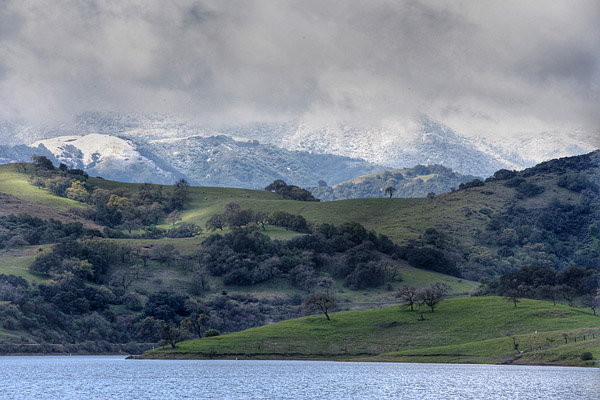
#01 Antonio Dias
1 - Duplicate layer
2 - Apply Shadows/Highlight correction:
Shadows: Amt 69% Tonal Width 50% Radius 38 px
Highlights: Amt 38% Tonal Width 50% Radius 79px
Color correction -60 Midtone contrast +25
3 - Create curves layer: 28:22 118:130 144:162 196:200 (Luminosity
Fade)
4 - Reduce bicubic to 600 px wide; sharpen
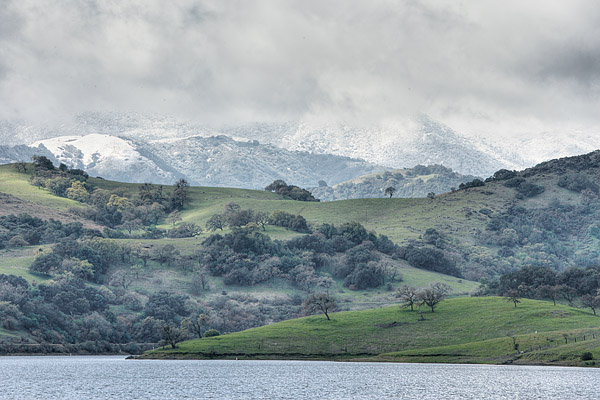
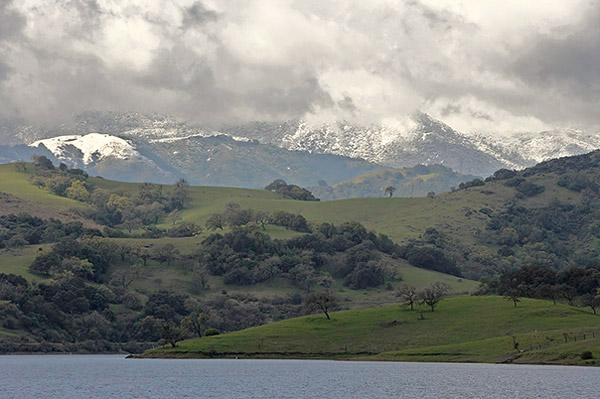
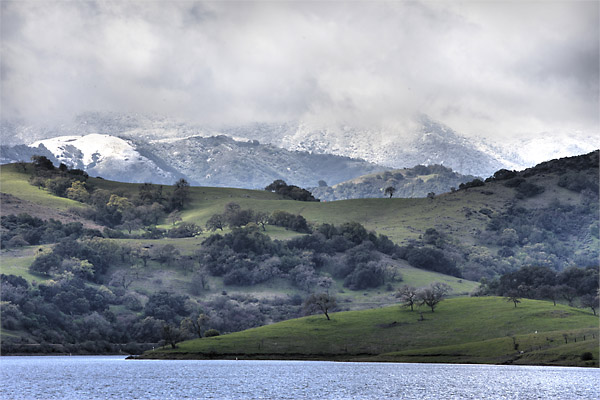
#02 Fabio Riccardi (architect of LightZone)
Fabio wrote: "There are three different levels that I can see in the
image, the lake, calm, the vegetation with the dark and light areas
and then
the
mountain
rising towards the bright clouds.
What I really like is the darker areas,
where the vegetation is thicker. These trees are old, keep secrets,
something sleeps there. I did not feel like waking it up. I tried
to respect the original and not overdo the adjustments.
What I tried to pull out was the detail in the trees, the light on
the hills. The original had a blueish cast which I removed, and tried
to recover detail in the clouds."
- Edited in LightZone (you
can even download
the LZN file from here
and check the image with a free demo version of LightZone). This
is a good experience for anybody. In this case the workflow is
100% documented inside the LZN file.
Fabio got my permission to use this image for a tutorial. Even if
you do not use LightZone his comments are useful for all photographers.
Note: Remember these contests at Digital Outback Photo
were created with the goal to share ideas and visions about handling
digital photographs.
There is often no right or wrong but all our readers help you in your own ability
to create photos that match your personal style. If we give Fabio here
some extra coverage than this is because he provides extra useful help
and not because we find his solution better/worse than other ones on
this page. Only you are the judge what you like or not.
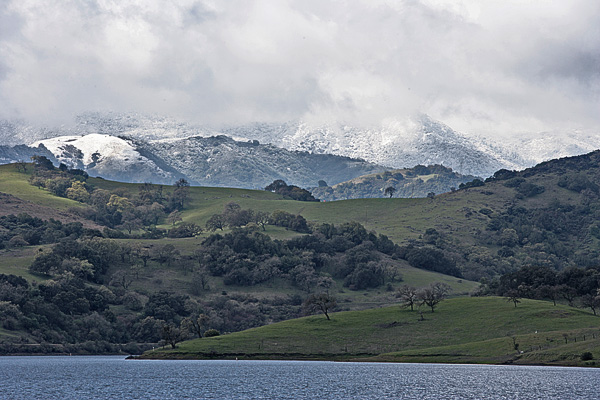
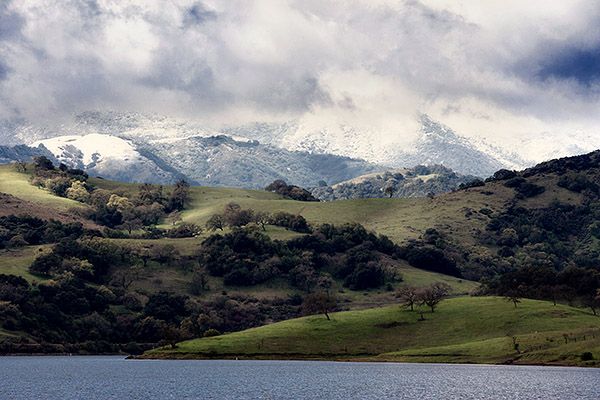
#03 Sam Briggs
1. Used Exposure command in Photoshop at -3.00 and used
Save As... tosave a copy.
2. Opened the copy and the original in Photomatix and generated an
HDR image.
3. Used Tone Mapping feature at 60% setting--increased color saturation--MicroContrast
on high.
4. Returned to Photoshop and did some selective dodging & burning.
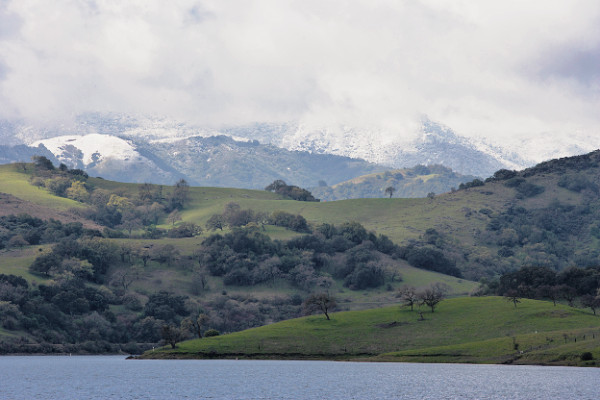
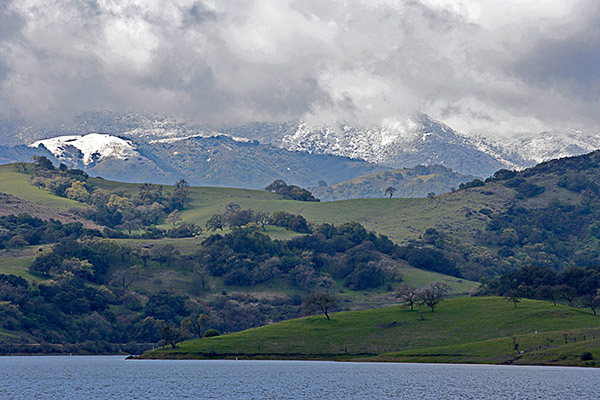
#04 Dick Barbour
1. Convert to LAB
2. Select Lightness channel
3. Image/Adjust/Shadow-Highlight, decreased highlights to bring out
detail in clouds
4. Select all channels
5. Image/Adjust/Curves:
a. Lightness channel, steepened curve to add
contrast to mountains
b. A channel, steepened curve to separate colors in green areas
c. B channel, steepened curve with emphasis toward the yellow to
decrease blue cast
6. Convert to RGB
#05 Ed Verendus
1. Light chanel curve adjustment on the cloud in lab
mode.
2. Selective color to adjust the colorbalance [local adjustment]
3. Curve adjustments for greens and blues
4. Dodge and burn on the hills
5. Unsharpmask 20/30
#06 Ian scholey
shadow / highlights
25 76 108
44 51 30
curevmeister lightness adjustment on
duplicate layer at 50%
slight yellow desate to tone down the green's
unsharp mask 20 50 0 at 65% on dup layer
spot healing to remove dust bunnies ;-)
#07 Dieter Bethke
I changed the mode of the downloaded file to 16-Bit,
in oder to be able to apply a Tone Mapping with the Plug-in "Photomatix
Tone Mapping" within Photoshop. Settings are provided as
XMP-File.
For your interest:
Luminosity=-7
Strength=52%
Color Saturation=80%
Whitepoint=5.0% (max)
Blackpoint=1.040%
Smoothing=medium
Microcontrast=high
Afterwards I dodged&burned the sky,
|