| Digital Outback Photo - Photography using Digital SLRs |
|
 |
|  |

|
 |
|
Profile your Camera with "inCamera Professional"
review by Uwe Steinmueller |
|
As long as we launched this magazine we always used all digital cameras only in RAW mode. We know this is more work but the only way to get the maximum quality from your camera. If you work with RAW files then you will need to use a RAW conversion software. Most of the time the RAW conversion software will be developed by the camera manufacturer (although Bibble and Qimage are two very popular exceptions). Unfortunately every RAW conversion software has a different view on how the colors should look like. It is like buying a camera and only can use it with a certain kind of film (e.g. Velvia). With digital cameras you probably like to get the color a close as possible match to reality. If you then like more saturation or different colors then Photoshop and it's many plug-ins is the right tool at hand. It is easier to start the image manipulation from a neutral point than from colors which were already messed up (green is the #1 problem color for all nature photographers) |
| How to get color correct images? |
| The answer seems simple: you need a camera profile. But be aware that often not only a single camera profile will do as every profile is strictly only valid under the same lighting condition (which can be much more controlled in a studio than outdoors). |
|
Otherwise the process to create a camera profile is always the same:
|
| GretagMacbeth ColorChecker |
 |
|
The GretagMacbeth ColorChecker is established as an industry standard for profiling purposes. It now comes in two variations:
There is some discussion which of the targets works better. The DC version seems to have some glossy patches which can add reflections and can be counter productive. We only use the standard version as it is also not as expensive as the DC one. The ColorChecker has beautiful matte colors which look very much like real nature colors. These colors seem to be a really good representation of the colors in the outback world. |
| Photograph the Target |
|
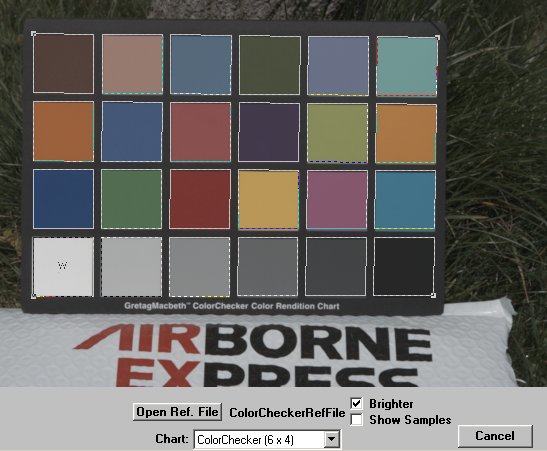
We photograph the target at sunny midday light (as you can see in the top photo). You then process the RAW file in a standard well defined way as the profile makes only sense for images which gets processed in the exactly same way. We always set the WB (white balance) to "sunny" to have a well defined reference point. We also recommend only to use 16-bit TIF images because it is a general rule that you always want to stay as long in 16-bit mode as possible. Only switch to 8-bit if you need to use tools which are not supported for 16-bit and gain try to use those as late in the process as possible. We will later discuss the issues using linear RAW files. |
| Create a Profile with inCamera |
|
"inCamera" is a product by Pictographics. Pictographics is also well known for its Photoshop plug-in iCorrect. If you also have a look into the inCamera profile editor that you can see how inCamera and iCorrect use same technology. inCamera is available for PCs and Macs (we only used it on a PC) |
| The creation of a profile with in camera is very easy (takes about a minute). |
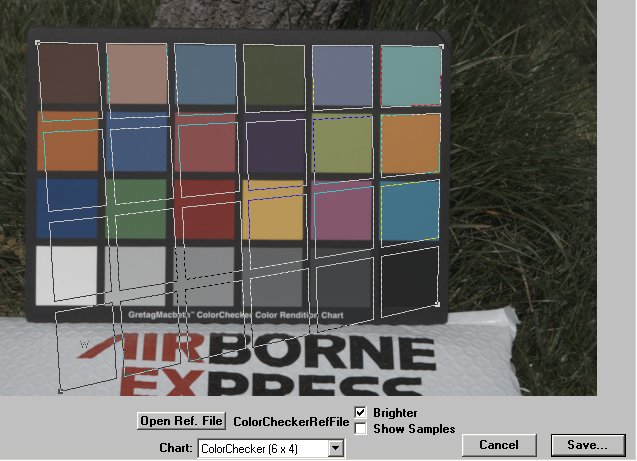 |
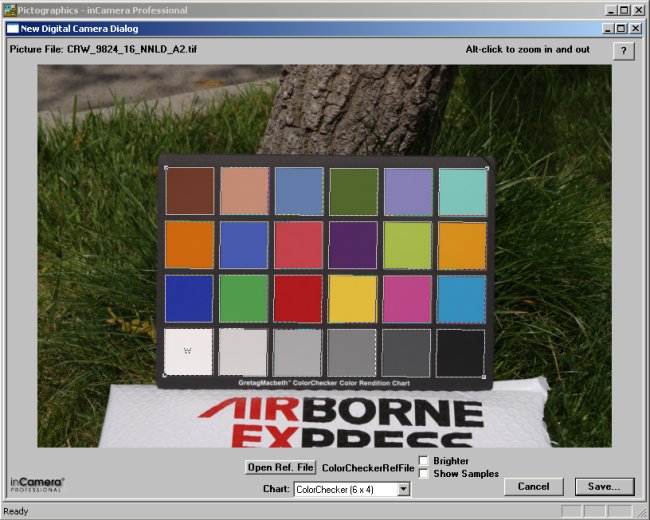
| You select "Profile->New->Digital Camera" in inCamera, open the test image, select the right chart type (in our case 6x4 the standard ColorChecker) and you will then see a mesh on top of the photo. It takes some seconds to fit the mesh exactly to the color patches. |
 |
| Now you are ready to save the profile information. inCamera will save the profile in an own proprietary format. But don't worry you can then easily export the profile to a standard ICC compliant format using the "Profile->Export" functionality. |
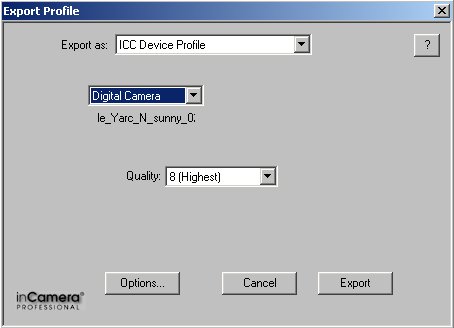 |
| Export will place the ICC profile into the right folder for system profiles. |
| Using the Profile with Photoshop |
| The use of the profile in Photoshop depends on the RAW converter you use. |
| a) No profile attached to image |
| Applications which don't tag the image with a profile(e.g. Canon software). If you have setup Photoshop properly you then will get the following dialog: |
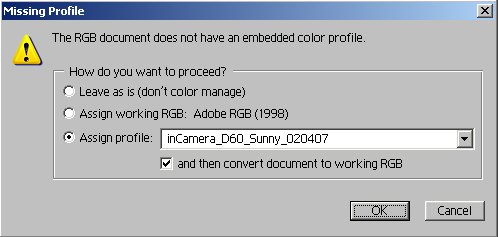 |
| You just assign the custom camera profile to the image and convert it to your working space. |
| b) Custom profile attached to image |
| Some applications (like YarcPlus has this nice feature) allow you to tag the image with the custom camera profile and you will then see the following dialog: |
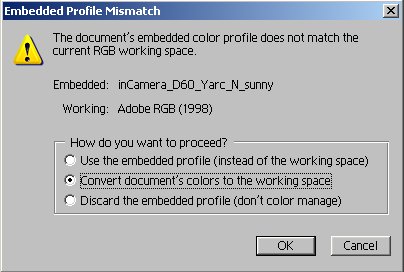 |
| Just select "convert to working space" and you are done. |
| c) Some other profile attached to image |
| Applications like Qimage and Nikon Capture attach a profile to the image we will not use with our custom profiles. Please understand that this is actually a very good behavior by these application as they state a well defined profile for the resulting images. |
|
But we ignore the profile and perform the following two steps (best done in a PS action):
|
| Sounds all like a long description but can be done in a short period of time. |
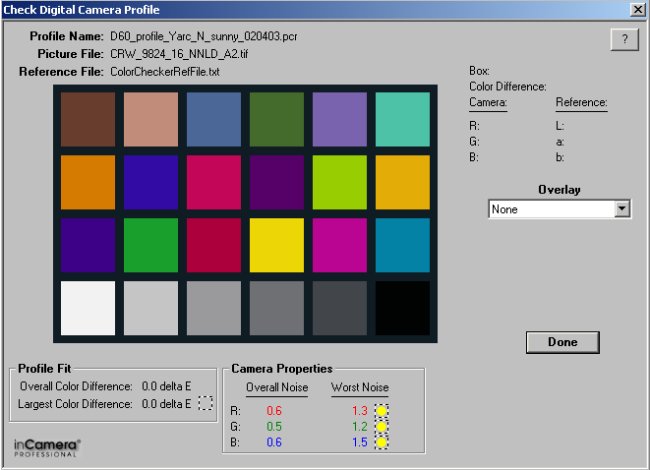
| More features of inCamera |
|
There are a lot more features in inCamera:
|
There is even an other tool called ColorCircuitQ where you can use batch convert images and even remove some noise (see below). We did not use this tool extensively as we like to use Photoshop as much as possible in our workflow. |
| Generic vs. Custom Profiles |
|
Probably the best results can be obtained creating custom profiles for all different light conditions. Sound complicated but is not. Just make one image of the ColorChecker at the same location with the same light. On the other side we believe that even the generic profile created at sunny light works very well and is a great improvement compared to not using any profile. |
| Linear or not Linear |
|
Using linear converted RAW files might be ideal way to proceed. But in some case (e.g. using YarcPlus for noise removal) working with regular converted files seems to be a better choice. We think it has to be decided based on all the tools you use in your workflow what works best. |
| Boosting up contrast |
| Sometimes the results can look flat (especially working with linear files). Still it might be closer to reality than other over saturated images. If you need more contrast than use curves like these: |
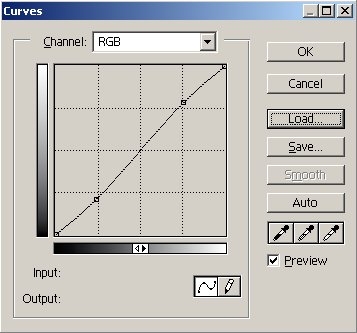 very low boost 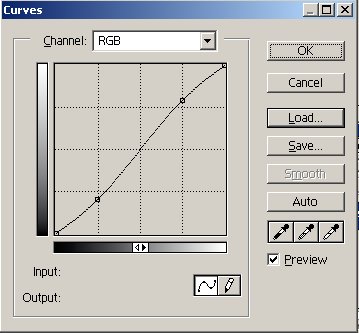 medium boost 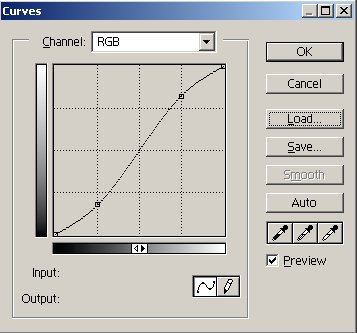 strong boost |
| These curves come also handy at other times. We have them saved on our disk and just load them back. |
| Conclusion |
|
We have used inCamera with many (more than 200) Nikon D1x, Canon D60 and Kodak ProBack RAW files and found the results much more pleasing in color than using the manufacturers results. We hardly can say how much we are excited about using camera profiles. There are still many issues to check:
|
| The price point of $475 is quite high but if you want to get the color more correct than this is a way to go. |
|
Other Reviews:
|
| For Comments post in our News Group |