|
 |
|  |

|
 |
Workflow Technique #018"Improving Saturation and Contrast"
article by
Uwe
Steinmueller
|
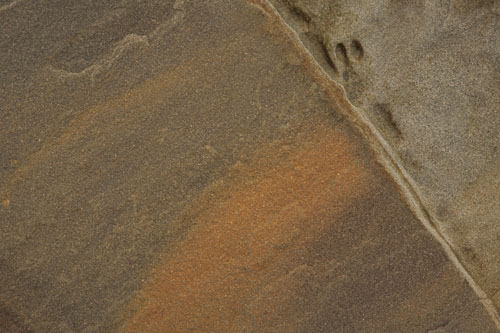
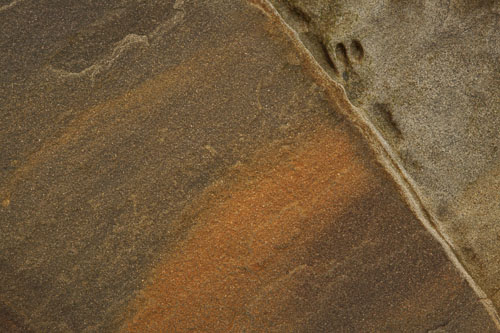
As all photographers know there is rarely something like the "right light". Especially for our recent work called "Earth Frames" there are the following choices:
From these alternatives we favor the "overcast". Best would be a very light overcast so that the light is like an optimal light box. |
|
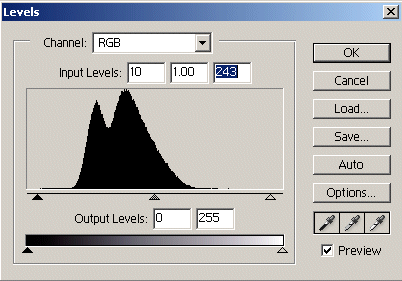
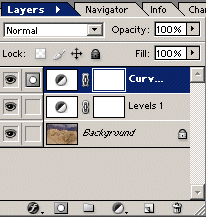
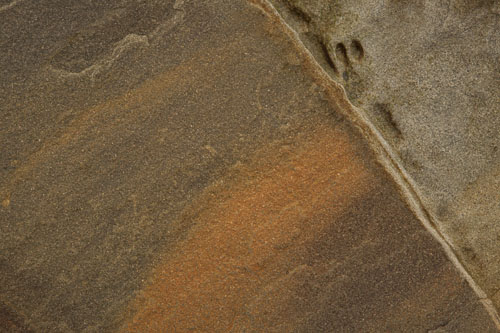
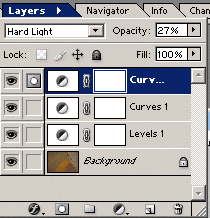
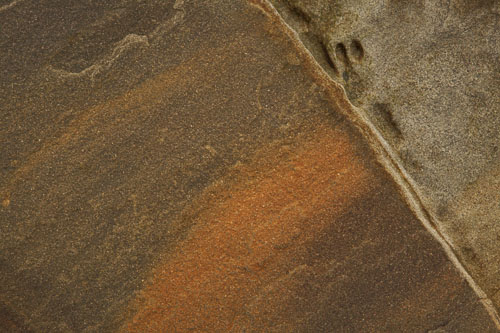
We will most likely get some flat images right from the raw converter. Yes, we could tweak it in the raw converter but prefer to do this work with layers in Photoshop That way we can revisit all our changes and improve them later. The first step is most often an adjustment layer using "Levels"
As you can see we did not move the white point that much as the photo would get too bright and also does not contain real white details.
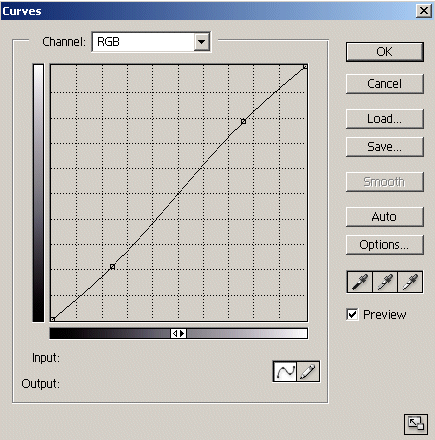
Now we increase the contrast using some S-Curve in a Curves adjustment layer.
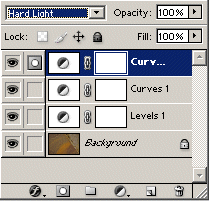
S-Curves tend to create a slight color shift that can be removed by changing the blending mode of the layer to "Luminosity" (the change is subtle and best you try everything yourself).
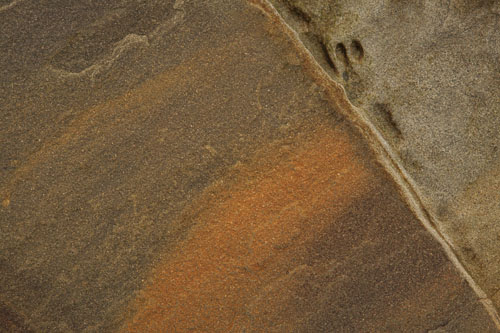
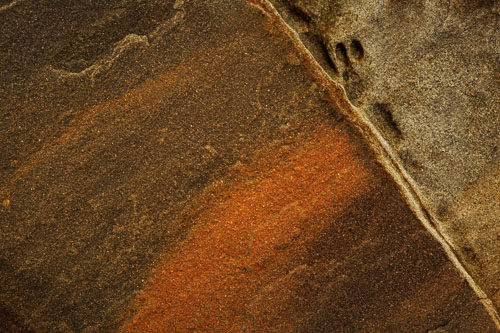
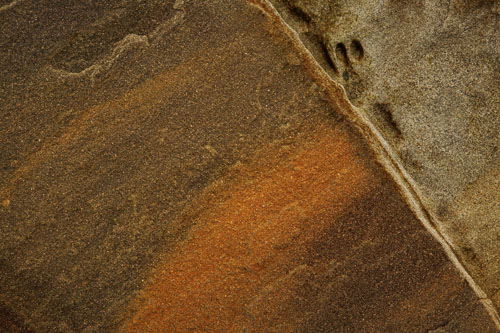
There is still the desire to increase saturation and micro contrast. There are many ways to go. We want to explore a technique outlined to us by Katrin Eismann (author of "Photoshop Restoration & Retouching"). Using an adjustment layer with "Hard Light" blending mode Create a new Curves adjustment layer and change blending mode to "Hard Light".
Kind of obvious that this is not what we want, right? Don't worry, the right selection of the layer opacity allows us to tone the effect down to a more pleasing level.
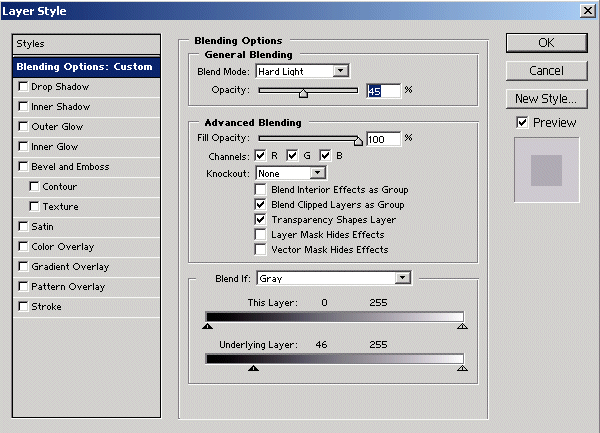
There can be a problem using this technique, the shadows might get to dense. As we use a Curves adjustment layer we could use curves to control the impact on the shadows. But there is a more elegant solution. Open the layer's blending options and move the left slider for the "Underlying Layer" to the right. Now below 46 the values are not effected anymore.
This is still not what we want as the transition would be visible. But there is more. If you look carefully you see that the tiny triangle sliders are split. You can separate them by using the ALT key and moving the right part of of the triangle to the right. Voilà:
Now all shadows below 52 are protected from our "Hard Light" layer, then there is a smooth transition zone up to 85 and finally the layer effect is fully visible above 85. Variation with "Soft Light" You can do the same using the "Soft Light" blending mode. This time the effect is less dramatic.
Be careful that your photos don't get
too punchy. Also photos directly contrasted with strong saturation photos
look even flatter than they are. This is one reason that natural saturated
photos are received as flat because we are bombarded with to many over
saturated photos today (the heavy metal of photography). |


| For Comments post in our News Group |