"Flat" stitching with shift
lenses
Normal stitching is done best with lenses rotating
around the nodal point of the lens. Some photographers (e.g. Jim Collum,
Paul Calwell and me) prefer to do so called "flat" stitches
with shift lenses (using mostly tilt/shift
lenses but the tilt is just an extra feature here). Why do we do this?
We believe that we need no major corrections as the film plane and
the lens stay parallel. How to stitch in Photoshop images that are
created this way (3 shots: shift left, middle, right) is covered in
some detail in our ebook DOP2000 (technique
used by Jim Collum). But unfortunately this technique has a major flaw.
How about Parallax?
If you would use a view camera you would keep the
lens in place and move the body (film plane) instead. This way there
are no parallax. But moving the lens instead (with your shift lens)
creates parallax that can be painfully visible at shorter distance
and on straight lines.
Here is a sample image to illustrate artifacts from
parallax from Jim's article "High
Resolution Stitching: Sinar and Canon 1Ds".
Fortunately we came up with at least two solutions
(I may even get the credit here).
Solution #1: The Really Right Stuff focusing rail
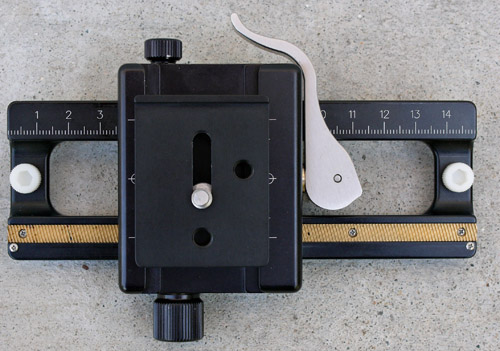
The basic idea is simple: If you move the lens to
the right you move the camera body for the same distance
to the left. This way the lens virtually was has not
moved. How to do this? We mount the camera on
the RRS focusing rail and shift the body (the mm scale helps here
a lot).
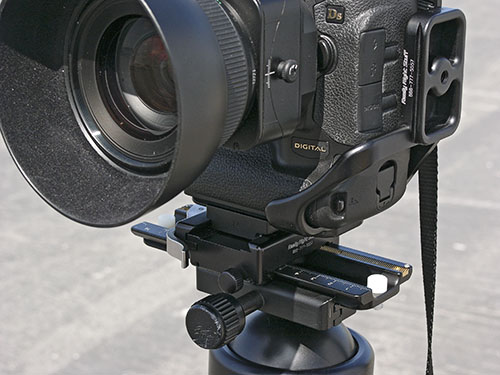
Especially with Canon T/S lenses this
is pretty easy as they shift 11mm from the center to either to the
right or left.
Here is the process (assuming a Canon
T/S lens will shift 11mm ):
1. Compose the image by shifting left
and right
2. Shift lens to the left, position
the camera on the clamp at 4.1cm and take picture 1
3. Shift to the middle, position
the camera on the clamp at 3cm and take picture 2
4. Shift to the right, position
the camera on the clamp at 1.9cm and take picture 3
Note: The camera may kind of slightly
twist due to the geared rail. You better push gently on the right side
of the camera to avoid this effect.
Look here for the RRS Focusing
Rail. Although this is a very nice solution
we actually use method 2.
Solution #2: The marks on the Really
Right Stuff L-Bracket
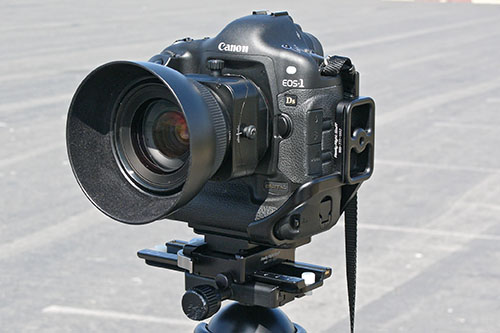
For using the T/S lenses for stitching
we all use anyway a RRS L-Bracket. So our friend Jack Flesher came
up with a great idea. He made marks on our L-Brackets. Actually only
2 as the third is assumed to be the edge of the bracket (the marks
are all 11mm apart).
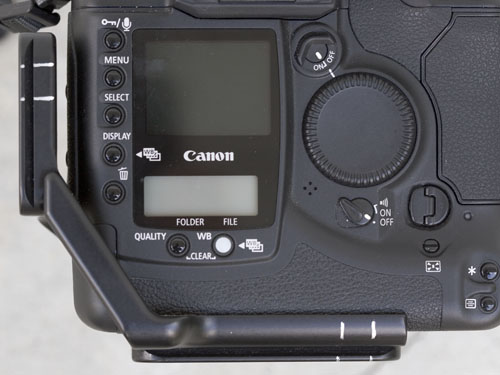
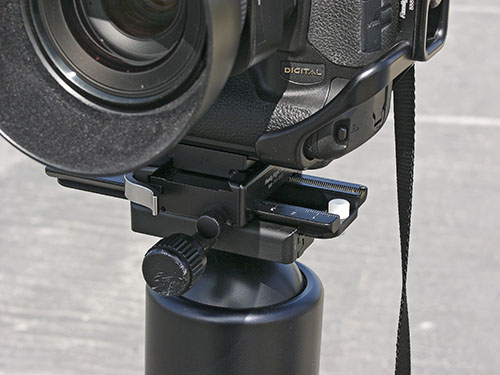
Here is the process (again assuming a
Canon T/S lens will shift 11mm):
1. Compose the image by shifting left
and right
2. Shift lens to the left, position the
camera to the left mark and take picture 1
3. Shift to the middle, position the
camera to the middle mark and take picture 2
4. Shift to the right, position the camera
to the right mark and take picture 3
Note of caution
Because you have to loosen the
clamp be sure that you lock the camera again safely! You
are warned! Actually it works very well with the RRS quick release clamps.
Look here for the RRS
L-Bracket.
Jim Collum and I use now exclusively
the method #2. Jim has done many photos this way as he nearly stitches
every single shot to gain higher resolution (about 22MP from the 1Ds). |


