This workflow session will show how well Lightroom
(our
review) and LightZone (our
review) can work together. Some
may ask why we not just do everything in Lightroom in the first place.
The
answer is very
simple:
Because
Lightroom lacks the power of selective, layer based editing this kind
of work
cannot be archived in Lightroom alone. In these cases you need either
Photoshop or LightZone. We personally like to use LightZone for all
of our B&W (and colorized) work.
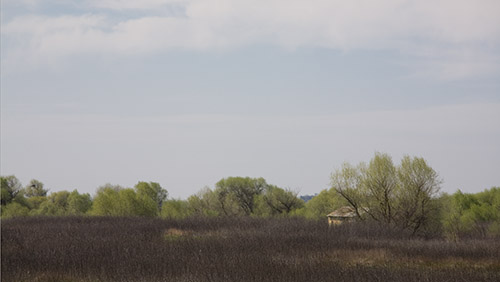
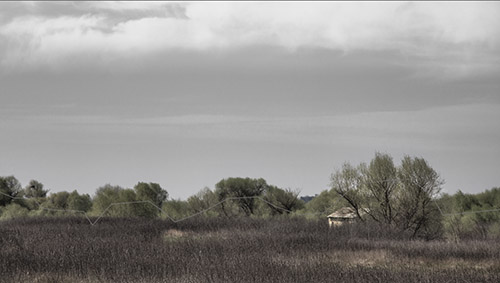
The photo we show here is now also our front page photo.
Starting in Lightroom
In Lightroom we create a soft image that does not have any clipping
in the highlights and also hardly any in the shadows.
Start from Lightroom
Because the sky was so hazy (but had
some rare CA clouds) we wanted to enhance the blue for the future B&W
work. Here are our Hue/Saturations settings in Lightroom:
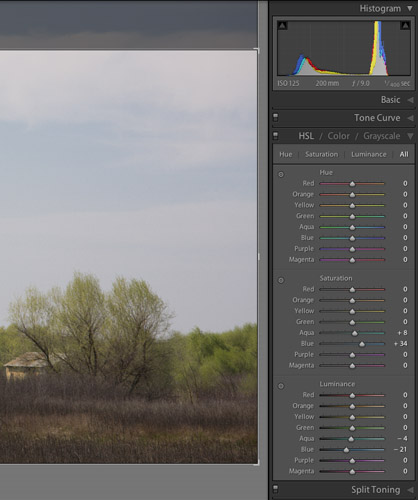
More saturation and darkening in the blue hues
If we would pull more saturation on the
blue colors we would get too much noise. Except of cropping this is
basically all (except no sharpening) what we did in Lightroom.
To use now LightZone as a second editor
we have to setup the preferences in Lightroom like this:
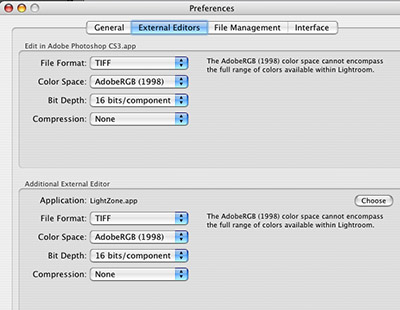
Lightroom "External Editors"
Note: we would like if Lightroom would
allow more than one extra external editor (Photoshop CS3 is default
editor #1).
To open the photo in LightZone we
need the following steps:
- Select the RAW file in the film strip
- Use the "Edit in LightZone" menu entry
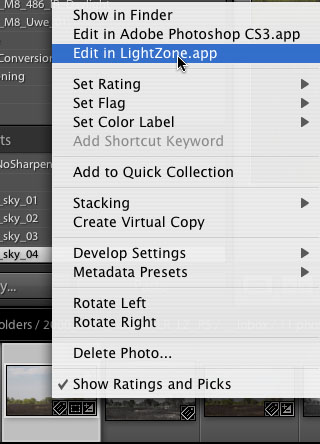
Select "Edit in LightZone"
- Select to edit a copy in the external editor (here LightZone)
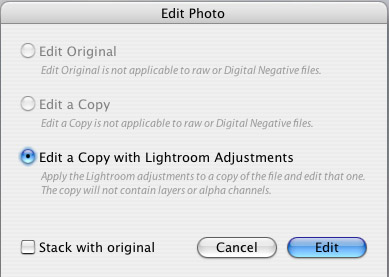
Edit with Lightroom Adjustments
Editing in LightZone
This opens the TIFF file into LightZone:
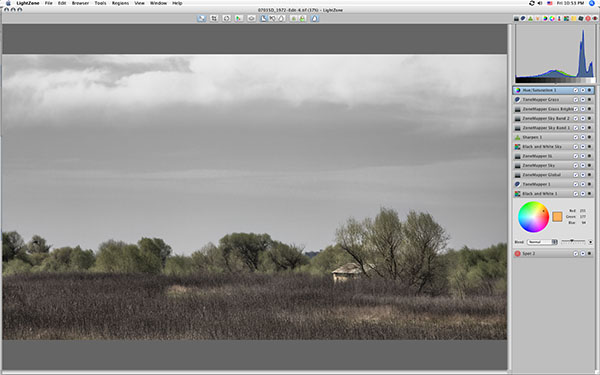
Working in LightZone (here with final layer stack)
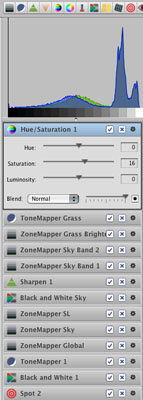
Our final Layer Stack in LightZone
We won't cover all the steps but show some essential
ones. Out goal is to create a colorized image (blend of B&W and color)
in LightZone.
1) Our sensor showed quite a few dust spots. It is your
choice where you correct them: Lightroom or Lightzone. That is why
our first layer is a LightZone spotting layer.
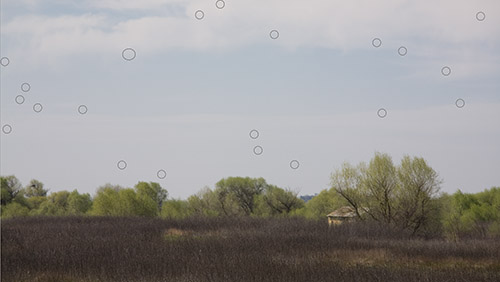
Spotting dust in LightZone
2) The next layer creates the colorized
photo:
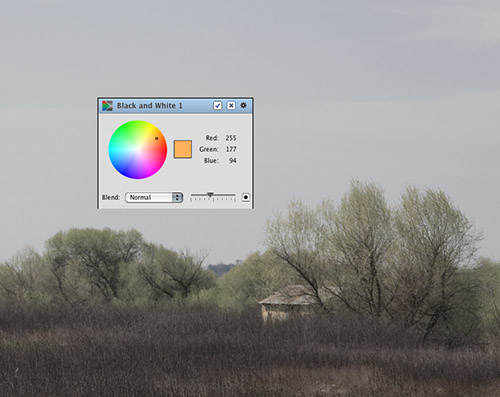
B&W layer
We create a B&W layer but lower the opacity
so that the color bleeds through.
3) We then first tune the global contrast
using a ZoneMapper and the ToneMapper.
4) The next step is to work selectively
on the sky (here normal RAW converters do not help):
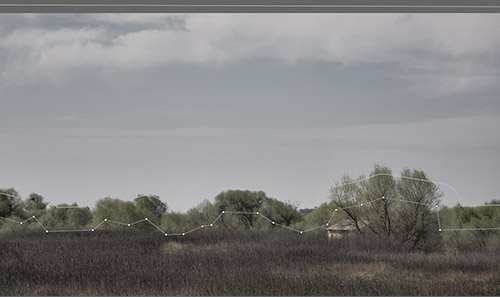
Working on the sky (via a LightZone Region and a ZoneMapper)
5) Now it gets interesting. We want the
sky pure B&W and not colorized. That is why we use a second B&W
layer but this time with a Region for the sky:
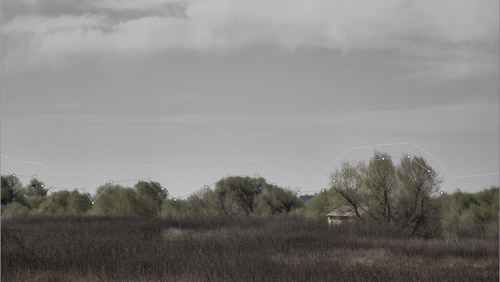
B&W only for the sky
6) Some sharpening
7) We enhance the cloud bands selectively
with 2 selective ZoneMapper layers:
Middle cloud band tuning (the other works on the top band)
8) The next two layers brighten the grass
area and add some better contrast:
Working on the grass
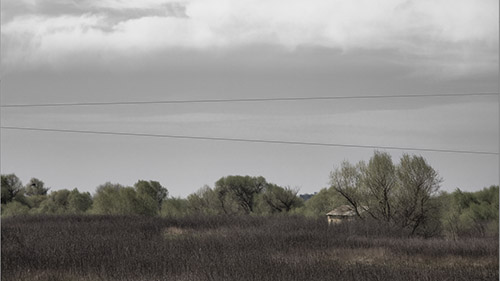
9) The final and top layer adds some
saturation
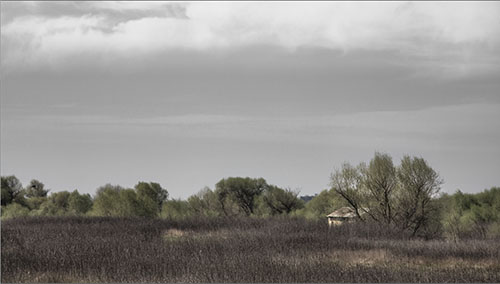
Final image from LightZone
Slightly larger version can be found
here
Now we can save the image back to Lightroom:
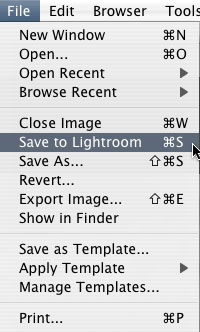
Save to Lightroom
LightZone does some tricks here. Lightzone
saves actually a TIFF back that includes these three parts:
- (#1) TIFF file at the time LightZone was opened
- (#2) The fine LightZone rendering
- All instructions in the layer stack that allow to get from #1 to
#2
This allows LightZone to keep all the information for a future fine
tuning (nothing is lost). The next time you want to update this file
you open the original file into LightZone:
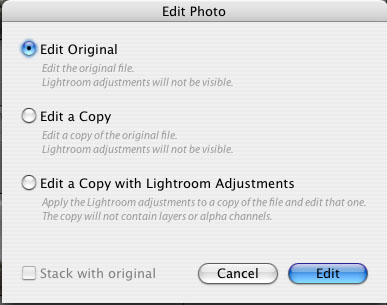
Edit Original in LightZone
This way you continue the next time in LightZone where
you finished your last editing session (do not use a copy!).
You can also find out which of your TIFF files were edited
in LightZone by checking the Metadata panel:
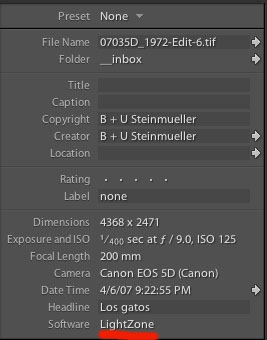
Software indicates LightZone as the original editor
Some advanced tricks
Lets assume you have edited your file in LightZone and
find out that you should use some other settings in Lightroom as your
basis. It is not possible just to exchange the base TIFF file of the
LightZone edited TIFF file. Fortunately there is an easy and powerful
technique to do the same:
- Open the first version in LightZone (see above)
- Save all layers (including regions!) as a new LightZone template
(these templates are very powerful and big time savers)
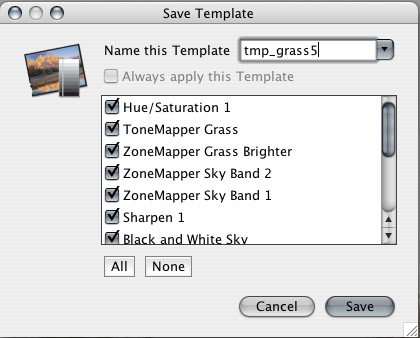
Save Template (all steps)
- Change your RAW settings in Lightroom (Develop mode)
- Open as shown in the beginning in LightZone (a new duplicate TIFF
gets created)
- Once the file is open in LightZone you can now apply the old saved
template to the new TIFF file
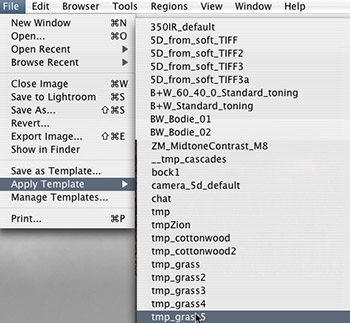
Apply the saved template
- Tune the layers in LightZone (depending of course on the changes
you made in the RAW file)
We hope you agree that LightZone and Lightroom work very well hand
in hand and that there is clearly a need to perform selective editing
on images like this one.
|


