| Digital Outback Photo - Photography using Digital SLRs |
|
 |
|  |

|
 |
|
NEF Conversion Contest 02 (closed) Moderator: Uwe Steinmueller last updated 04/22/2001 |
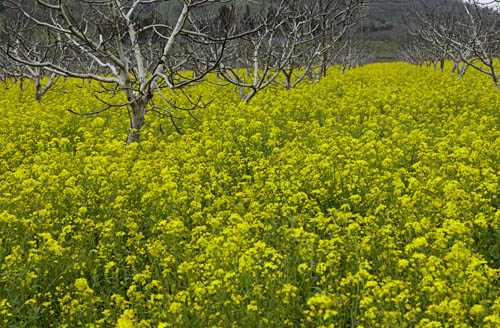 |
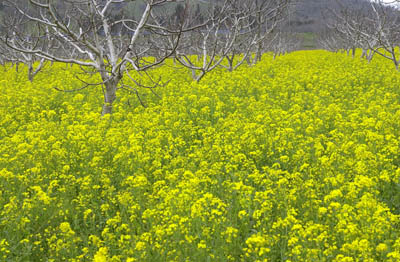
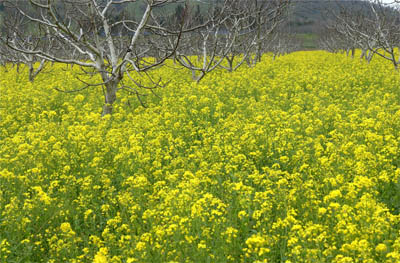
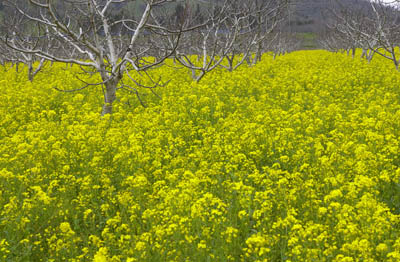
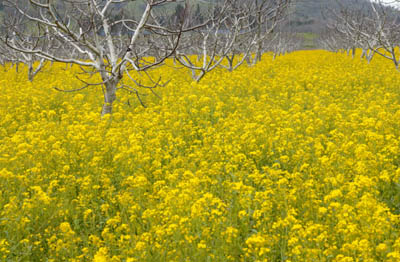
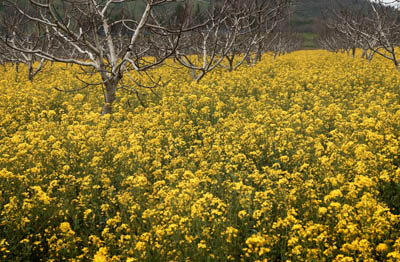
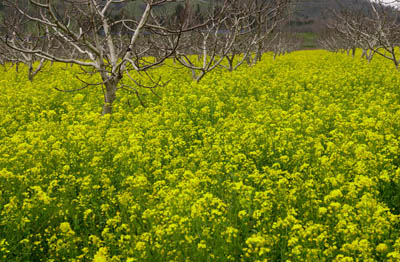
| The photo above was presented in our article "Color Odyssey". We demonstrated how different colors can be if you use NEF conversion tools and how to correct this with Photoshop. Now you can try it yourself and share the experience with others. |
| The original NEF file can be downloaded here. |
|
Before you start read the following articles:
|
| Rules |
|
| Results |
| The resulting files are available here in full size. |
| 1 |
|
A.J. deLange |
|
1. As you mentioned that the tree trunks were actually very gray, I used MacBibble's "click on white" option to do the color balance. I used a spot fairly far up the central trunk on the tree nearest to the camera. This was necessary as close to the flowers the tree trunks are quite yellow by reflected light. Color management was by ICC and the chosen workspace Abobe RGB. 2. In PS convert to Lab mode 3. Use a touch of "curves" - very little actually 4. 200 USM on Luminance channel. 5. Before curves and USM the flowers were very, very, yellow i.e. 98 - 100% saturated at 61 - 62° with brightnesses also near 100%. USM and curves desaturated this a bit so I put saturation back at 100% with +5 saturation, not that you'd get this on a print anyway. 6. Checked tree trunks. Very neutral - 1-2% saturation except on lower sides of branches and near the flowers where they are yellowish by reflected light. 7. Convert back to RGB 8. Convert to .jpg. Had fun doing it. |
| 2 |
 Tony Kurdzuk |
|
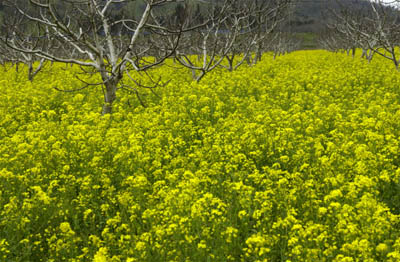
Image was processed in Bibble using new CC method color. I set a click white on one of the lightest branches of the tree and the HSV to -6 to pull some of the green out of the flowers (I assume they are really closer to yellow in color). The tone compensation was set to normal and I increased the exposure compensation to +.6 via the built-in histogram. Once in Photoshop I neutralized the color of the whitest branch on the tree by using the white eye dropper in Levels and zeroing out the a+b channels in the color picker (I have found the click white in Bibble to be close but rarely dead on). I also dragged the black slider in to where the histogram starts in the R and G channels. Next I brightened the image slightly in Curves (moved the output from 128 to 140). At this point the flowers still seemed too green to me so I used Selective Color to remove 3% Cyan and add 3% Magenta to the yellows (again, this is my best guess as to the actual color of the flowers). Finally I applied Unsharp Mask at 200%, 0.3 radius and 2 threshold, then faded the USM to the lightness channel. This is my standard USM setting for printing on my Epson printer at 10" wide. |
| 3a |
 Seth Rossman |
|
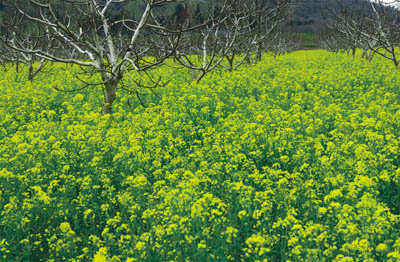
The photo didn't leave much of a place to get color information, so it is pretty subjective. There are so many shades and varieties of "gray," the tree bark was iffy, so I felt cloudy was a better choice in Bibble (using the old CC method). I do not do AutoLevels anywhere since it is too extreme and more a graphic arts tool. The NEF said the ISO was 200, so no noise elimination or sharpening here. The Exposure Adjustment was set to +.30, just sliding the Histo to its right edge. I would have like to have seen more of an Ansel Adams approach with a little more tree top and a touch of the hilltop-- and a little swing to the right for another row of trees. It would have given a little more color to "play" with. I used my ATN for Auto Contrast (which auto levels with less color destruction) then fades it back to 75% using Luminosity. Although it was obviously a blah day, this needed some Zone System, so a very shallow "s" curve was done in curves. Before closing curves, no black value had dropped below 7, so it wasn't too extreme. Then a Purge to keep things moving at speed. Saturation is Master 12, with a slight reduction on the yellow channel. Selective Color: In the yellows just a +4 Black keeps the flowers from becoming brassy and -6 Cyan to dump the B/G from the leaves of the plants. (An 81A/KR1.5 may have prevented this.) There are some blue house trailers or something in the background that would have added a nice Van Gogh token color, but they got too posterized by any attempt to boost the color. A little deep background UV haze was removed with a Curves/History Brush routine. Using an old B&W printing technique, an 11% gradient (Color Burn) on the lower two corners added a little depth with a touch of darkening. USM was 149%,1 pixel at threshold 3. Then Edit>Fade>Luminosity. Save as JPG. |
| 3b |
 Seth Rossman |
| Seth used the same stepsdescribed in 3a except that he used the new CC method in Bibble |
| Editor's comment: As I was at the original place it is clear for me that the version 3b is much closer to the reality. |
| 4 |
|
Joern Tornow |
|
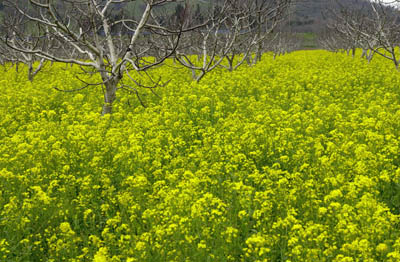
Bibble (2.4) Click-White tree trunk, Colorspace: sRGB, contrast: Low, no sharpening, no noise filter Photoshop: Perspektive Correction on the left side, Gaussian Blur: lower part, Radius: 1-4 Pixel, Gausssian Blur top part: Radius: 0.7 Pixel, USM for the trees (selection): Radius 40(!!!!), strength 30%, USM on center: Radius 0.5, strength 80% |
| 5 |
|
Kevin Wenker |
|
Image was processed in Bibble in the standard way I've established for almost all my images from the D1. 1. Shadow and Highlight under Autolevel are each set at .015, Gamma 2.2, Raw Decoder to Newer. 2. I use the new CC color method. I use ICC and proceed to test each Profile until the Histogram gives the best bell curve. In this case it was NTSC(1953)). 3. I adjust Curves to a very slight S curve. 4. I use only Unsharp Mask, Amount 250, Threshold 2, Radius Small. 5, I set White Balance to Override - Sunny at 2. I normally take all my shots at 2 or 3 (ala Moose Petersen), so I balanced this one to that. EV at -.05 just to shift the Histogram slightly. 6. I did nothing further in Photoshop. I try to avoid doing anything in Photoshop which might compromise the integrity of the picture. But that's just me, you mileage may vary. |
| 6 |
|
Jon Dokken |
|
0. Processed in Bibble Tone - Low Gamma 2.2 No Color Management No Interactive Adjustments Sharpen Low Remove Noise Low Unsharp Mask Amount 250 Threshold 1 Method Gaussian Radius Small 1. Brought into PS 2. Convert to 8 bit 3. Apply Mode - Ntsc(1953) 4. In Lab A -8 Brightness +8 Contrast B -8 Brightness +8 Contrast L +8 Contrast 5. In Cmyk Brightest spot 10C 6M 6Y 0B Darkest spot 80C 70M 70C 75B Set C M Y B midpoints to 50% 6. Unsharp Mask 200 0.4 4 7. Convert To Rgb 8. Save As Jpg Lvl 9 |
| 7 |
|
Justin Rhodes |
|
| 8 |
|
Uwe Steinmueller |
|
| 9 |
|
Bernard Rome |
|
| 10 |
|
Uwe Steinmueller |
|
| For Comments post in our News Group |