We have reviewed in the past tools like Akvis Enhancer and Photomatix Tonemapping. Both tools implement local contrast enhancements.
PhotoLift is a new plugin to enhance the local contrast. Our eyes are much more sensitive to local contrast than just global contrast. All sharpening is based on this idea. While sharpening is focused on more local edges a more general local contrast tool considers a wider range around each pixel. Some local contrast can be gained using USM with high radius and low amount (0.15 amount and 50 radius). Overall this method does not show that strong effect like a dedicated local contrast enhancer.
At first we did not show much interest into PhotoLift because it was only available for Windows and we never use Windows for our real work (has more to do with convenience than OS fanatism). Now PhotoLift is also available for Intel Macs (not PowerPC, which hurts us a bit).
PhotoLift
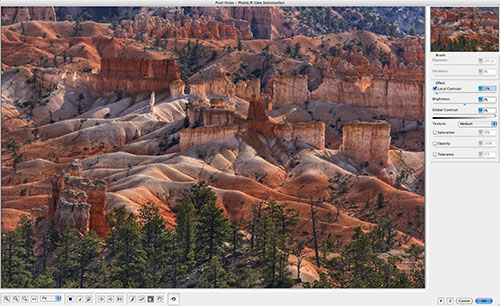
PhotoLift user interface
PhotoLift supports a paint interface. We actually only use a global operation (Paint bucket) and would do selective editing via CS3 Layer masks.
Basic workflow with PhotoLift
We always apply PhotoLift on a new layer. This way we can tune the strength later via the layer Opacity.
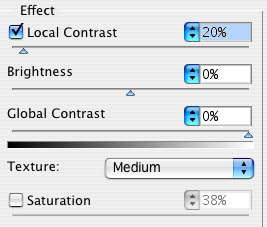
Our main settings
We use for normal pictures a local contrast strength of 15-30%. The improvement in local contrast can be subtle or very dramatic.

before
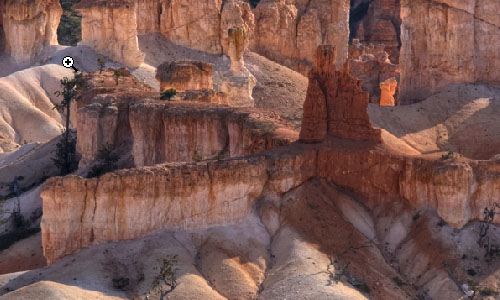
after
Even on these small screen shots you can see the difference (better try yourself).
There is one side effect of using PhotoLift: Highlights and Shadows can clip. That is why we always apply a midtone mask with our own Tonality Tuning Kit:
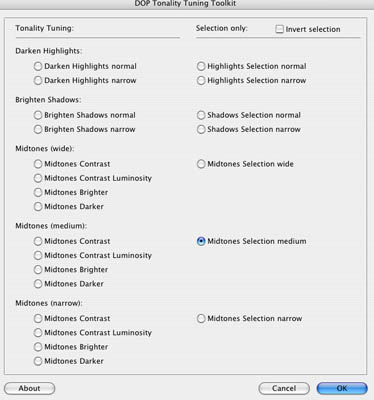
Creating a midtone mask
This way the local contrast is restricted to the midtones only and all clipping is avoided (if not present already before applying PhotoLift).
We are very pleased using PhotoLift. There is hardly any image that could not use some sort of local contrast boost. Actually we are so pleased that we go through the extra hassle to add a PhotoLift layer from our Macbook while working on our main PowerPC Quad.
"Grunging" using PhotoLift
As we stated before we use local contrast strength of 15-30%. On the other side your can have settings way over 300%. These high settings will ruin most conventional images but are just perfect for "grunging" (read more on "grunging" here).
We experiment with grunging a lot and PhotoLift is now our favorite tool. Here is one of our results (this is from a more recent photo and not just a crop of the photo in the other article):
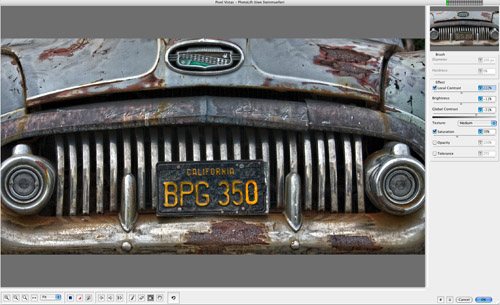
"Grunged" Car
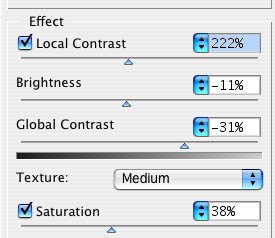
"Grunge" settings
In these cases you absolutely need to restrict the effect to the midtones (see above).
Conclusion
As of now PhotoLift is our main local contrast tool. There is still a lot to explore. Local contrast enhancement is addictive and can very easily be overdone.
Highly recommended
|


