.
DOP B&W Resolver
DOP B&W Resolver is a Photoshop CS3/CS4 script that implements a simple yet very effective B&W conversion workflow for digital color images.
Motivation
We find that dealing with contrast is one of the key elements in creating good B&W photos. Improving contrast is easy in many tools but often it can be challenging to avoid clipped highlights and blocked shadows. The DOP B&W Resolver implements a workflow that leads to good contrast without these side effects. This workflow is implemented using Photoshop adjustment layers. This means that all changes are non destructive and can be tuned easily later at any time.
Here are some extra benefits:
- Fast preview for all changes
- Lower overhead than for Smart Filters and Smart Objects (needed to use other tools in a non destructive manner)
- Full screen Photoshop preview and fast zoom
- No complex and error prone curves adjustments
Installation
The DOP BW Resolver V1.0 comes as a Javascript file for Photoshop CS3/CS4 (we only support CS3/CS4).
- Full version is named: DOP_BW_Resolver_V1.jsx
- Demo version is named: DOP_ BW_Resolver _V1_Demo.jsx
Installing the script
The script needs to be copied to the Photoshop CS3/CS4 folder and here to Presets/Scripts (or to the equivalent locations for other languages). After restarting CS3/CS4 you should find the script under File->Scripts. If you do not find it there you did not put the script into the proper location.
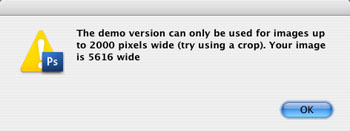
Note: The free demo version can only handle images up to 2000 pixels wide. The commercial version does not have this restriction. You will get this warning message if you use larger images with the demo version:
 \ \
Using the DOP B&W Resolver
Using the script
Using the script is simple. Run the script from File->Scripts
- DOP_BW_Resolver_V1 (or the Demo version)
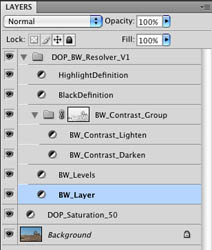
The DOP B&W Resolver does not have a user interface in the script. All control is performed in CS3/CS4 using the created layers:
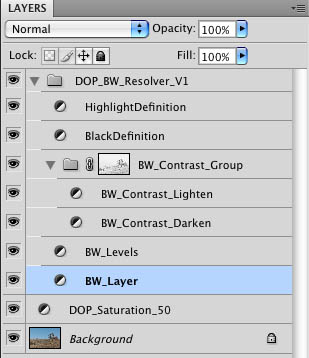
The script creates a Photoshop Layer Group “DOP_BW_Resolver_V1” with 7 layers (including one layer group). We cover all the layers and the layer group in our sample workflow.
Sample Workflow
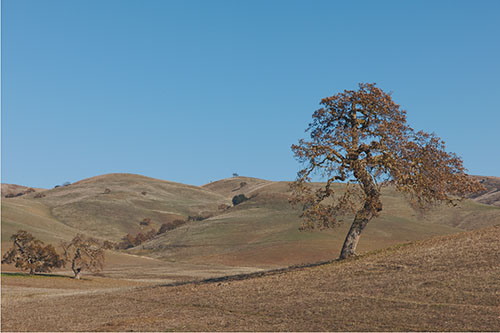
Start with a color image
You always start with a color image that is fully processed (means would be a good or at least ok color image). Without:
- Blocked shadows
- Clipped or harsh highlights
Running the DOP B&W Resolver script
The layer group will be created on top of the current top layer or layer group.
Note: If the top layer is a Layer Group it must be collapsed.
Run the script from File->Scripts.

You see an initial B&W image and the layer stack is like shown above.
Our tuning of these layers starts at the bottom layer and moves up the layer stack.
Note: The script uses some Curves adjustment layers. There is no need to change the curves. All is controlled via opacity settings of the various layers.
BW_Layer
This layer converts from color to B&W using Photoshop’s B&W adjustment layer. Always leave opacity to 100%. We will revisit this layer later again. Right now leave it as is.
BL_Levels
You nearly always need to modify the settings for this layer.
 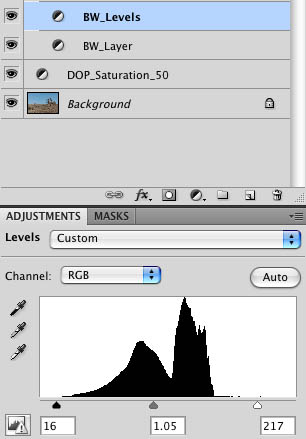
Adjust the following Levels settings:
- Black Point (left triangle): That you get a good black level but no blocked shadows.
- White Point (right triangle): Again get good highlights but never clip the highlights.
- Gamma (middle triangle): get the brightness into the ballpark
BW_Contrast_Group
This is a core part of the workflow. This layer group controls the contrast. The generated mask (this mask is crucial) prevents that the contrast boost clips highlights or blocks shadows.
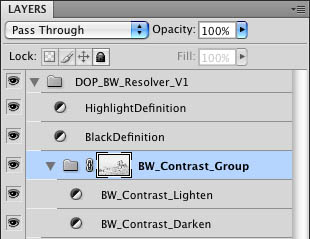
The contrast can be controlled using the opacity in three different ways:
- Opacity of the group: controls the overall contrast (best to use the opacity of the other two layers)
- Opacity of the BW_Contrast_Lighten layer: Controls the brightening effect of the contrast boost
- Opacity of the BW_Contrast_Darken layer: Controls the darkening effect of the contrast boost
BlackDefinition Layer
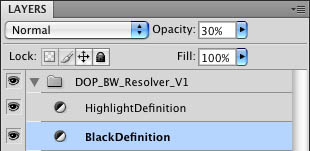
The opacity of this layer is 30% by default. The idea is to give the dark shadows a black push. Watch that the shadows don’t get blocked. Use the opacity to get a good black definition but still don’t get just black shadows. This of course very much depends on your image. If you get too dense shadows you should open the shadows on you color image. Watch your Photoshop histogram all the time (needs to be updated to be correct).
HighlightDefinition Layer

The opacity of this layer is 30% by default. Again find the right balance in boosting the highlights while not making them too hot. Watch your Photoshop histogram all the time (needs to be updated to be correct).
Read this article by George Barr "Get Those Highlights Right, and Shadows Too". It helps to judge shadows and highlights (we use this all the time).
BW_Layer
Now it is time to revisit the BW_Layer. This layer allows you to fine tune the color/grayscale mapping.
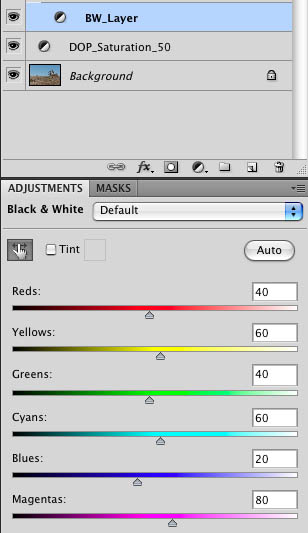
You can either use the different sliders or the TAT tool:
-
 icon in CS4 icon in CS4
- in CS3 the TAT tool is always active with the B&W adjustment layer
The Photoshop Targeted Adjustment Tool (TAT) allows you to select an area with your cursor and correct the colors with your mouse:
- Move to the left: darkens colors like the one at the cursor position
- Move to the right: brightens colors like the one at the cursor position
Note: avoid extreme settings because this can cause posterization or extreme noise
Iterate over the current settings
The whole process is about iterating over the various settings. Nothing is cast into stone because even after saving the file all settings can be changed later (of course you should not flatten the layers if you want to stay open for changes).
Final Image

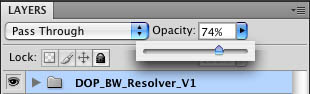
Colorizing
Colorized images are a blend of the final B&W version with the original color image. This is very easy to archive by lowering the opacity of the global “DOP_BW_Resolver_V1” group.
Best you try this all yourself using the Demo version.
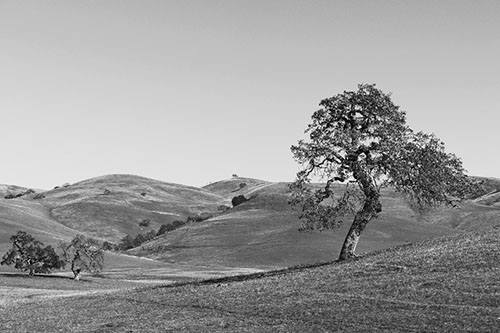
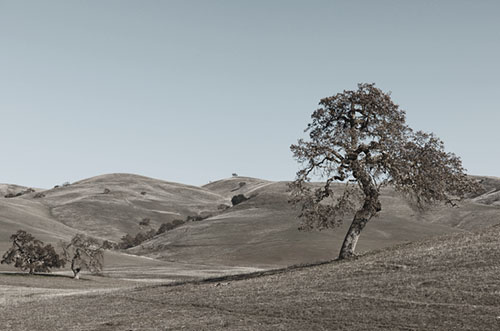
Sample Images
For each image it took about one minute to find the right settings.
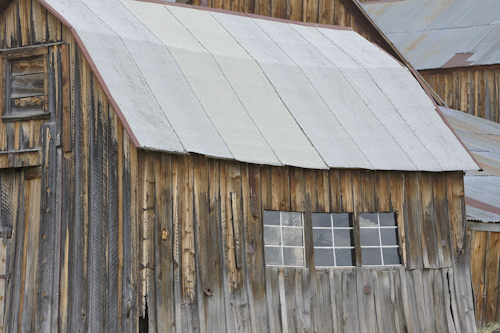
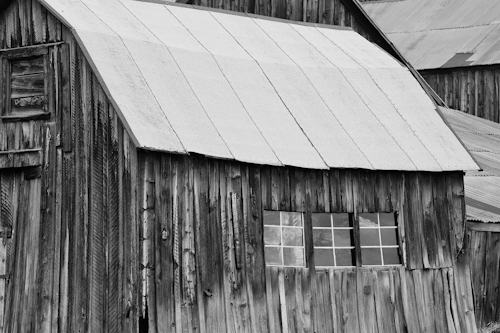
Bodie
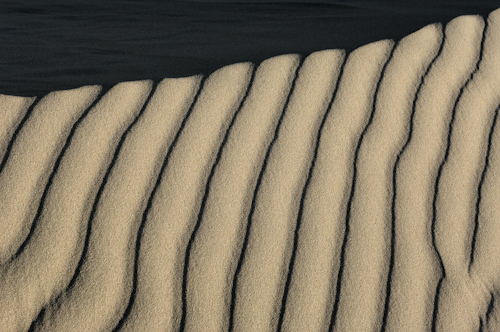
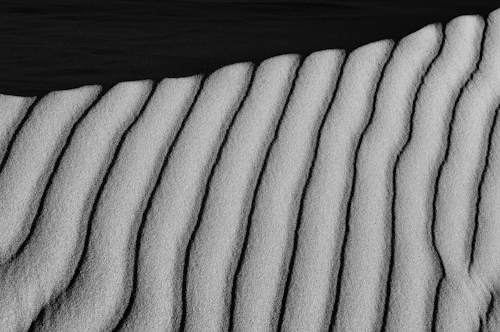
Dune Pattern

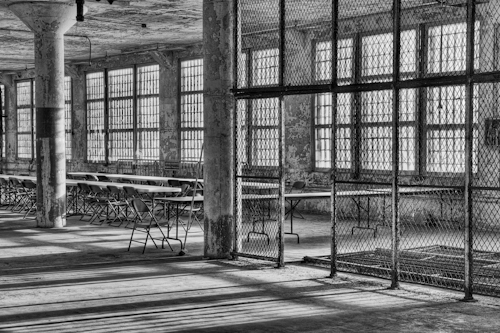
Alcatraz
|