Last year Nik Software introduced the innovative new B&W plugin Silver Efex Pro (our review). This article features our use of Silver Efex Pro.
There are so many options in SEP (Silver Efex Pro) that you want to be sure to be able to tune some of the settings later. If you just run SEP on a normal new layer you won't be able to re-edit the settings later. Fortunately since Photoshop CS3 so called Smart Filters allow just that. We show with an example how to work with SEP as a Smart Filter.
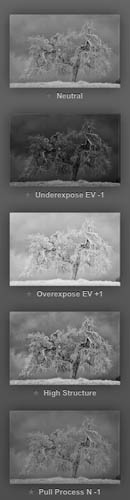
Sample Workflow
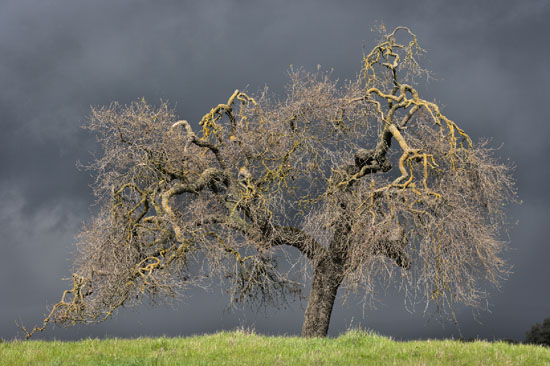
Oak in Storm
You start with a color image that is fully processed and could hold its own. Sometimes we find it useful to have it slightly over-saturated. This often allows better color separations. We have the color image as a single layer. Because Smart Filters only work on Smart Objects we need to convert the layer into a Smart Object.
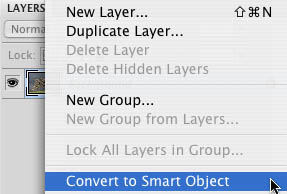
Convert Layer to Smart Object
The layers palette shows the new layer as Smart Object:

Smart Object
Once you have a Smart Object SEP will act as a Smart Filter on this Smart Object. A Smart Filter stores all the settings used so that it can re-create the same settings the next time you open the Smart Filter. This allows a fully non-destructive workflow. The downside of Smart Objects is more memory and higher disk usage. Overall this is well worth the effort.
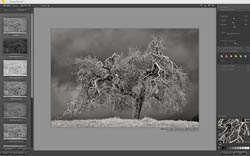
If we have the Smart Object selected, call SEP and it will automatically act as a Smart Filter (there is no extra step needed). We now launch SEP from the Photoshop Filter menu.
Silver Efex Pro user interface
We won't cover all options of SEP but rather show some features you should pay attention.
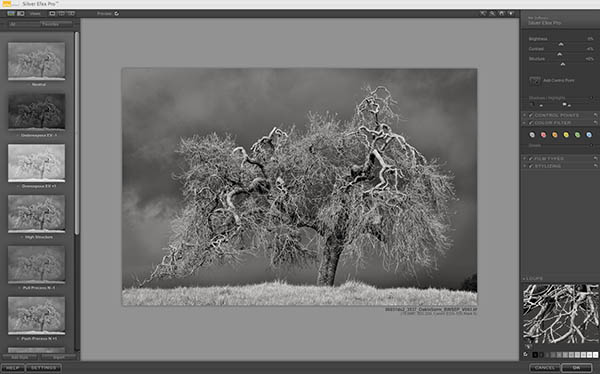
Presets
When you are new to SEP you need to find the best B&W style that fits your taste and images. The best way is to explore the existing SEP Presets:
Presets
Once you found a Preset that is close to what you like start fine tuning it to your taste. Once you like the settings save them as your own Preset. We actually also add some versioning information to the Preset name (e.g. V001, V002). This helps you to evolve your presets to the point of perfection. If you work on more than one computer you can export and import presets to exchange the settings. You can also update your Presets.
Brightness, Contrast & Structure
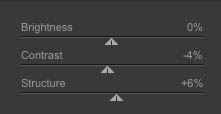
These are some key tuning parameters. Brightness and Contrast are quite obvious. Structure is something special. It improves midtone contrast and detail (see an example later). We often use negative values for Contrast and Structure to get more smooth B&W images.
Color Filters
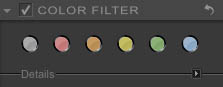
It is often helpful to check whether the Color Filters improve the B&W.
Color Sensitivity
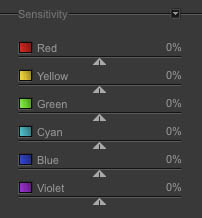
Color Sensitivity helps to improve the separation of colors in the B&W image. if you find some new settings for Sensitivity it maybe a good time to create a new Preset.
Tone Curve
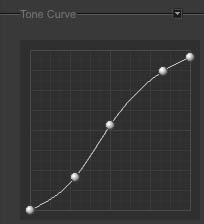
The Tone Curve allows you to fine tune the global tonality (mainly Shadows and Highlights). Again new Tone Curves may call for new Presets.
Grain
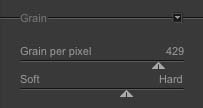
Grain is not only a (nice) relict from the old film days. It can provide the picture with some interesting texture. There are also cases where the Grain can hide/heal posterizations in the sky and other smooth areas. Better to print the images to judge the Grain. Grain looks often much stronger on the screen (especially at 100%). The Grain feature in SEP is special as it recreates the whole image from grain structures and is not only a simple grain overlay.
Toning
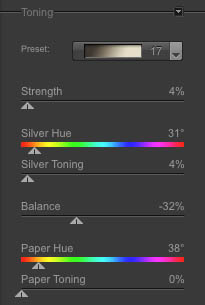
Many photographers (us included) want the images split-toned. Best you test the toning on real prints as it often shows stronger than on the screen (the settings above show our toning right now). It is worth to spend some time just on finding your favorite Toning.
Control Points
This is again a unique feature in SEP. As far as we know this is the only B&W plugin that has builtin support for Dodge&Burn. Bases on Nik Software's U-Point Technology it allows very sophisticated image tuning. Best you read our review on Nik Viveza to better understand this technology.
In our example we wanted to provide the oak bark with more structure (detail) without adding any harshness to the rest of the image:
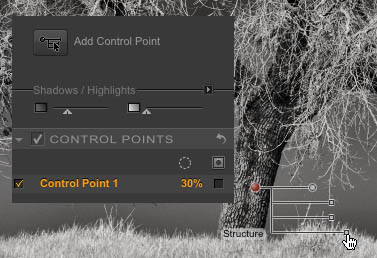
Note: What is not shown is that we also added Control Point to the sky (all at default values) to protect the sky from any changes.
Once you like the result click "ok" and you are done.
SEP will now show up as a Smart Filter in the layers palette:
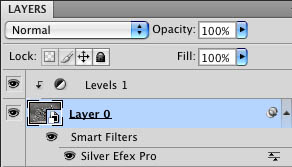
SEP as Smart Filter
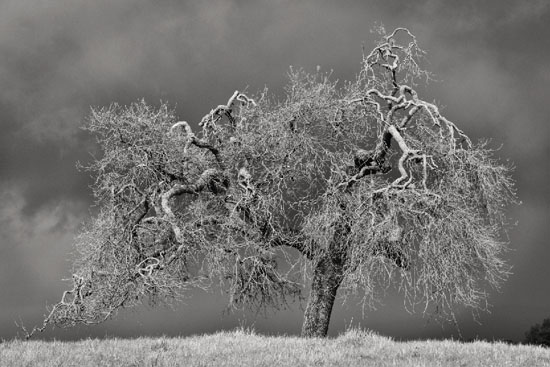
Result after SEP
Further possible fine tuning
Any Adjustment Layer on top of the Smart Object preserves the non-destructive nature of this workflow.
Now what:
- Want to change the SEP settings
- Want to make some changes to the underlying color image
Want to change the SEP settings
This is easy. Just double click on the SEP Smart Filter entry and SEP opens up with the last settings you have used. Any new changes will be saved and stored for future tuning. We often want to add new Control Points to fine tune the result.
Want to make some changes to the underlying color image
We often want to change some aspects of the original color image:
- Dust spots and other disturbing elements we did not see earlier
- Some sort of geometric corrections (e.g. "Skew")
In this case you just double click on the Smart Object layer and the original color image shows in a second window. Remove the dust or change the geometry and save the results back ("Save" and not "Save as" needs to be used.). Once this is done the original B&W image will reflect these changes. Saving is kind of slow because the Smart Filters have to be rendered on the changed color image.
Conclusion
The full power of Silver Efex Pro can be experienced as Smart Filter. We work now on nearly all of our B&W images this way because non-destructive editing allows us to improve our B&W photos over time.
|