Digital Outback Photo
- Photography using Digital SLRs


Digital Outback Photo Contest #005

Raw Conversion Contest #3 using a Kodak 14n Photo


  There will be no prize this time.


Rational:

This contest is about sharing experience and there are hardly wrong results. Of course we all have different opinions on how to see a scene and how to present. Feel free to discuss the merits of the different entries in our news group.

In case of some outstanding result we might ask our sponsors for a special prize, but do not count on it.


See also our


These were the early times of raw conversion for the new generation of digital SLRs. We now have many cameras at the 6 megapixel (MP) level and even with the Canon 1Ds and the Kodak 14n above 10MP.

To share experience it is not enough just to show the results. We need precise step-by-step descriptions of all image editing operations that had been performed. That is why we need to limit the used tools to the ones that are available at Digital Outback Photo (and they have to be available for PC or Mac):

  • Photoshop (this is the standard image editor we use)
  • Kodak Photo Desk, dcraw (Adobe Camera Raw will open the file but does not support the 14n)
  • Other tools (if the tool author provides a free full working copy to Digital Outback Photo)

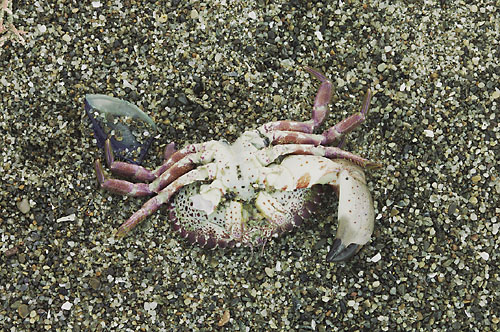
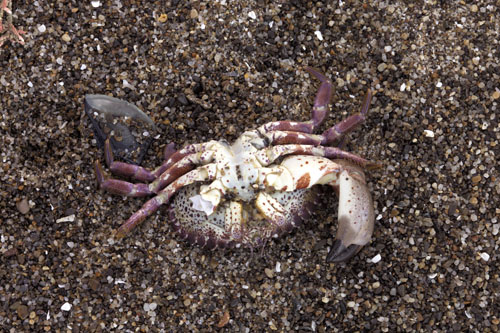
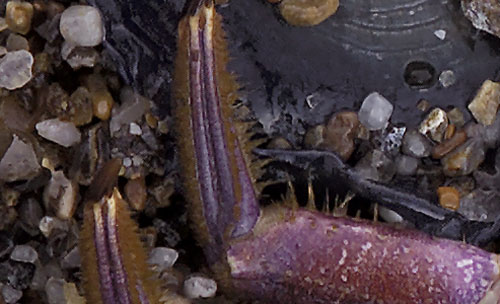
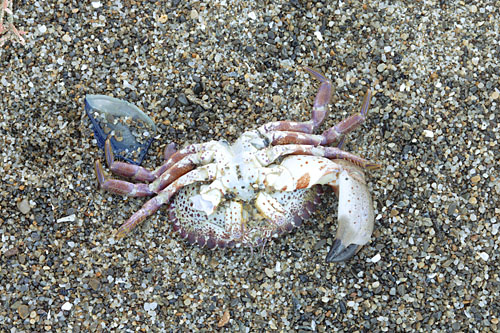
This photo was taken with the Kodak 14n and a Nikon 105mm Micro lens (1/4 sec and f/16)

Rules:

  • Image should not be cropped
  • All preparation should be done for a normal inkjet print and not for web presentation
  • Color Space: Adobe RGB
  • You load the full raw image (copyright Bettina & Uwe Steinmueller) (Link removed)
  • You make the best out of it and fully document all steps (try not to be too complex as this makes our life difficult)
  • You then resize the resulting file to 500 pixels wide at JPG 8 compression in Photoshop
  • Also send us the same crop (500x300) at 100% pixel level as shown below in the sample entry
  • Do not forget to include the full instructions
  • We need be able to perform all steps ourselves following your instructions
  • We may reject entries without any further notice if they get to complex, the tools are not at hand or we see major quality issues.
  • Send images and instructions to: contest@outbackphoto.com
   
  Note: As all photos should be in the Adobe RGB 1998 color space it is recommended to download interesting samples and view them in Photoshop on a profiled monitor.
   
   
  Sample Entry (by Uwe Steinmueller)


  • Converted with Photo Desk 3.0
  • Some brightening with Curves
  • Midtone-Sharpening in Photoshop (a new modified version, we will publish it soon)


  #1 John Hill


  • In photodesk no sharpening and noise reduction at lowest possible level
    • click white balance on the whitest part of the crab shell
    • exposure compensation of -0.3E
  • In Photoshop 7
    • Auto levels
    • Unsharp mask (Amount 56%, Radius 2.0, threshold 1.0)
    • High pass filter in new layer in overlay mode


  #2 Antonio Dias


  • Converter: PS7/Adobe Camera RAW (Temp: 6100K, Tint: -18)
    Note: all other ACR parameters left at default.
  • PS7 Processing:
    Curves: 0-0, 50-46, 139-149, 201-208, 255-255
    USM: 20,20,4
    USM: 50,0.3,0 (3 times)

Note by the editor: Camera Raw opens the 14n files but there is no official support from Adobe for the Kodak 14n because there was not enough time for testing and calibration. Every user may use Camera Raw on it's own risk.


  #3 Pter K Burian


  • In Photo Desk 3: White Balance click ; Exposure Compensation at -0.4; Sharpening at 10/1.0/2
  • In PS 7:
    • Levels adjusted: Input 0/1.06/239
    • Color Saturation: +9 in Reds, +9 in Magentas and +9 in Yellows; Blues lighten +34
    • Color Balance: +7 Red in mid tones only
    • Contrast +5
    • Unsharp Mask, 50/0.8/2 - Applied twice!


  #4 Nicolas Eertmans


  • Use David Coffin’s dcraw freeware to convert the RAW file to a 48bit Photoshop file. No command line option used.
  • Open in Photoshop (and assign AdobeRGB as working space)
  • Levels:
    • Click on “Options…” and select “Enhance Monochromatic Contrast”
    • Move the midtone slider to the left until the middle “input levels” box read “2.2”
  • Increase the saturation by 50%
  • Apply an Unsharp Mask filter with amount=200, radius=1 and threshold=0


For Comments post in our News Group

© 2000-2007 Digital Outback Photo