| Fine tuning of your images costs at least as much work
as getting the image into the first shape. Our DOP
Tonality Tuning Kit was a first set of plugin and actions that help to get the image into
a final shape. These routines look simple but yet these really help for
what they are designed: Fine tuning.
Comparing is a powerful tool to optimize color, brightness, contrast,
saturation and more. There is a nice tool in Photoshop called “Variations” that
guides you through a sequence of image variations.
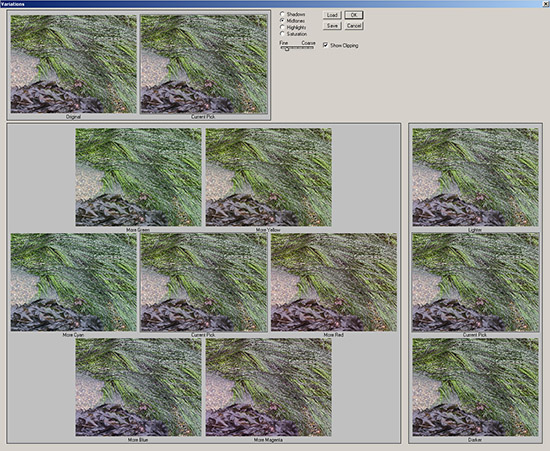
PS Variations
Nice tool but with at least major shortcomings for real fine tuning:
• Pictures are way to small
•
Once confirmed the change is cast in stone and cannot be edited (would
be nice to make it an adjustment layer)
•
Not easy to customize
When our friend Brad Hinkel brought “Ring - Around” to
our attention this got us thinking about a better method to use variations.
Our goals were:
• Use the full Photoshop image to compare
•
Have different comparison patterns
•
Correct in iterations
•
Leave all corrections in adjustment layers (nothing cast in stone)
•
Preview before and after at any time
•
Easy to customize
•
Not waste too much disk space
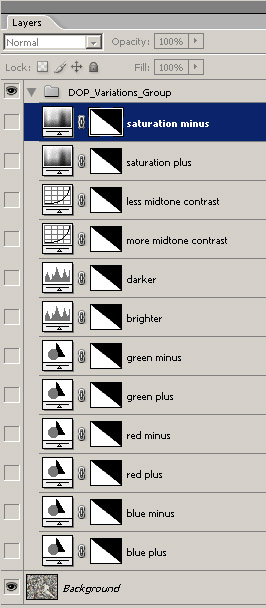
Introducing "DOP Variations"
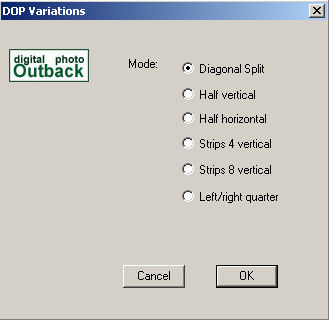
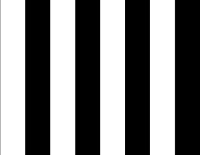
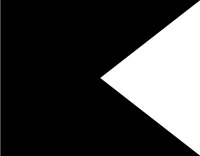
This dialog won't show on the Mac. But all 6 different masks can be
created using our actions.
As many good ideas it is actually very simple. The plugin creates
adjustment layers with layer masks that are used to compare before/after
scenarios. Here are the masks you can select:
The last two masks will be used for the “Left/right quarter” option
and provides an alternative method to compare.
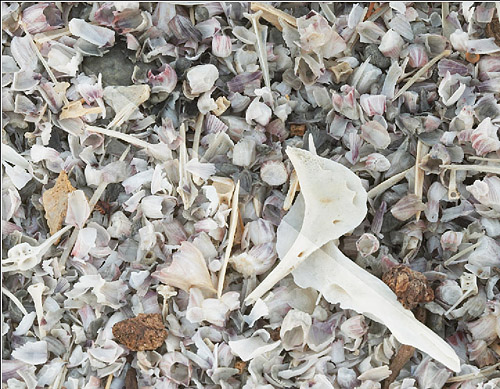
Introduction
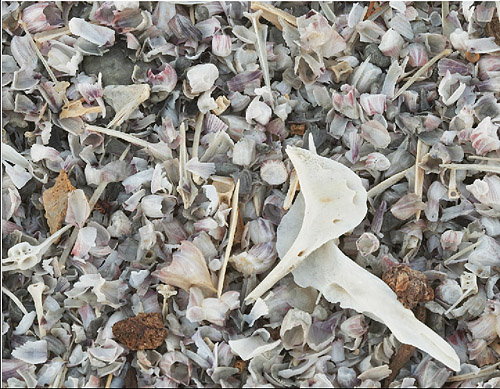
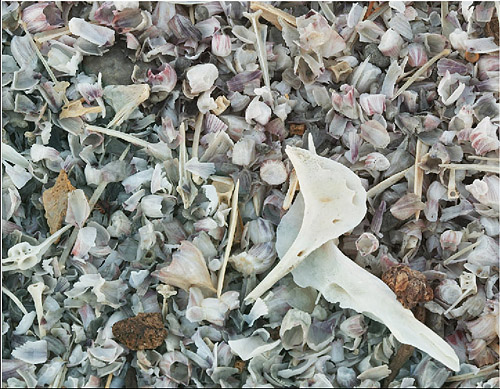
We will use this image also in our full correction workflow.
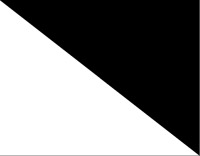
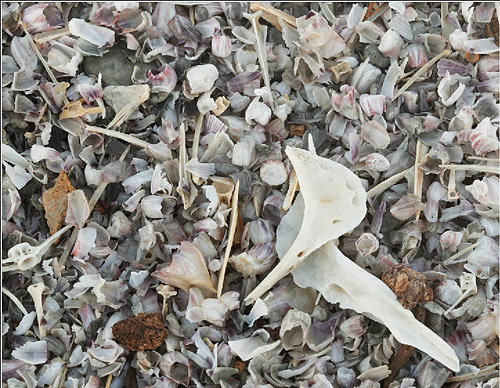
Let’s assume you use the mask #1 (“Diagonal Split”)
then the action “DOP_Variations_Layers” will create a layer
group (set) with layer masks that use mask #1. It would be like in
the following image.
The goal of the mask is to provide a help that you can see the difference
from before and after. As we will see later the Adjustment Layer can
easily be tuned using opacity to reduce the brightening effect. The
full benefit will be shown in our next full example, Here we just want
to provide some information how this toolkit in principle works.
You will say that these masks can be easily be created by hand. This
is true but still we would like to avoid the manual work over and over
again.
The full optimization workflow: Method 1
We again start with the original file (we provide a smaller crop of
this file for your own tests as part of the demo and full version).
This time we use the supplied action called “DOP Variations
Layers” and use options 1-6. This will create the following layer
structure:
The plugin together with the actions create a Layer Group (before
CS2 called Layer Set) with all layers disabled. We get 12(14 to 18
are possible) Adjustment Layers:
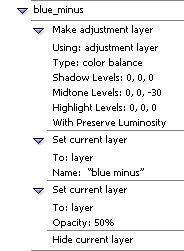
• Blue plus/minus Color Balance (+30/-30 at 50% opacity)
•
Red plus/minus Color Balance (+30/-30 at 50% opacity)
•
Green plus/minus Color Balance (+30/-30 at 50% opacity)
•
Darker/Brighter Levels (0.8/1.2 midpoint at 72% opacity)
•
More/less midtone contrast S-Curves (at 80% opacity)
•
More/less saturation (+20/-20 at 75% opacity)
•
Warmer/Cooler (Photo Filters at 50% opacity) Note: not shown in screen
shots)
The goal is now to inspect each of these pairs of corrections and
to find out whether the picture benefits from one of these corrections.
Sample #1 Darker
We enable the “darker” layer and see the following image:
We can now tune the opacity of this layer to darken it as much as
we like (probably less darken). If we are happy with the result we
disable the Layer Mask:
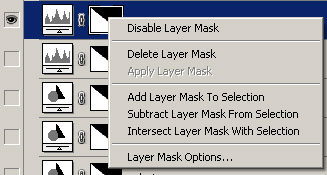
and get the following layer structure:
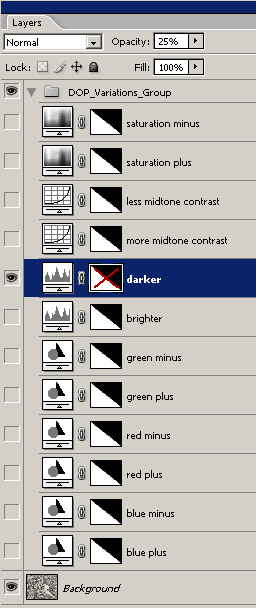
Now “darken” with opacity 25% is applied to the full image.
Also we can check the global effect at any time by enabling/disabling
the complete layer group.
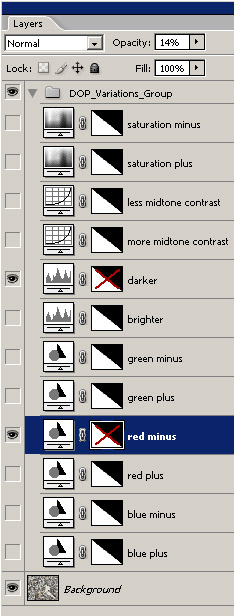
Actually we perform these tests for each of the layers. In many cases
we see right away that this sort of correction may not make sense.
We found that “red minus” could be useful.
But not at the default opacity of 50%. The following layer structure
shows what we settled with (14%):
Best you try it all yourself with the provided test crop and then
with some of your own images. You maybe surprised.
The full optimization workflow: Method 2
Method 2 works like method 1 but allows you to see two alternative
corrections at the same time (which you may find helpful too). Call
the action again but now select method #6“Left/right quarter”:
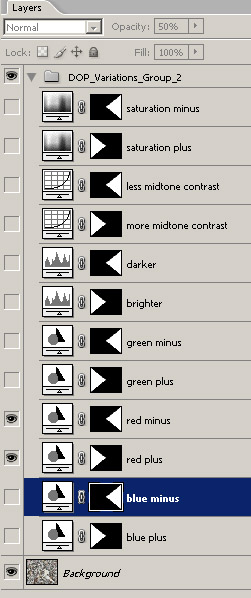
Here you see how the two corrections “Red Plus” (left
quarter) and “Red minus” (right quarter) are shown at the
same time. This way you can see easily that “Red plus” is
probably not the way to go.
Otherwise method 2 works exactly like method 1.
Tuning the helper actions
There are exactly 9 pairs of actions.
• “red plus” / “red minus”
•
“green plus” / “green minus”
•
“blue plus” / “blue minus”
•
“blue plus” / “blue minus”
•
“brightness plus” / “brightness minus”
•
“contrast plus” / “contrast minus”
•
“sat plus” / “sat minus”
•
“warm plus” / “warm minus”
•
“extra1 plus” / “extra1 minus” (empty by default)
•
“extra2 plus” / “extra2 minus” (empty by default)
You must not change the name of these actions as they get called from
the plugin (callback actions). But you can customize the actions if
you like and even add new layer types by customizing the “extra*” actions.
Here is how each of these callback actions is structured:
Each of the callback actions normally performs 4 operation:
• Create some sort of adjustment layer (this will then use the
masks created by the plugin)
•
Name the layer
•
Define the opacity
•
Hide the layer (or not if you want it active by default)
By customizing the callback actions you can:
• Change the actions (opacity, name of the layer, visibility,
settings of the adjustment layer)
•
Disable step in some actions (do not remove the actions though)
•
Add up to 2 pairs of own layers by using the “extra*” actions.
Conclusion
Let us revisit our design goals:
• Use the full Photoshop image to compare: can use all PS magnifications
•
Have different comparison patterns: yes
•
Correct in iterations: see our workflow above
•
Leave all corrections in adjustment layers (nothing cast in stone):
yes
•
Preview before and after at any time: enable/disable the layer group
•
Easy to customize: yes
•
Not waste too much disk space: no real issue (see below)
The last point needed some verification. We tested it on a full Canon
1Ds Mk. II file (16.7 MP):
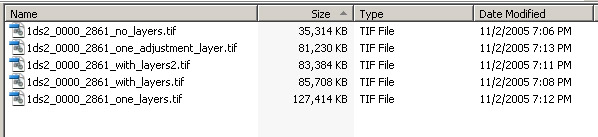
Image without any layers: 35MB
Image with a single adjustment layer: 81MB
Image with the full layer group: 85MB
This means the overhead is significant if we don’t use layers
at all. But because layers are the way to go for fine tuning anyway
our base size is at 81MB. In this case we have about 4-5 MB overhead
and this means no more than 5% more than the minimal size for just
one adjustment layer.
We hope you find this workflow helpful. Now you
can decide to roll your own actions or just buy our DOP Variation
plugin.
Thanks to Brad for thinking out of the box.
|