Recently late at evening I just
wanted to try a plugin called "Photomatix Tone Mapping" and the result
was a short night. Once in a while I get carried away to explore the
possibilities of a new tool and Photomatix Tone Mapping (PTM) is one
of those tools.
We write this as a diary as we expect future new samples
and insights. What can PTM can help to do?
- Open up shadows and show details
- Tone down highlights and again show more details
- Show more local contrast which again translated into showing more
detail
How does PTM work?
The PTM plugin is based on the HDR (High Dynamic Range) tool Photomatix
that allows to work with and create HDR images (HDRI). So PTM either
starts with a 32 bit HDR image or creates one from a 16 bit image.
This is
not the place to get into the whole HDR technology as I am only interested
what PTM can do to normal images that not start as HDR (you may want
read this HDRI
FAQ). This means you get best results staying in 16
bit until you use PTM. But
we even
got good results by converting 8 bit images to 16 (this is of course
not recommended).
Interesting enough at least two readers used this tool in our
latest contest (one used the Photomatix application
and the other one used the plugin).
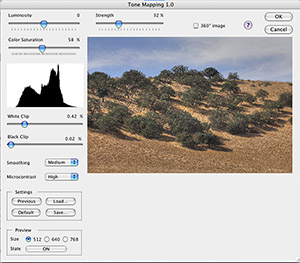
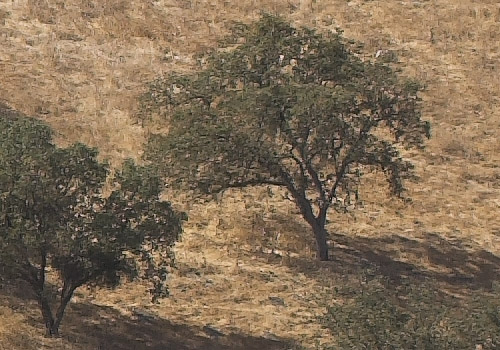
A real world sample
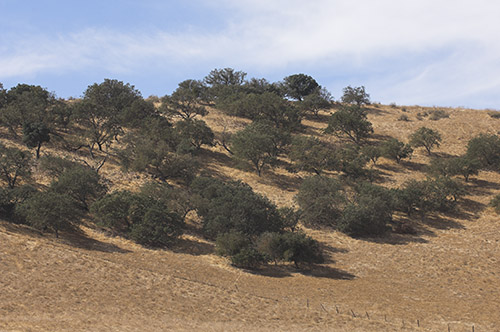
Golden Hill with Oak
The beauty of these oak hills is the
fine structure of the oak branches. They are kind of hidden in the
shadows.
Because it hardly shows in this small image we show the effect of PTM
in full resolution crops.
First we duplicate the background layer
of the 16 bit image and run the PTM plugin. Depending on you machine
this will take some time (on our Quad it is reasonable fast). 
You will see that the preview is quite small and hardly shows the
final effect. But in this case we understand that a full preview
would take way too much time to be useful. In the end you need some
experiments and also some experience. PTM also allows to save settings
and recall them later again (also the previous settings).
Here is the image after calling PTM:
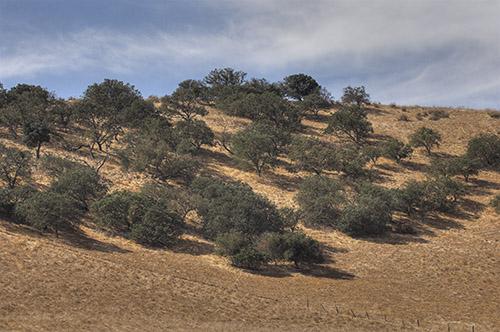
Full image after using PTM
100% crop before PTM

100% after PTM
We found two issues with this conversion:
- Sky a bit too dark
- Noise amplified in the sky
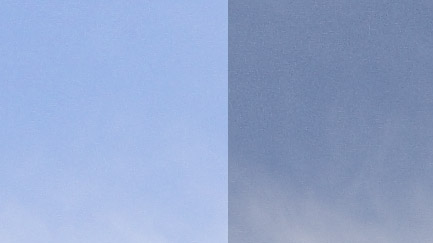
Sky before/after
We used our Tonality
Tuning Kit to
create a highlight selection and then invert it to create a layer
mask:
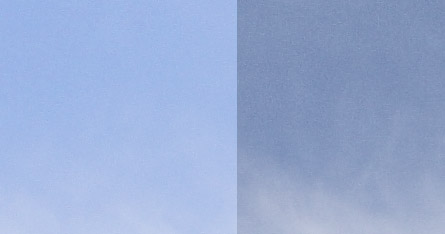
If the noise bothers you then you need to use
a noise removal tool and limit its use to the sky only. The noise
is amplified because PTM tries to improve local contrast even for
very small details (future versions may improve here).
Note: PTM will also show
all your dust spots at a higher contrast which actually helps to
find them. 
Final version (we may even brighten is a bit using a curve)
What can we say? We are still excited
and find many images that can be improved using the PTM filter. Right
now PTM is our most used filter and we don't want to be without.
Known side effects
- Not very fast
- Can easily be overdone
- Amplifies noise (yet another reason to stay at low ISO and use
a tripod)
Like with all plugins you should test the tool whether it fits into
your personal workflow!
Highly Recommended (in
our opinion even a must have filter)
For all readers of Digital Outback
Photo HDRSoft offers the Filter and the Photomatix bundle at a special
discount. Actually
we
heard many good comments on Photomatix (so try the Photomatix
application too).
We recommend that you buy the bundle
because we also will explore Photomatix soon. We would not like to
miss both tools.
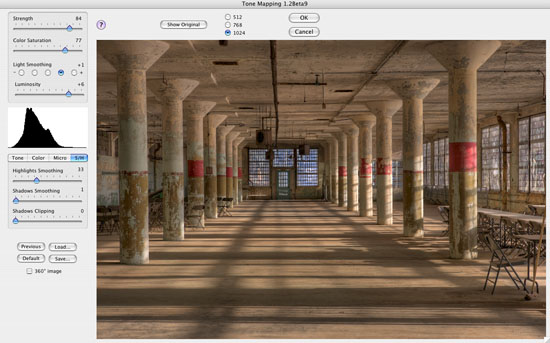
9/15/2006
Version 1.1 released
This is a serious improvement over the previous versions
with an also improved UI:
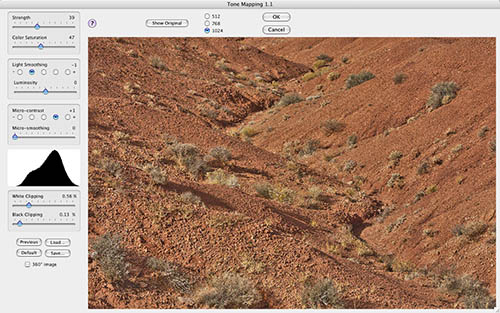
Tone Mapping Plugin 1.1
Buy
here at a discount  |