Photomatix 3.0 introduced a new improved Exposure Blending method called "Highlights & Shadows - Adjust". This article explains why this new method is an important alternative for photographers.
HDR vs. Exposure Blending
Don't we photographers all want/need HDR? Not really unless HDR capable devices become more common or you use the HDR images for CGI (movies or 3D models). What the photographer wants is the following:
- Photograph a scene that has such a high dynamic range (shadows to highlights) that we cannot capture it with one single exposure. Then we want to use these multiple exposures to get a final image that we want to view on a display or print.
How can we get there?
- Blend the exposures manually (mainly in Photoshop)
- Use automatic Exposure Blending (like in Photomatix)
- Create a HDR image (in Photomatix or Photoshop) and finally use Tonemapping to compress the dynamic range for display or print.
Method #1 is nearly as old as photography and can produce stunning results. On the downside it is a very tedious and error prone process. Method #2 needs a computer and digital photos. Method #3 has developed over the last 2-3 years and seems to be more "modern" (from the technology point of view it actually is).
In the end these are just tools to help you on your way. You are the only judge whether you like the results. Photos should be judged by the content and quality and not the tools used.
Advantages/Disadvantages of automatic Exposure Merge or HDR/Tonemapping?
HDR/Tonemapping
Plus
- Lots of different Tonemapping algorithms
- Can act as a detail enhancer
- You can store the HDR files and do as many Tonemappings later as you like
- Can create beautiful artistic painterly looks e.g. the (in)famous Photomatix look
Minus
- Tonemapping is not really straight forwards and can introduce artifacts like: Halos, gray clouds and more
- Detail Enhancers can amplify noise
Exposure Merging
We only discuss method #2 (automatic) here.
Plus
- Avoids the painterly look
- Fewer artifacts like halos and gray clouds
- Reduces noise. This alone can be reason enough to use Exposure Blending!
Minus
- No detail enhancing (can be added by using a detail enhancer later)
- Cannot store intermediate files for later use (means you have to restart always from the original files)
In the end both methods are very useful for our photographic workflow. For some images method #2 may work better for us than method #3 and vice versa.
We use now most of the time method #2 for our work. Why did we not use Exposure Merging in Photomatix more in the past?
- The new Exposure Merge function in Photomatix "Highlights & Shadows - Adjust" seems to create better results
- The new improved Photomatix alignment can now also be used for Exposure Merge (very important for us).
Sample Workflow
We present now in more detail our current workflow using "Highlights & Shadows - Adjust".
Preparations in Lightroom
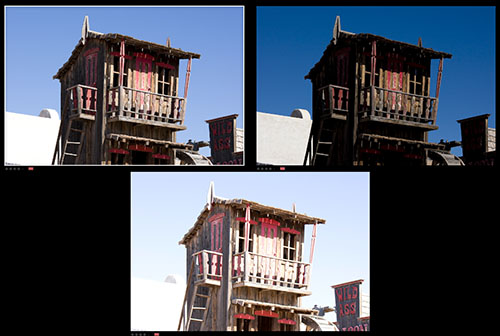
Most of the time we only use 3 exposures (we rarely have to handle extreme dynamic range scenes). We perform the following corrections in Lightroom:
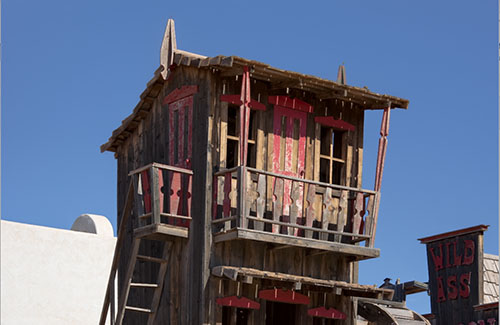
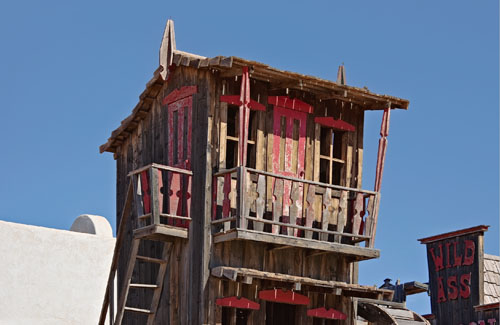
- Sometimes tune exposure, shadows and highlights to get better results in the merging process (in this image we want to avoid that the bright wall gets clipped in the final merged photo)
- Check and correct for CA (chromatic aberrations) and fringing (Photomatix currently cannot correct both directly from RAW, that is why we convert the files to TIFF in LR)
Sample CA corrections

The green and purple edges show CA
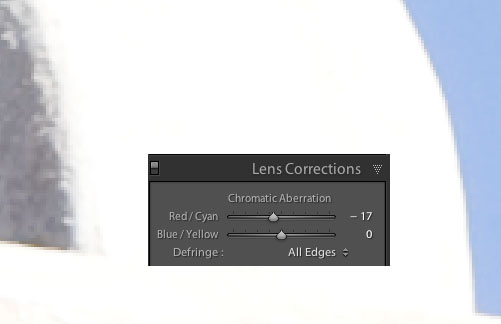
Tuning in the LR "Lens Corrections" fixes CA
Export the RAW files to TIFF
We export the converted TIFF to a temporary folder (we have a folder called "x_Photomatix"). We also have this folder open in Bridge. Once the RAW files got exported to TIFF they show up in Bridge. On a Mac we then only need to drag&drop all three TIFF files onto the Photomatix 3.0 dock icon.
Exposure Merge in Photomatix 3.0

We choose Blend Exposures as our method
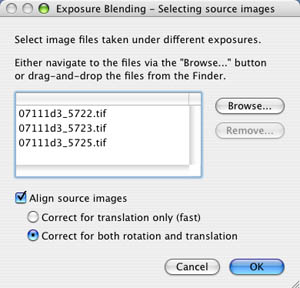
File selection and Alignment dialog
Because we used drag&drop we already have the right files in the list. We then always use the most advanced alignment method "Correct for both rotation and translation" (works on most of our images just perfect).
Because the alignment is more complex we need to wait a moment till we get the Exposure Blending dialog:
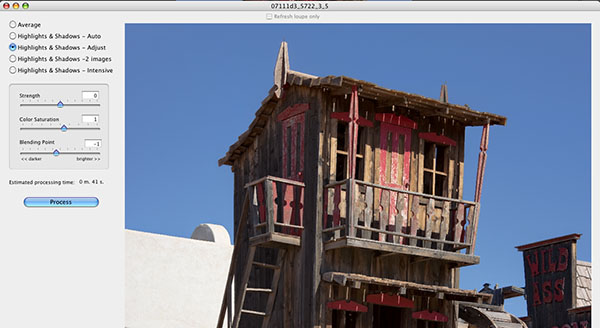 Exposure Blending dialog Exposure Blending dialog
We are only interested in the new "Highlights & Shadows - Adjust" option. There are three sliders:
- Strength: We mostly use the default of "0"
- Saturation: As the name indicates you can tune the saturation
- Blending Point: We tune the Blending point so that all our highlights are preserved and we don't get any clipping (a histogram would be nice to have here). If we darken the highlights also the shadows darken as well. We take care of the shadows later in Photoshop.
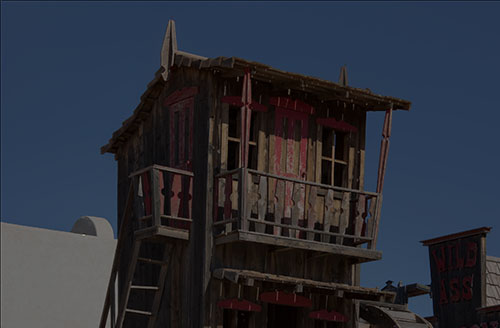
After Processing we get this image:
In Photomatix 3.0 processed image
Final tests and touches in Photoshop CS3
- First we check the resulting photo for highlight clipping. Please read this article by George Barr to better understand what the next images shows. Only if there are white spots your original image has values above a 250 threshold.
Only a very minor spot in the wall shows clipping
Improved texture
 
before/after Detail Extractor and sharpening
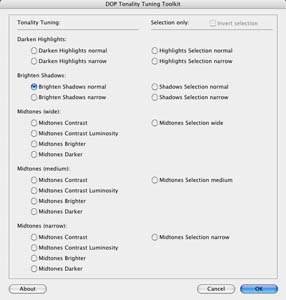
Setting in DOP Tonality Tuning

Shadows brighter
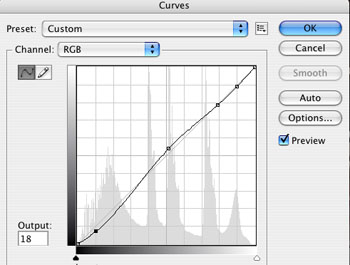
- Improve contrast with Curves
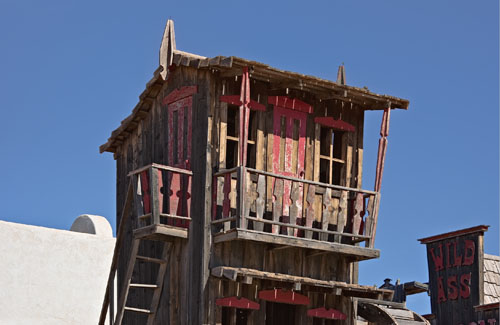
Final image
Conclusion
The new Exposure Merge "Highlights & Shadows - Adjust" in Photomatix offers a valuable and more "photographic" alternative to the usual HDR/Tonemapping workflow. We use it now most of the time.
Final note: Before we write any of these articles we work on many images to understand the implications of new tools. We can cover all of this in more detail in our workshops and you can ask your own personal questions. |